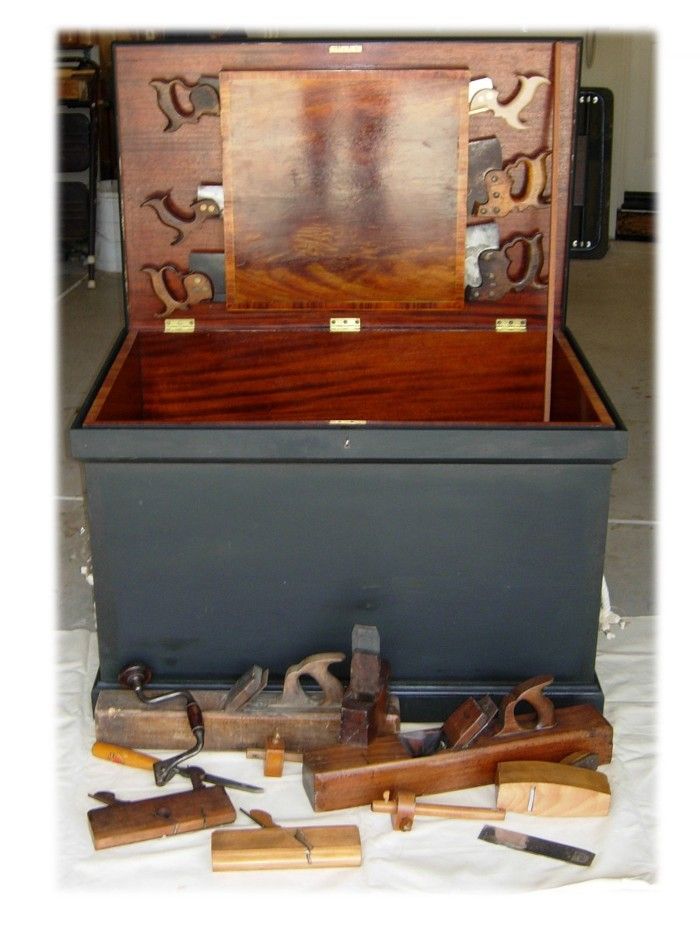
A replica of the Benjamin Seaton Tool chest
This is my version of the cover of "The Tool Chest of Benjamin Seaton"
In 2006 I decided to build a replica of the Seaton tool chest. The chest itself took about nine months working about three hours a day. Another hundred or so hours was spent making some of the tools for the chest. In addition to building the chest I wanted to duplicate the original inventory as closely as possible. I was able to get most of the planes from the shelves in my work shop. Other items like wooden squares, file handles and tools probably made by Seaton had to be fabricated. The most time consuming item to reproduce was the bevel gauge without a slot. The article referenced below has a list of the original inventory, what remains, and the planes and tools I have put in the chest.
I wrote an article on the project which can be seen at: http://www.wkfinetools.com/cCorner/art/seatonChest/Part1/sChest1.asp
Dave Nelson
-
This is my version of the cover of "The Tool Chest of Benjamin Seaton"
-
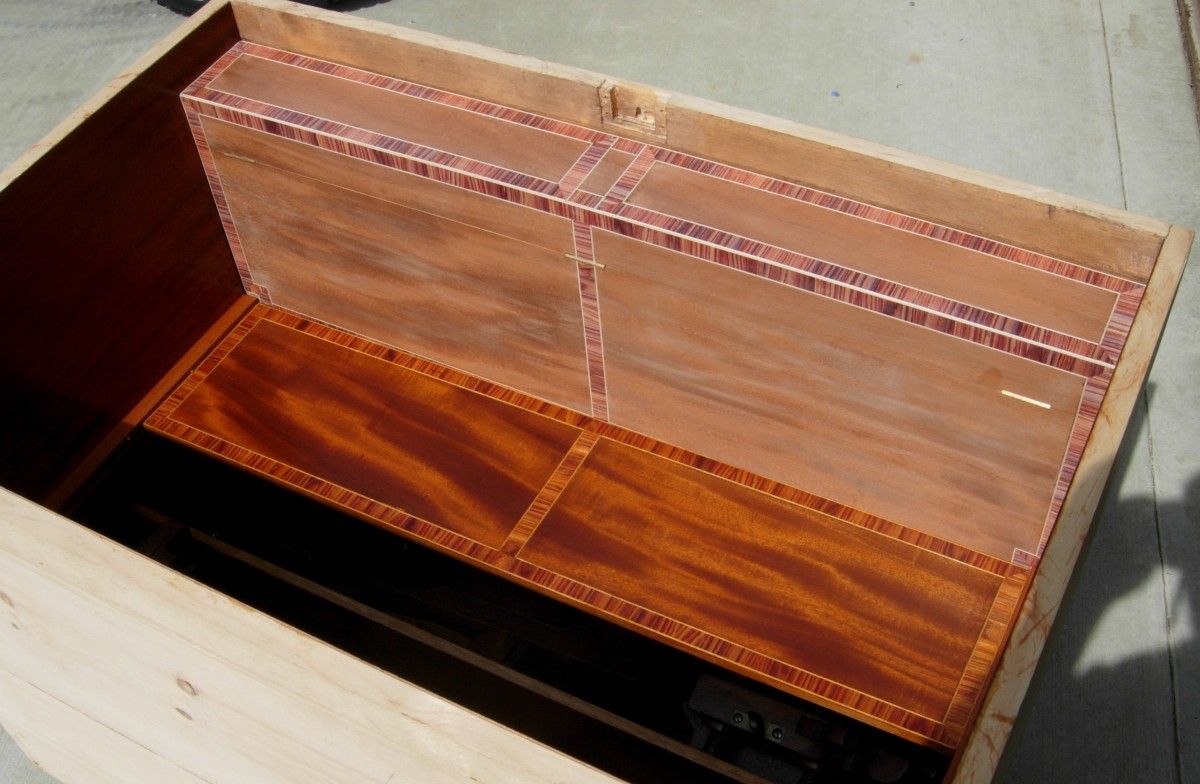
View of the chest back to front. The finished piece at the bottom of the photo is the sliding dustcover. The chest lid has not been installed at this point.
-
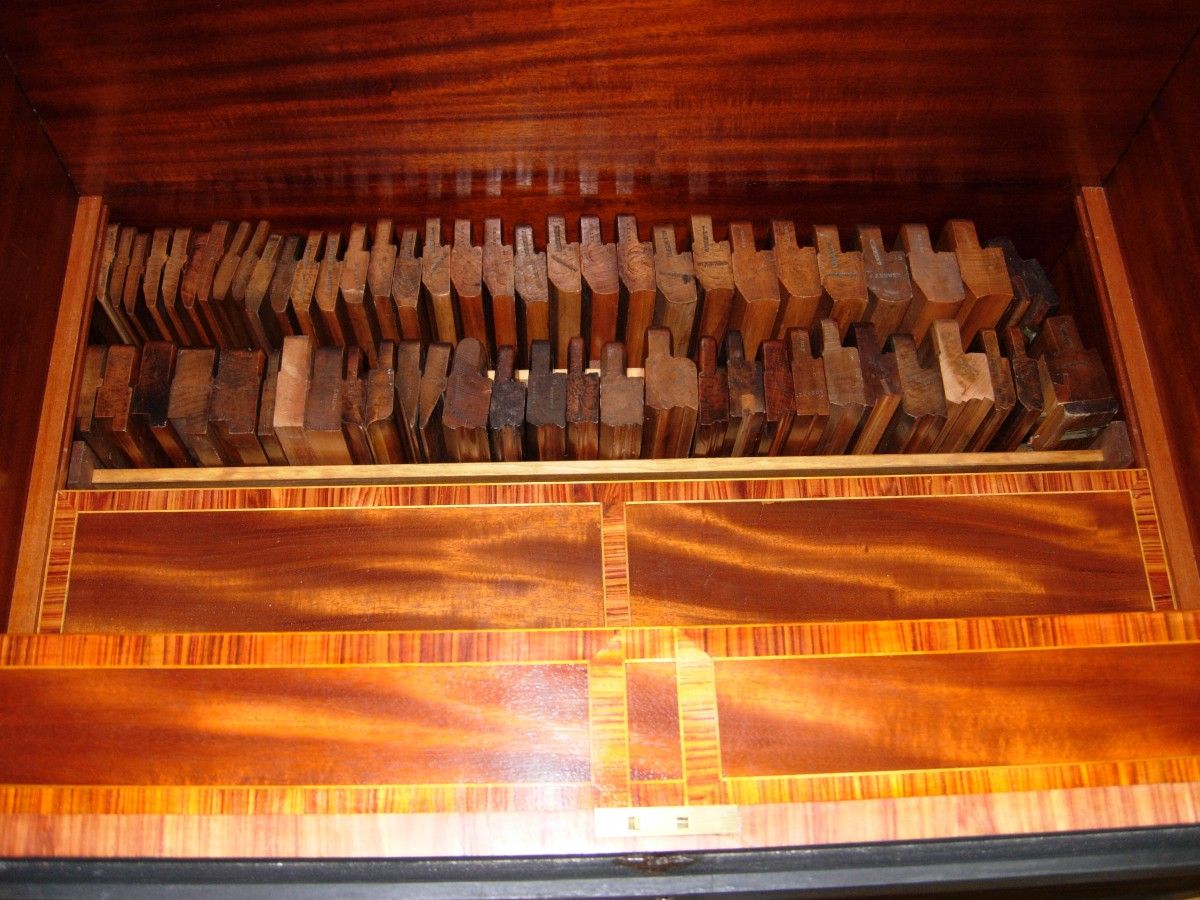
View of the molding planes stored in the bottom back of the chest. The row in the back is taken up by hollows and rounds number one through 16. The wedges and irons are in boxes behind a trap door.
-
The sliding till shown in place. This piece may be lifted out of the chest for easier access to the tools in the bottom.


Comments
Hey Dave, way cool chest, love the sliding till. Was it hard to cover the dovetails on the chest with paint and did you hand cut them or use a jig?
Thanks for the compliment.
The milk paint is thick so it does a pretty good job of covering things. There were a couple of tear outs in the dovetails so I filled them in before painting. I put two coats of paint on. The first was black and the second a 50-50 mixture of lexington green and black.
I have been cutting all my dovetails by hand since 1996. I used my Leigh dovetail jig one time several years ago. I sold it in 2006 after it sat unused on a shelf in my garage for eleven years.
I usually make one item at a time and very rarely make more than one like item so I find it easier to lay out and cut the dovetails by hand.
If you read the article I referred to I describe the finishing process I used on the chest. I have also used this same process on some painted Shaker furniture I made.
The drawers in the sliding till have hand cut dovetails on all four corners.
Regards. Dave Nelson, Folsom, CA.
Dave,
This is what fine woodworking is all about. Excellent chest.
-jonnieboy
I cannot seem to follow the link. I have searched high and low for benjamin seatons tool inventory. would you be able to inform of his tool list? I am thinking of replicating this chest if it is able to hold all my old hand tools.
Log in or create an account to post a comment.
Sign up Log in