
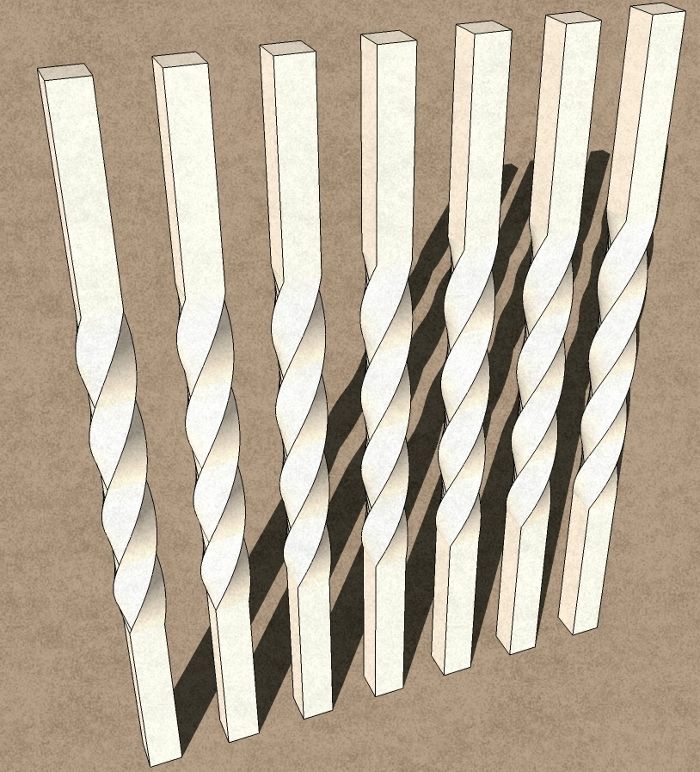
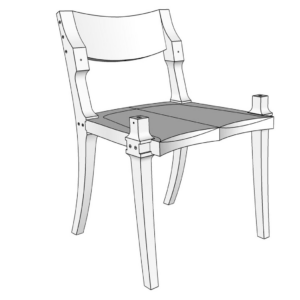
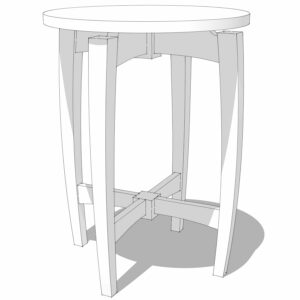
One of our readers asked about how to put a twist in a square spindle or leg. Here’s a method to do that. There are certainly other ways to do this but I think this is fairly straightforward and understandable.

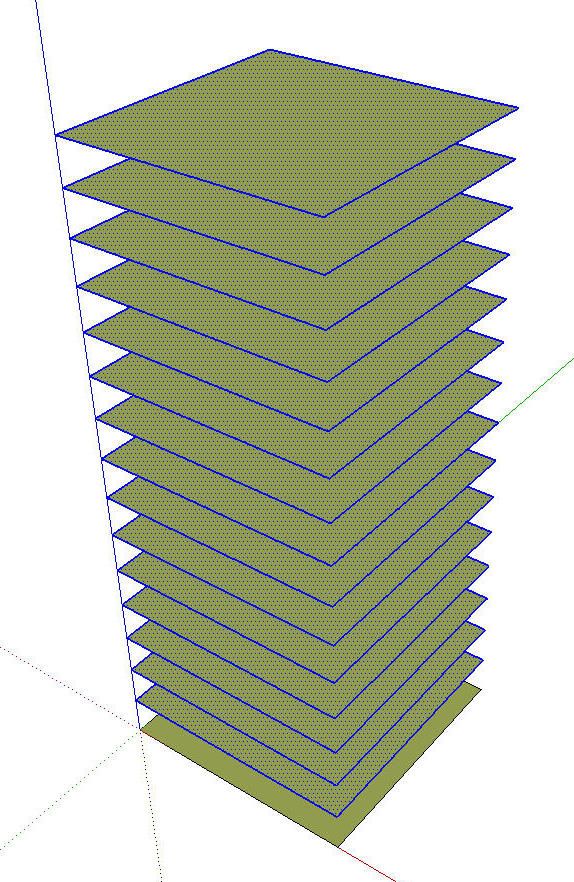
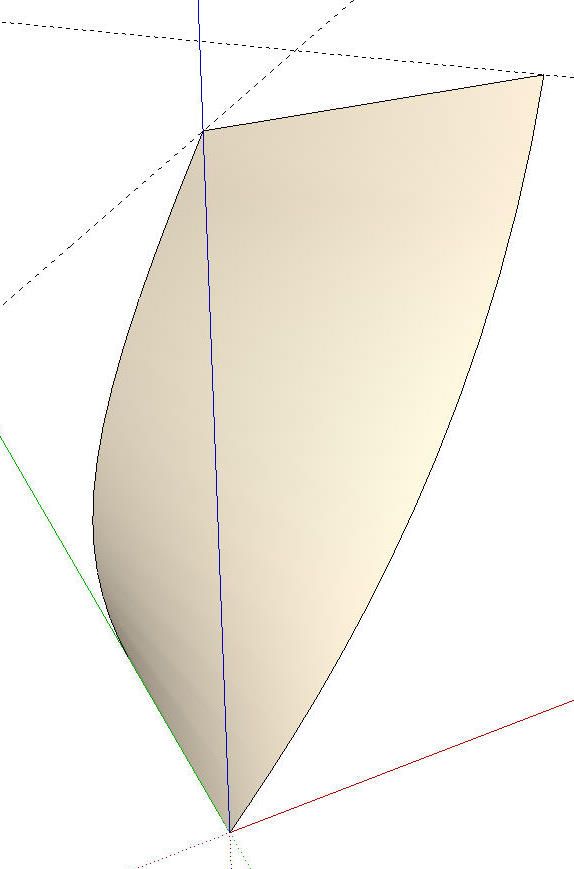
We’ll start with a square. It’s green because that’s my back face color. The face orientation isn’t important for this part of the drawing. I made it 12″x12″ for this example. We can scale it down later.

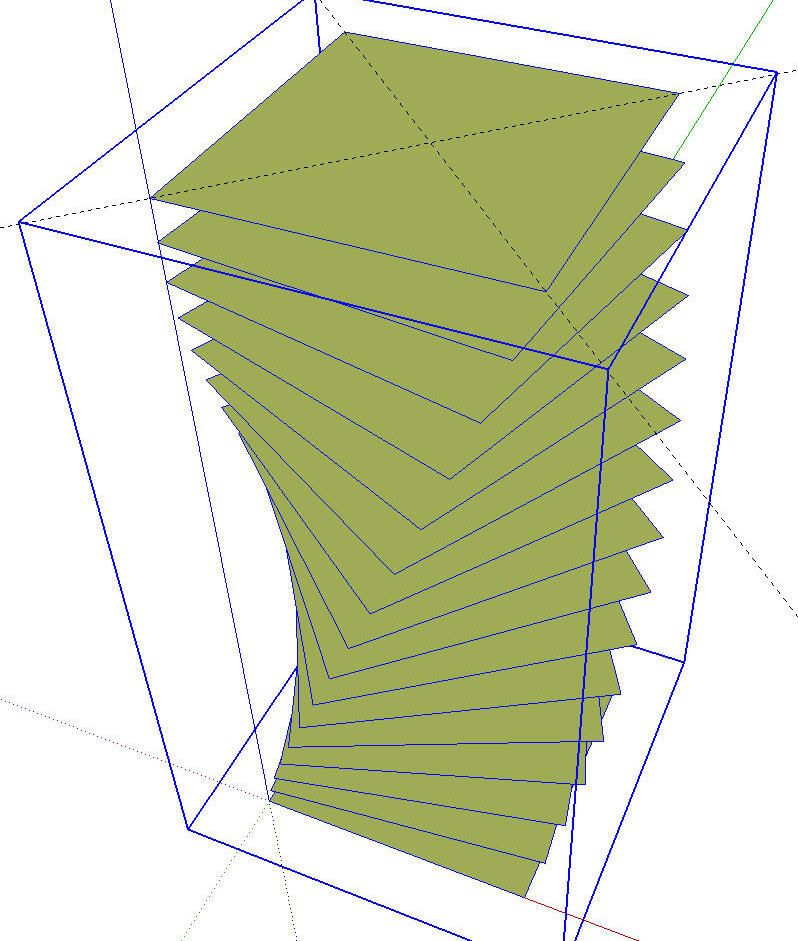
We’ll select the square and copy it upward. Use Ctrl+Move (Option on Mac) to do this. I copied the square up 2″ and made 15 copies. This is done by starting the move direction in the correct direction. Then we let go of the mouse and type 2, Enter, *15, Enter. We’re going to create 90° so we need to choose a factor of 90 for the number of copies.
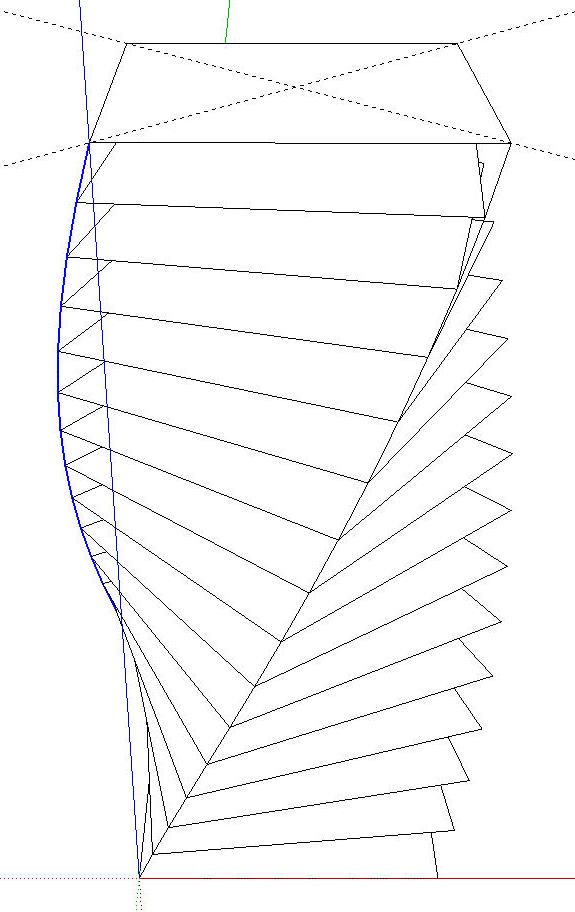
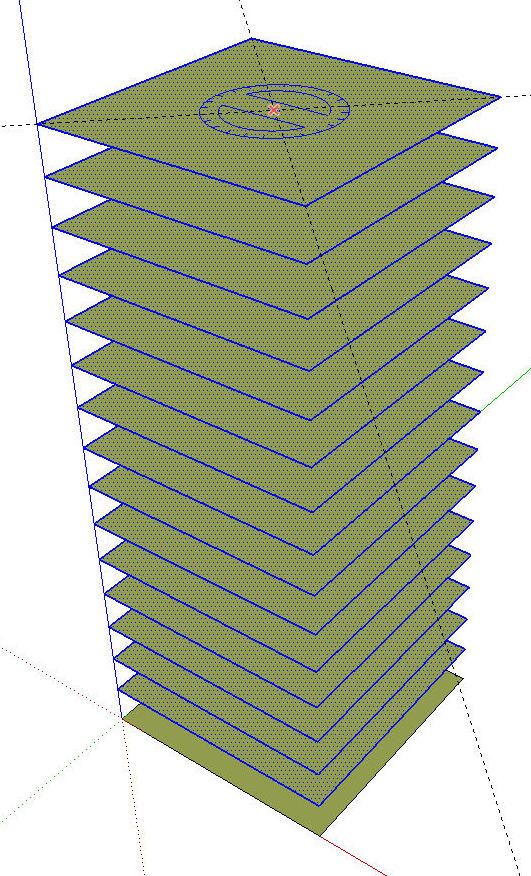
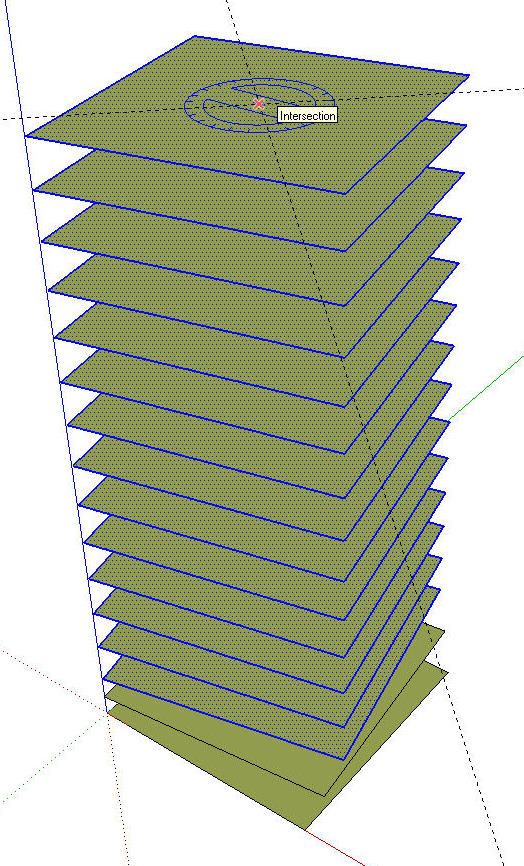
After making the copies, use the Tape Measure tool to put a couple of diagonal guidelines on the top square. Then we’ll select all but the original square. The easiest way to do this is to orbit so that you are looking at the edges of the squares making sure there’s a gap between the lowest two squares. Then drag a selection box around the top fifteen squares.

Get the Rotate tool and using the intersection of the guidelines as the center of rotation, rotate the selected squares 6°. That’s 90 divided by 15.

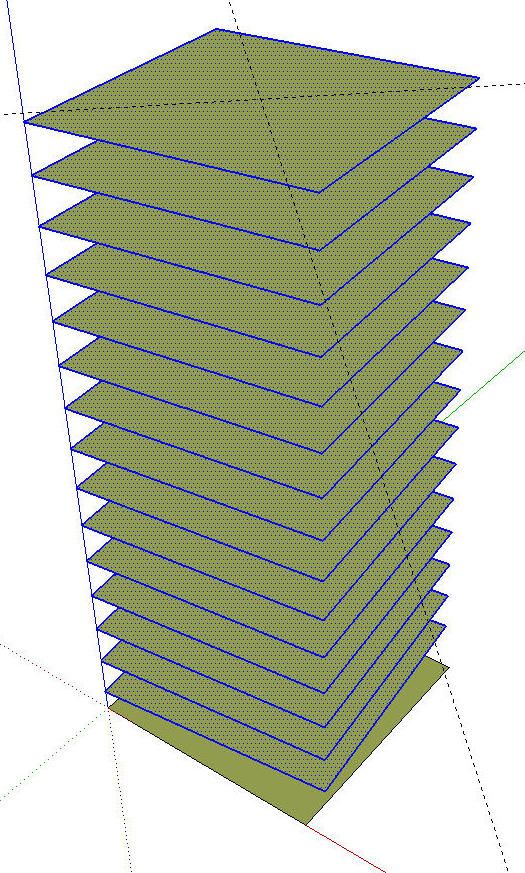
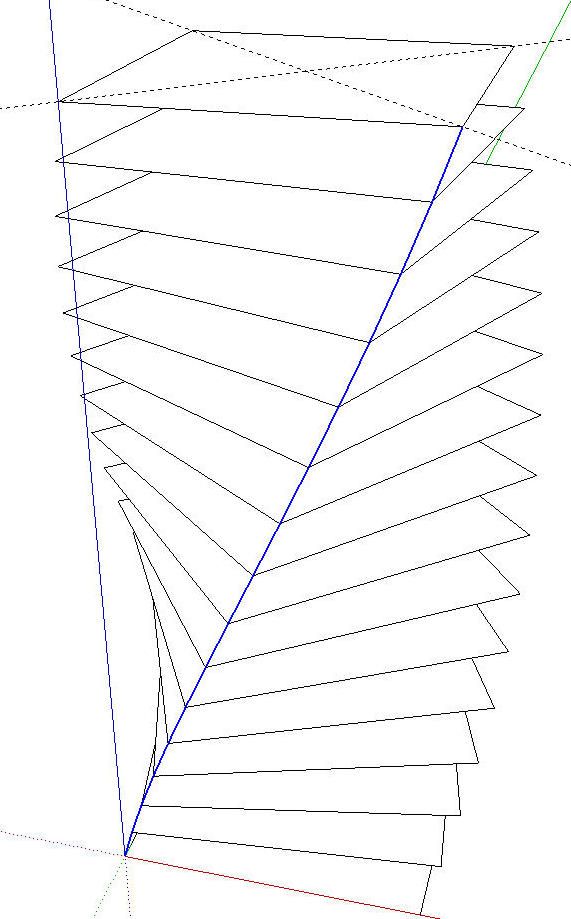
Get the Select tool, hold Shift and double click on the lowest of the selected squares.

And the rotate the remaining selection 6°.
Continue deselecting squares and rotating the remaining selection 6° until you get to the top.


When you’ve completed all the rotations, select all of the squares and make a group of them. Leave the guidelines. We’ll use them again shortly.

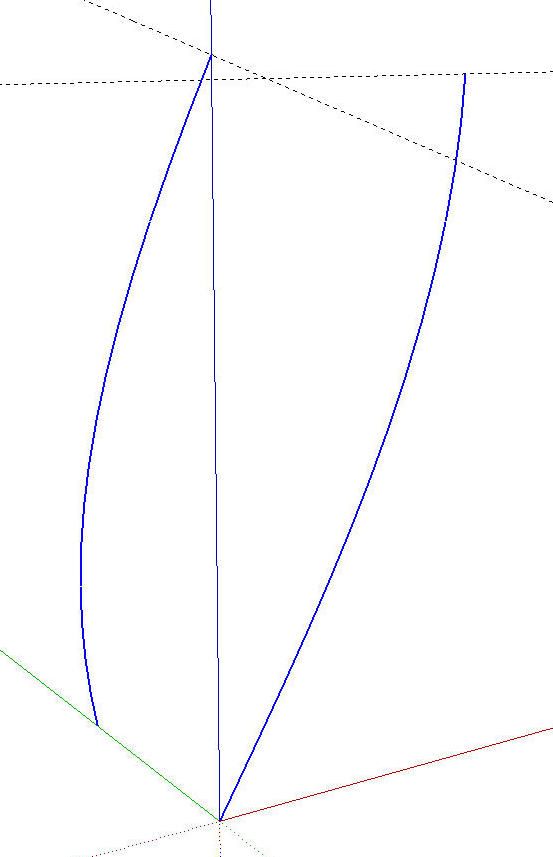
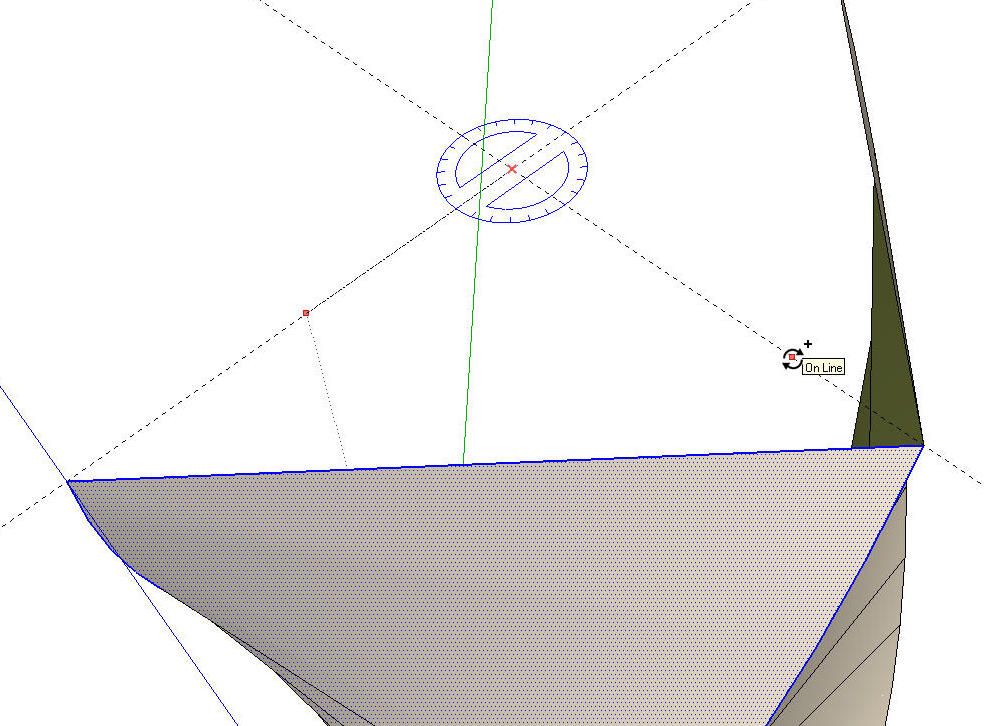
Get the line tool and draw line segments between corners of neighboring squares. Select these lines and copy/rotate them 90°. Center the rotation on the intersection of those guidelines. To copy and rotate at the same time, get the Rotate tool and hit Ctrl (Option on Mac) to toggle on the Copy function. At this point we’re finished with the group of squares so we can either hide or even delete them.

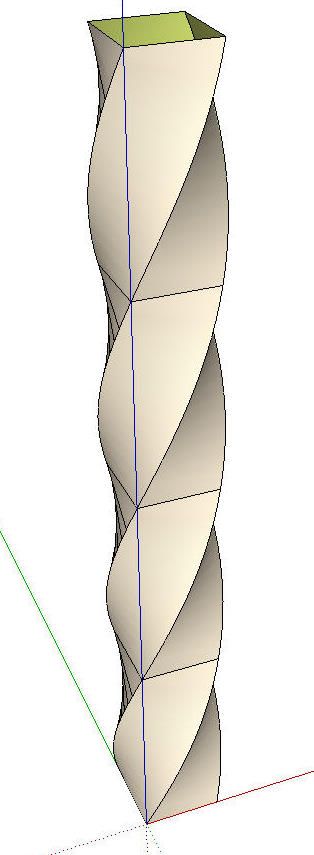
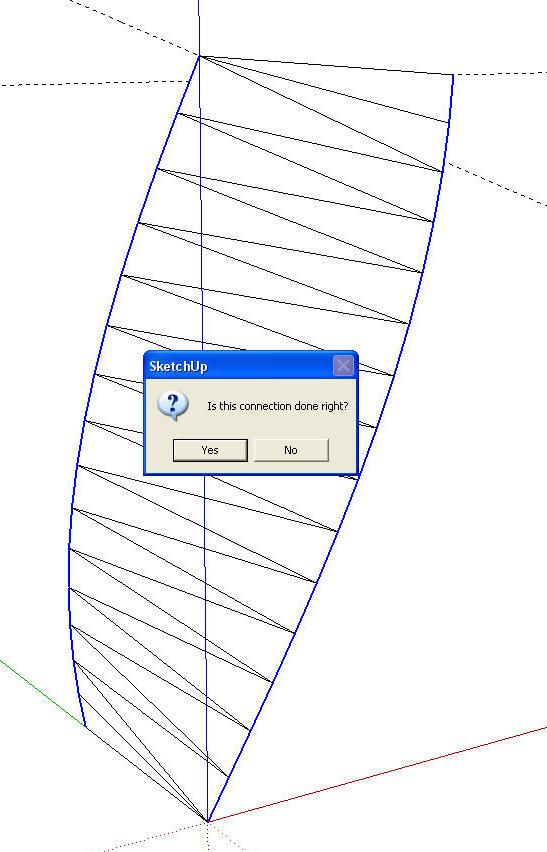
Next we’ll select both of these curves and use the Skin plugin to quickly fill in the faces between. It is possible to do this without the plugin by drawing the lines between the vertices on each of the curves. You can see the lines in the following image.

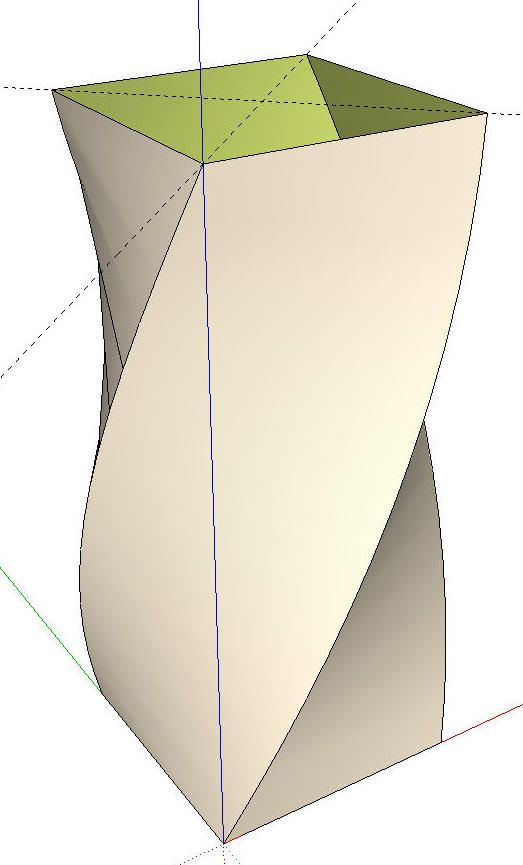
After the skinning is completed, we’ll soften the diagonals. I used Ctrl+Eraser (Option+Eraser on Mac) but you can also select the geometry, right click and choose Soften/Smooth Edges.

Next, triple click on the twist with the Select tool. Get the Rotate tool and copy/rotate it 90° and make three copies. Start the rotation, type 90, Enter, *3, Enter.


We now have the 90° of twist. We’ll select it all and make it a component. Then we can copy it at many times as needed to create the rest of the length of the twist. If needed, we can scale this before making the component so that the dimensions are correct.

After copying the twist section as needed, hide the seam lines between the components. Open one of them for editing, get the Eraser and hold Shift while clicking on the seams. To complete the spindle draw squares on the ends of the twist and use Push/Pull to extend the spindle. Make sure to draw the squares outside the twist component. Hide the seam lines as needed and make those sections of the spindle components and copy the spindle as needed.

This twist component could be saved for future use as desired.


Comments
I followed the tutorial and everything went as planned until the "skin" part. I downloaded and installed the file, it created a skin folder that I dropped into the "plugins" folder. In the skin folder are 7 .png files and 1 file named skinl.rb. I know there is a skin choice under Tools but my choice when I click on it are "clear selection", "skin" and "set settings". I don't know if this is correct or how to used the skin tool. If I click on skin under tools and then skin, nothing happens. Can you help?
Thanks
shoorty777, I'm sorry you're having difficulty. When you look at the Plugins folder you should see a folder called "skin" and a file called "skin.rb". If you llok in the "skin" folder you should see the files as listed in this screen shot. http://img.photobucket.com/albums/v506/weekender410/SkinFolder-1.jpg
Make sure that you have all the boxes checked under Window>Preferences>Extensions. Also select the Skin toolbar from the View>Toolbars menu.
You should be able to select the two edges and run the plugin and have it fill in the space between. I hope that helps.
Dave
Dave, thanks. What did it for me was the skin toolbars menu under view. I didn't realize it was there. Once I displayed it, did the line selection and then click on the skin icon it filled it in just fine. Now I'll try completing the exercise and see if it looks anything like yours.
Thanks again.
Very good tutorial.
And I think there's an even faster way to do this:
http://www.youtube.com/watch?v=0eBIQC2Cgps
Ecuadorian, yes there is if you have all those plugins. Perhaps you could complete your comment by listing the plugins you used and give the sources for them?
Sure, I used two plugins:
The "Join" tool in the SCF Power Toolbar:
http://www.sketchucation.com/forums/scf/viewtopic.php?f=180&t=14770&st=0&sk=t&sd=a&hilit=powertoolbar
and the "Follow Me rotate" script:
http://www.sketchucation.com/forums/scf/viewtopic.php?f=180&t=13014&st=0&sk=t&sd=a
Both are available for free in the provided links.
There's a bit more info in the full description of the Youtube video.
The rest of the tools I used (Divide, Explode, Soften Edges, etc) are standard SketchUp tools. I also used the standard SketchUp Keyboard shortcuts (P for Push, L for line, E for Eraser, etc) and that's why the workflow looks so fast.
The key point while using "Follow Me Rotate" is to deselect the divided line and click on some pieces before joining it again. If you don't do this, the script might not work. Weird, isn't it? But then again, software often works in strange ways...
I tried this yesterday and I got it to work. Today, however, it won't! When I pick the line segments, then run skins, nothing happens. Any ideas? Also, how should I have the skins options set? Thanks for the help.
Tony - Memphis
maplwood, it's kind of hard to say without seeing the model that is giving you trouble. There's not a lot of detail in your question.
Log in or create an account to post a comment.
Sign up Log in