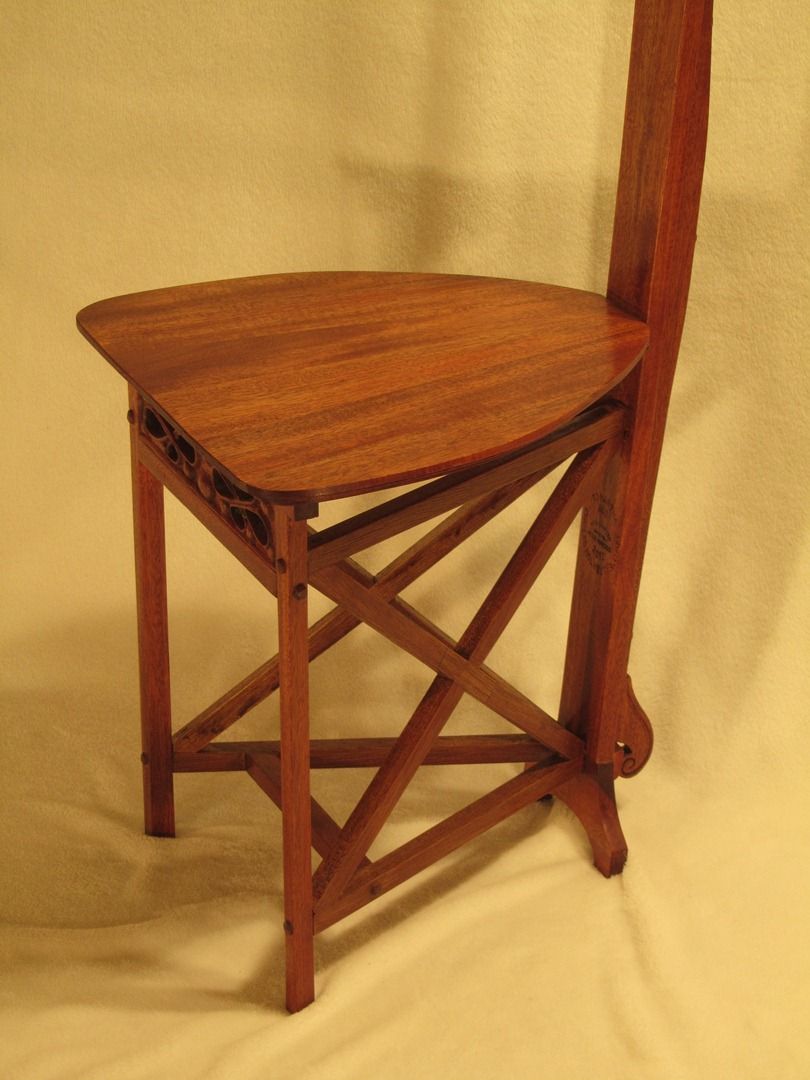
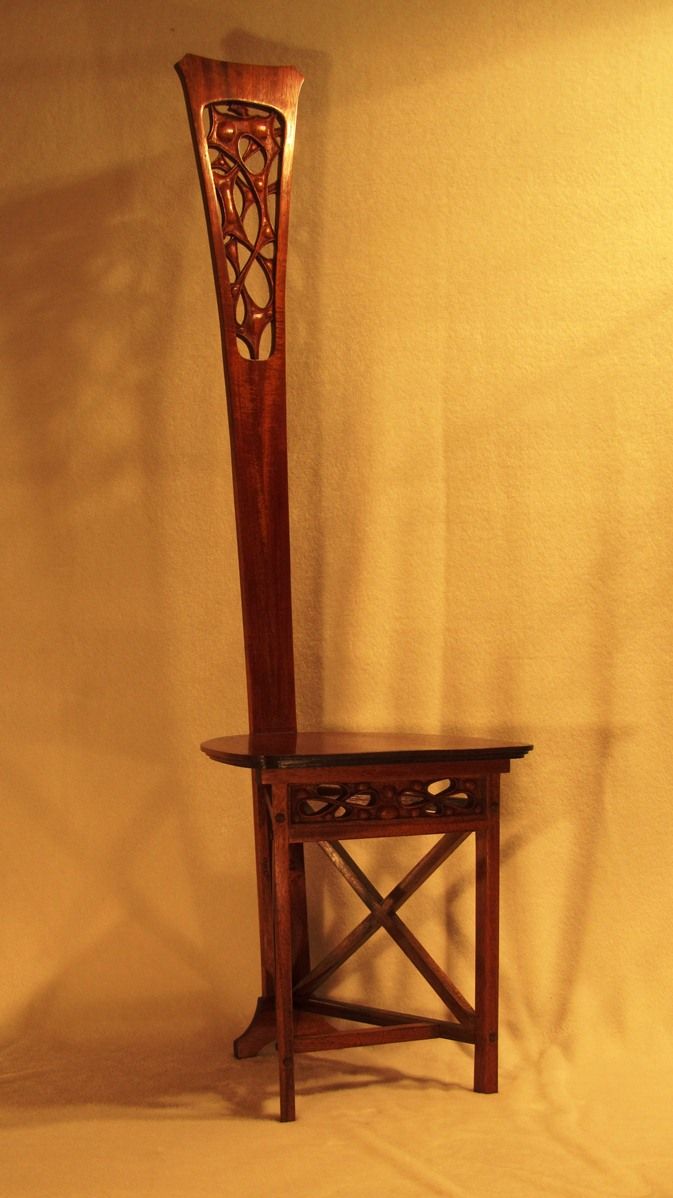
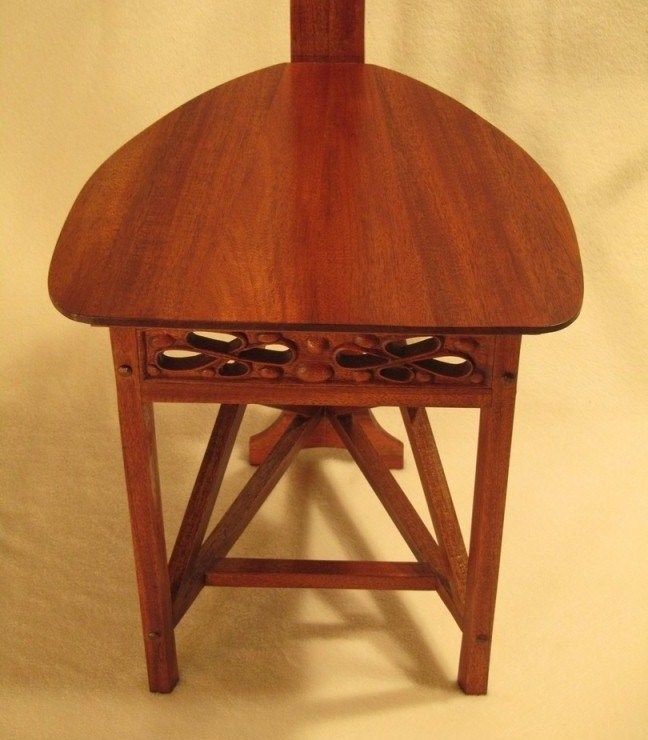
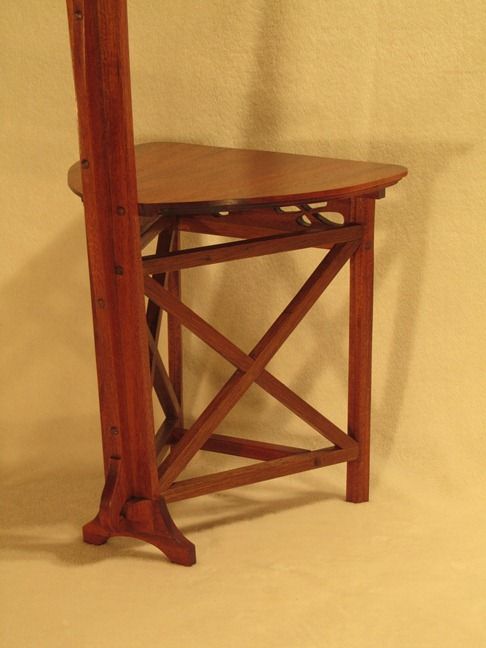
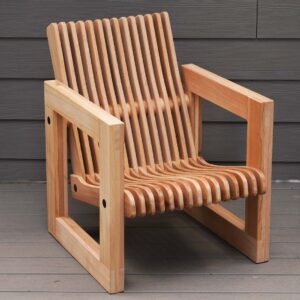
Charles Rohlfs 1898 Desk Chair Mahogany

This is the second reproduction of Rohlfs iconic desk chair that I have attempted. A few months ago on a trip to New York I had the opportunity to view the original Rohlfs chair at the Metropolitan Museum of Art.
After seeing the original and getting some additional details about the chair that I did not have when I attempted the first reproduction I wanted to build a second version more closely resembling the original. I had not planned to start this chair so soon, but a few weeks ago my cousin came by with a great piece of old mahogany baseboard. As soon as saw this piece of mahogany, Rohlfs desk chair called out to me. With some judicious cutting and glue-ups I was able to get almost enough mahogany to make another Rohlfs desk chair. I had some additional pieces of mahogany left over from another project to make the cross braces. I had the pleasure earlier this week of returning the mahogany to my cousin!
Like the original this version is much lighter in structure, the various parts are only 5/8 inches thick. Instead of a straight back, like the original this one is sloped at 5 degrees (my estimate). Although the 5 degree slope of the back feels okay when sitting in the chair (especially compared to the straight back version) the slope looks too great to me. If I build another version I might use a 3 degree slope instead.
As well, to better match the original, the back brace is shaped similar to the original and I have added a gusset between the bottom of the seat and the back.
The biggest challenge with this chair is fitting the cross braces. I have not fancy technique here other than a lot of trial and error using pine mock-ups before cutting the few pieces of mahogany I had. I spite of making the pieces out of pine first, I still managed to goof-up and had to make a repair to one of the mahogany pieces!
I also used a sanding mop for the first time and it worked wonders cleaning up the carving.
I put a light coat of stain on the cross braces to help match the colour with the rest of the chair and then finished the chair with three coats of tung oil and some dark wax.


Log in or create an account to post a comment.
Sign up Log in