
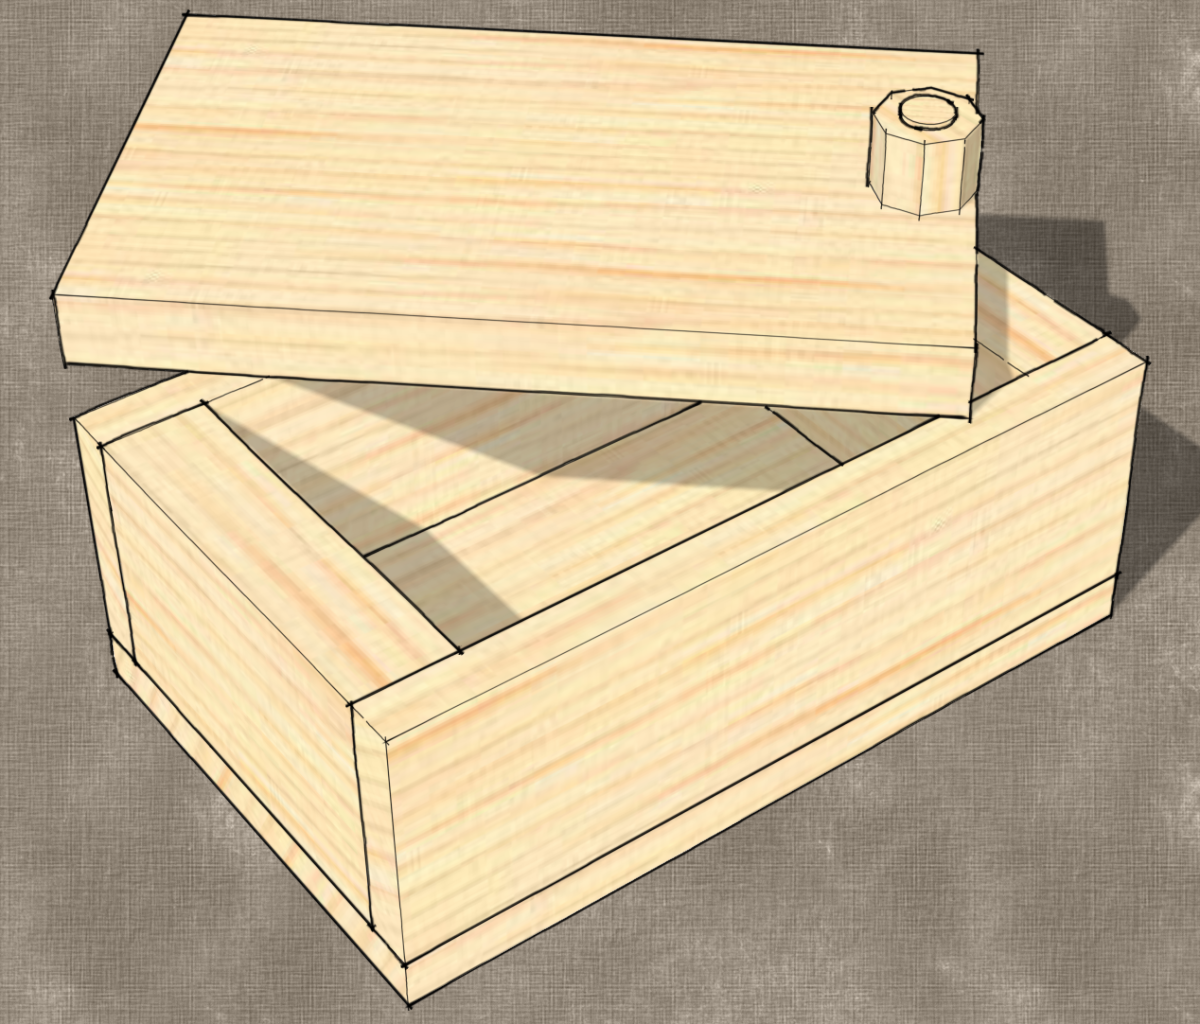
A group of friends are learning to use SketchUp. Each of them are at different points along the learning curve. They asked me to give them some sort of SketchUp homework to kind of force them to further develop their skills. While I was pondering a project to give them I came across Doug Stowe’s blog post about the little friendship box he makes with some of his students. The box is simple enough with butt joined corners and a peg to attach the swiveling top. Making one from scratch in the shop still offers enough challenges to a beginning woodworker to make it an interesting project but it is small enough that the project has a visible end.
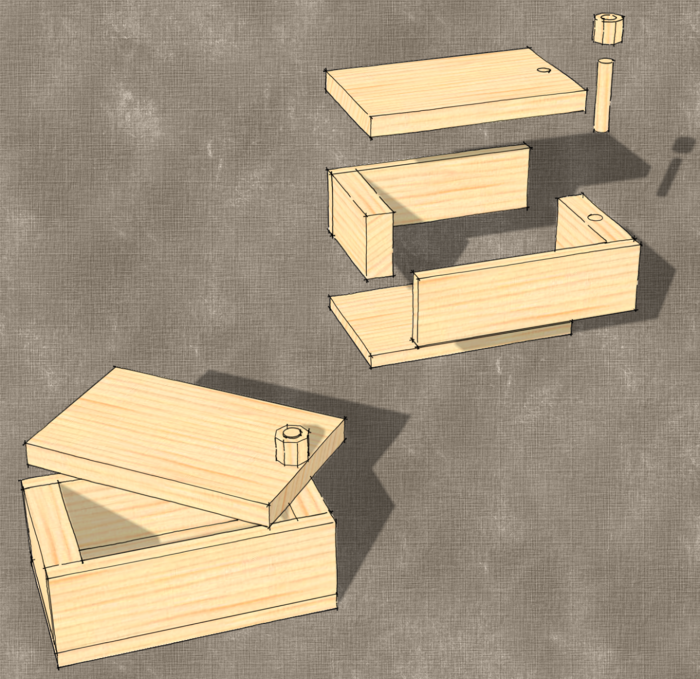
I took a few minutes to draw out Doug’s box. In the process I found it gives opportunities to use some fundamental SketchUp skills and thought this would be a good project for my friends. I gave them the two views of the box shown below and the instructions to draw the box using the dimensions given and I gave them a ten minute time limit although I didn’t hold them to that limit.


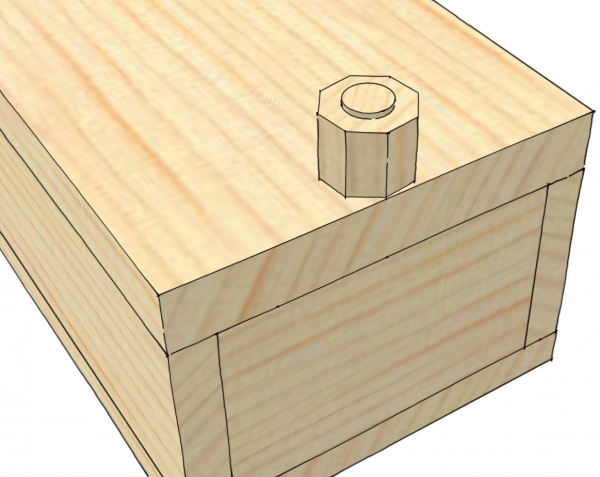
The results were quite interesting. Everyone got the box drawn eventually. Most got it in about 20 minutes or so. They all reported having various problems. Some had issues with getting the holes drilled for the dowel. Others had problems getting all the parts to line up. The octagonal “nut” on the peg seemed to cause the most trouble. They either had difficulty “drilling” the hole or getting it centered on the peg.
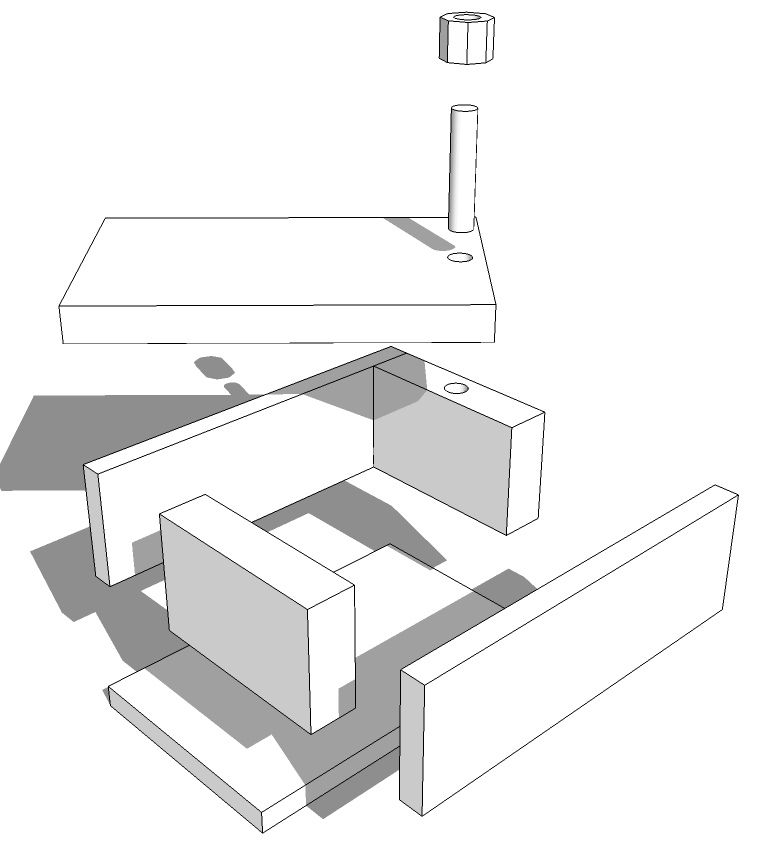
One of the guys drew each of the parts separately spread out on the ground plane much as you might lay out the parts on the bench before assembly. He found that after drawing the parts that way, he had to take quite a bit of time to assemble the box using Move and Rotate to get the parts into position. I’ve seen tutorials that teach this method of creating a model. I suppose it does give one good practice at using the Move and Rotate tools but it is an awful lot of extra work. As readers of Design. Click. Build. know, both Tim and I advocate drawing the parts in place as much as possible. This reduces the chances of errors and makes drawing easier.
Here’s a silent video showing how I drew it. It shows in real time how I drew the box.
The key lesson I think everyone learned from this exercise is to use SketchUp’s inferencing. This comes into play in many ways. Here’s a few of them:
When moving a component or a copy, use inferencing to determine where to place the component at the end of the move. Grab the component with the Move tool at a point that will coincide with a point at the end of the move. You can see that in the video when I make the copy of the side component and again when I make the copy of the bottom to use it as the top.
Drawing the end in place is simplified by inferencing. Instead of drawing a rectangle 2 in. long by 1-1/4 in. high, we just draw it to fit by clicking on the appropriate corners of the sides. At this stage we don’t care what those dimensions are as long as they fit.
After drawing the hole in the lid, I used inferencing to locate the center of the hole in the end component by holding the cursor over one of the vertices on the edge of the circle for two seconds before moving it toward the center. When the cursor gets close to the center, it’ll snap to it. The cursor dot will switch from square to round and the message, “On center outside active” will pop up. I used the same method for drawing the dowel and for both the perimeter of the octagonal nut as well as the circle for the hole in it.
Yesterday we had an opportunity to get together virtually using GoToMeeting and we were able to discuss how we approached this. I think we all advanced our skills and I for one enjoyed the opportunity to chat with these guys. The next exercise is to add some details to the little box.


Comments
Hi Dave, i've just downloaded the basic SketchUp & when it comes to computers, i'm hopeless. I've watched & watched the tutoral, but i still can't draw a simple project. What's the best way to learn from day 1. I'm getting on a bit, but i'm never to old to learn something new.
Thanks
Ron,
Hi Ron,
People learn in different ways. If you find books useful, you should look at Tim's e-book available here on Fine Woodworking. There are video tutorials including some here on the blog and an upcoming video covering the basics from me also here on Fine Woodworking. I do some online 'live' training and that seems to be the best. If you'd like, drop me an e-mail by clicking on my name at the end of the blog post, above. We can get you sorted out.
What is your method for making components - do you have a shortcut set up for that. It seems to be a very fast and simple process.
Jeff, I triple click on the geometry with the Select tool and then hit 'G', which is the default keyboard shortcut for Create Component. It is very fast that way and using triple click of the Select tool ensures that any connected edges and faces are included in the selection.
Hi Sprog1,
I recommend you go onto the web, and look up Sketchup for Dummies. The online tutorials are excellent. (The book is good, also.) Work through the first five tutorials. This will get you started and will help you avoid learning bad habits.
Dave, I find I go a long time between projects. Following your exercises helps me to keep my hand in, and are fun to do. This one is great, Thanks.
I actually spent more time figuring out the dovetail proportions than doing the drawing.
Thanks again, Fred.
Hi Dave, sorry i'm still having problems. Iv'e watched the first 2 tutorals & no matter how I try, the measurements do not come out right. I'm useing the template for woodworkers in inches, & if I draw a line 4ins it will come out as 48ins. Same if I draw a rectangle say 2ins x 2ins it will come out as 2ft sq. I have tried drawing 2 lines side by side, one at 5ins & one at 5ft, they come out the same. What am I doing wrong, is it me or is it sketchup.Please help before I go insane. Thanks Ron
Hi Ron,
Go to Window>Model Info>Units. My guess is you'll see that the units are set to Feet and not Inches. If you are drawing mostly woodworking type projects and working in inches, set the units to Fractional instead of decimal.
Drop me an e-mail so we can converse about this more easily. Just click on my name at the end of the blog post.
Log in or create an account to post a comment.
Sign up Log in