
Almost everyday I receive a SketchUp model from somewhere in the world. It is usually an attachment to an email describing a problem performing an action described in one of the many steps outlined in my eBook. The email may say something along the lines of, “I’m a bit confused by the procedure to ……”.
I look forward to receiving these notes, especially when they attach a model. I can often guess the problem by the description of the problem alone, but having the model makes a big difference in my ability to troubleshoot.
I have to say that the most frequent problem for new SketchUp users, continues to be failing to open the component for editing. The reader tries a Push/Pull for a tenon, mortise, groove or rabbet and it doesn’t work. It is frustrating, I know, and it is usually caused by not opening the component for editing before marking out a joint of some type.
I find that using an Exploded View is a key to troubleshooting these problems. You may find that this can help you get over a frustrating experience.
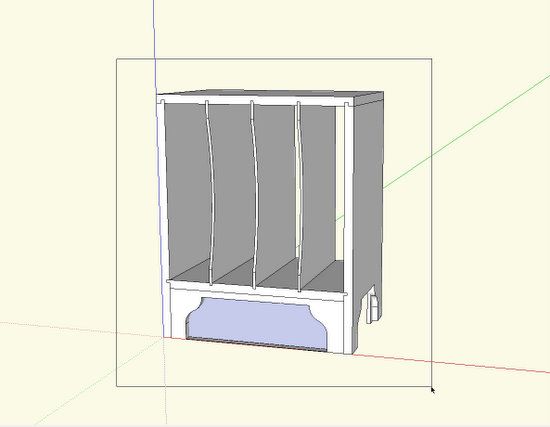
I’ll use an example of the Magazine Rack model. Here is how I received the model.
By the way, I have approval from the SketchUp user to use this as an example in this blog.

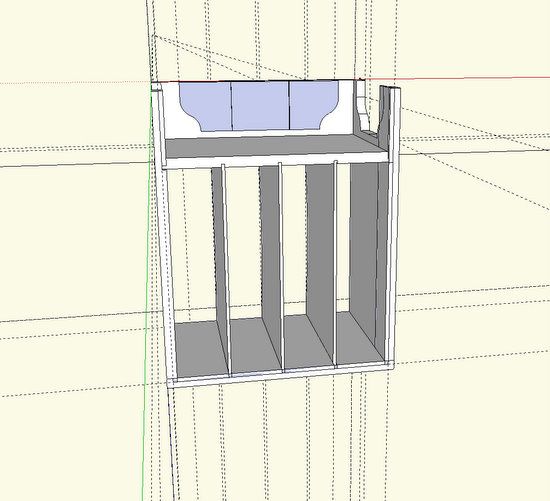
Step 1: I’ll spend a few minutes arranging the model for ease of inspection. This is a back view and upside down, so I’ll orbit and pan to get a standard front view, and get an idea of how the axes are oriented. If materials and grain colors are used, I will delete them, as they make it hard for me to see issues.
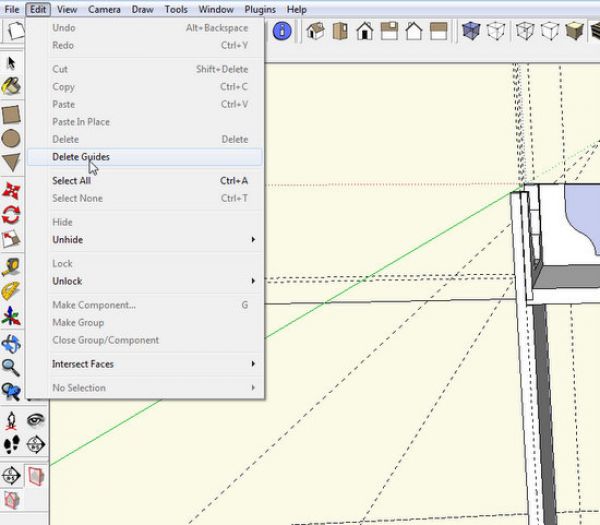
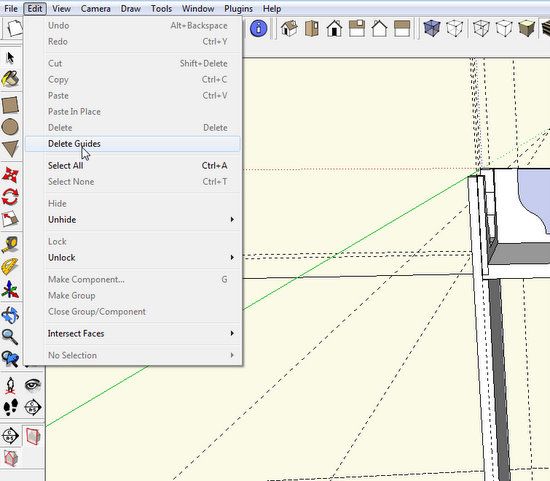
I find guidelines very distracting, and a fist step will be to delete them. There is a quick command to delete guides as shown below.
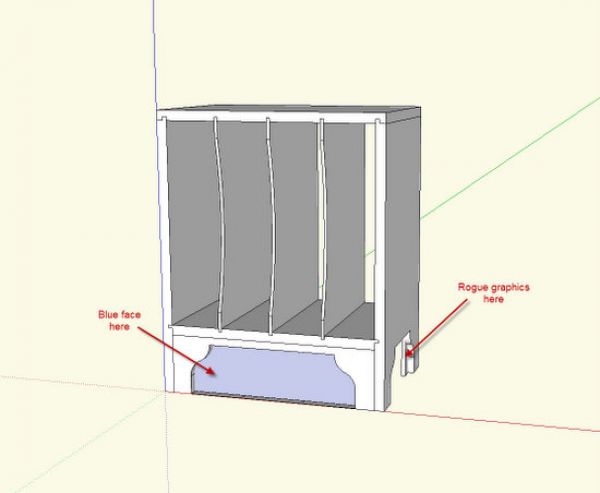
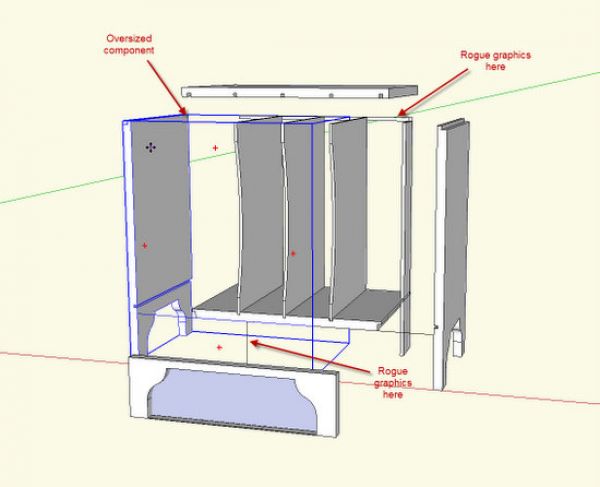
Step 2: I’ll do a quick inspection on the assembled model to identify some of the most apparent issues.
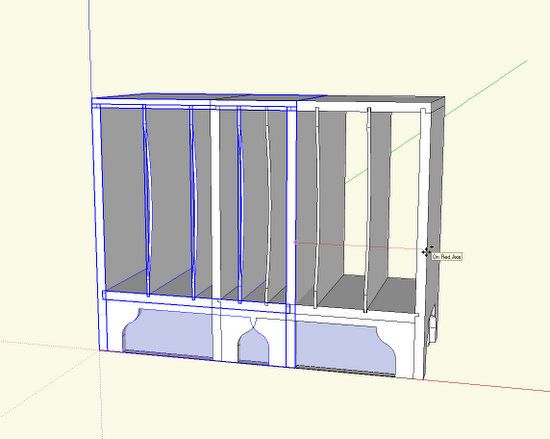
Step 3: With the Select Tool, draw a select box around the complete model. This selects all the graphics in the model.

Step 4: With the Move/Copy Tool, tap the Ctrl Key to make a copy of the model. Move it down the red access to a clear space.
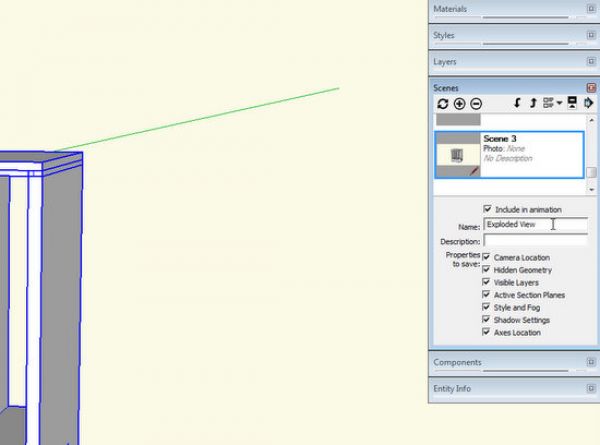
Step 5: I’ll open the Scenes Dialog Box, and make a Scene called Exploded View. Then I can always get back to this view with a click of the mouse.
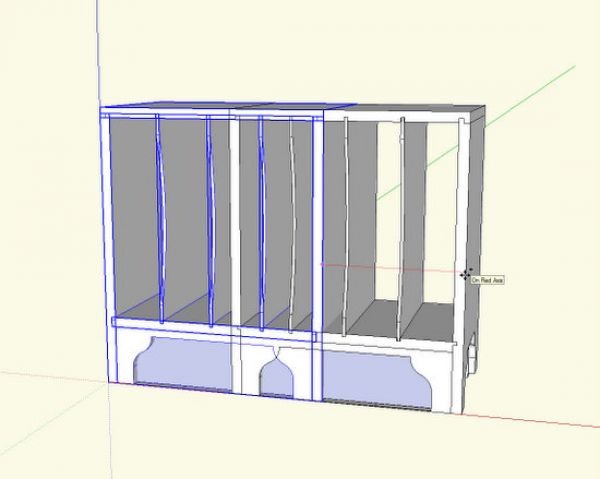
Step 6: With the Move/Copy Tool, pull the model apart. This is when issues usually show up.
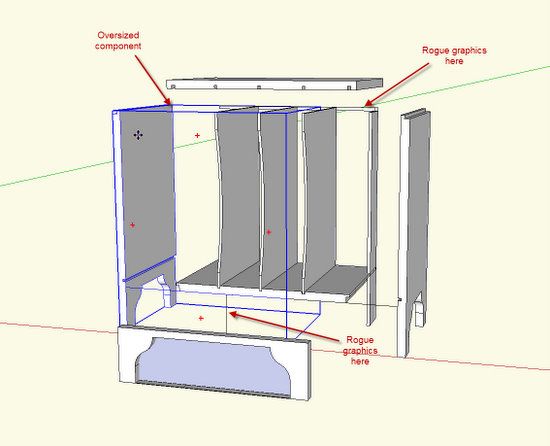
Step 7: Orbit around for a rear view of the Exploded model. This helps identify issues not exposed in the front view.
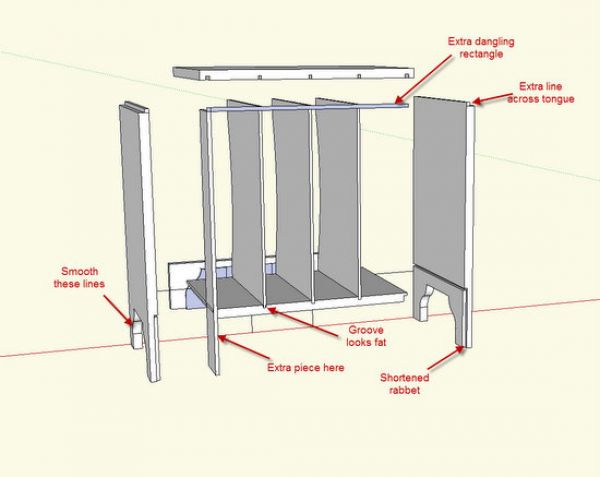
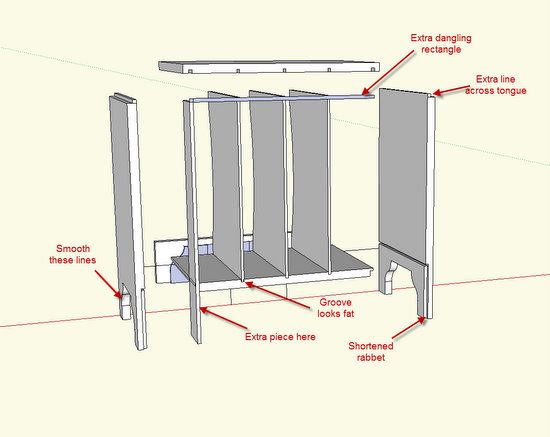
The Exploded View helps find problems. It does not necessarily identify the cause. In this case, the user was having trouble making the rabbet in the back edge of the Top. The Exploded view tells the problem; that the rabbet was drawn outside the definition of the Top component. The dangling rectangle is evidence of not opening the component prior to drawing the joint lines.


Comments
Hi Tim:
Thanks so much for this explanation. I'm working through your book and have just started Chapter 7, step 4, and found that I had some extra lines that I couldn't erase without erasing the entire top, or side, for example. I also had some trouble pushing out the the tongue and groove. So I decided to look through this blog to see if I could get some help. I applied this technique of exploding the model and was able to see the extraneous lines that I could then clean up. So I now have an exploded copy of the model off to the side that I will keep there so that I can see exactly what happens as I continue to work through this tutorial.
By the way, thanks for writing this book. I've had several false starts with trying to learn Sketchup in the past but am now learning a lot with this tutorial approach.
Dave
Dave, thanks for the note.
This link shows various blog items covering specific procedures in the book. In this list, you will see reference to difficulty working the tongue and groove joints.
https://www.finewoodworking.com/item/35752/an-index-ebook-references-to-dcb-blogs
If in trying to delete a line, the entire component disappears, then it could be that those lines exist within the definition of the component. Use your Select Tool to select the line. If the line lights up in blue, without the component also selected, then you can use your Delete key to get rid of the line.
If you click your Select Tool on the line and the whole component lights up, then you will need to open the component for editing, then delete the problem lines.
Tim
Tim
I just completed Chapter 7 and am 95% happy with the results. I am embarrassed at how many hours it took me but it has certainly been a learning experience. I ended up with numerous little "clean up" jobs that were not mentioned in the e-book so I was unsure if they were related to screw ups on my part. One thing common between the example you showed in the blog and my results is what you labeled "blue face here". I am unable to eliminate this feature. Do you know what I likely did wrong and how do I get rid of it?
I had some issues with the rabbet in the top. A fellow sketchup'er told me guide lines for editing a component could be drawn before the component was open for editing. After having some difficulty, I deleted the guide lines and reconstructed them with the component open for editing. Things then worked ok. My question is can you construct guide lines before opening a component for editing.
Thanks,
Ben
Ben, if I may, I'll offer a few points.
First, the blue face could be due to pushing the waste face too far through. From Tim's screen shot that appears to be the problem in the model he was showing. The Push/Pull operation needs to stop on the back face to result in an opening instead of the blue face(s). If that's the case in your model, at this stage you could open the component for editing and use the Eraser tool to delete the unneeded edges. If the real back face of the board is missing, trace one of its edges to heal the face.
As to the guidelines, yes, you can place them before opening the component for editing. That's usually my preference especially when there are multiple copies of the component in the model. Placing guidelines while a component is open for editing will result in corresponding guidelines being placed in all instances of the component and this can cause a great deal of clutter and confusion in some cases. No matter whether you put the guidelines in before opening the component or after, be sure to delete the guides when you've finished with them. I use Edit>Delete Guides to get rid of them. I've set a keyboard shortcut for that to make cleanup easier.
-Dave
Dave
Thanks for your suggestions. When I did the push/pull, I am pretty sure I typed in 5/8" for the thickness. If I rotate my model so I can look at the back side of the front skirt, I see the outline of the region I wanted to waste. If done properly, you should be able to look through the opening in the front skirt and see the inside face of the back of the magazine rack; I can't. I must have done something wrong when I created the front skirt.
Ben, what happens if you erase the bottom edge of the waste area? Zoom in close to that edge before you erase it. Is there more than one edge running parallel? Is it possible the board isn't quite 5/8 in. thick? To what do you have Precision set in Model Info>Units?
You could send the model for a look see. Click on my name at the end of one of my blog posts for my e-mail.
--Dave
Dave
You are a genius!!. I erased that back edge without first opening the component for editing; the line went away but the problem still existed. Next, I opened the component for editing, deleted the line and everything is great. Thanks for your help on this specific issue and also your many other great posts.
Ben
Ben, thank you and I'm pleased it worked out for you.
Log in or create an account to post a comment.
Sign up Log in