How to Make Arts & Crafts-style Drawer Pulls
 Dec 16, 2011

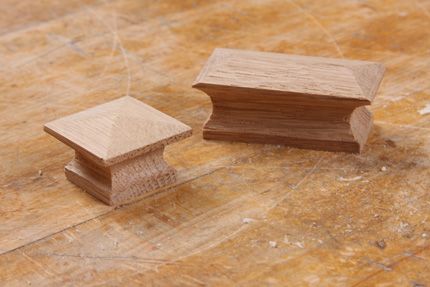
Learn how to build a classic Arts & Crafts-style drawer pull (at right). To learn how to produce a square version, be sure to catch Michael Pekovich's article in issue #222.
MORE FROM MIKE
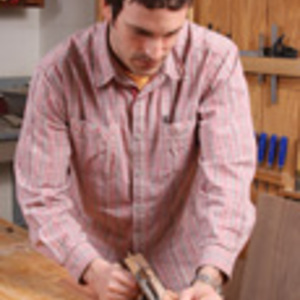
Drawer pulls are one of those make-or-break details that can turn a beautiful woodworking project on its head if executed poorly. Believe me, I know. I struggled through turning three perfect pulls on a recent Shaker writing desk project and am still not fully satisfied with the final product.
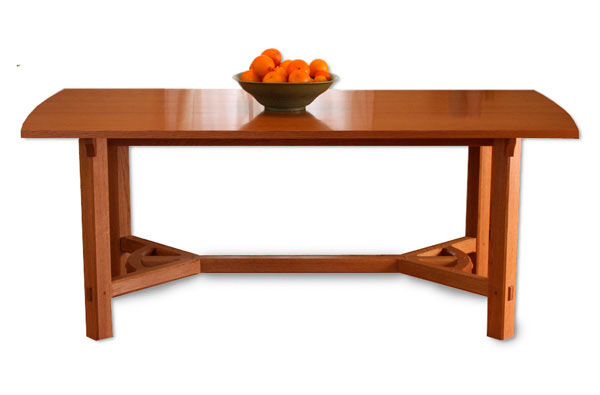
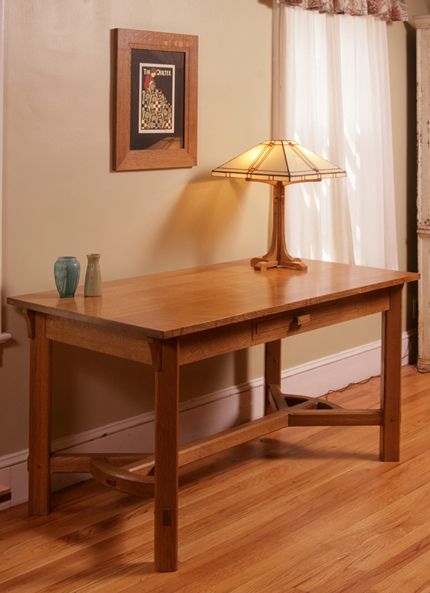
Fine Woodworking art director Michael Pekovich recently built a hayrake desk modeled after the dining table he built for a Video Workshop earlier this year. The drawer pulls he fashioned for the desk have all the handsome lines, shapes, and heft you’d expect to see in Arts & Crafts furniture, and so, I decided to ask him for a quick tutorial.
The process hinges upon a technique for wrapping a cove around all four sides of the pull. While it initially looks like it might require some fancy tooling, it’s actually quite easy.
How to Make Arts & Crafts-Style Drawer Pulls
 click to enlarge |
Rout the Cove-Mike begins with a long piece of stock measuring about 1-in. square. Using a featherboard at the router table and a 3/4-in. cove bit, he routs a profile on both edges of the long stock. |
 click to enlarge |
Wrap the Cove Around the Pull-Using a 5/8-in. Forstner bit, Mike drills a series of holes along the length of the stock. These holes delineate the edges of each individual pull and also serve to wrap the cove profile all the way around each pull. |
 click to enlarge |
Bevel the Top-Next, Mike rips a shallow bevel along both sides of the top. The saw teeth exit the stock at its center, thus producing a nice symmetrical apex for the two bevels. |
 click to enlarge |
Crosscut the Pulls-The long stock is now crosscut into separate pulls. Be sure to pass the blade through the dead center of each of the holes you drilled earlier. |
 click to enlarge |
Bevel the Sides of the Front-Use a block plane to bevel the front left and right sides of the pulls. Be sure you leave an edge of consistent thickness around all four corners of the pull. |
 click to enlarge |
Make the Inside Face Narrower-For aesthetic reasons, it’s best to make the face of the pull that meets the drawer, narrower than the front face. This can be achieved with a few passes of the block plane on either side. |
-
Learn how to build a classic Arts & Crafts-style drawer pull (at right). To learn how to produce a square version, be sure to catch Michael Pekovich's article in issue #222.
-
This hayrake writing desk features the pull the created in this post.


Comments
Clever trick using the DP in combination with the router. To minimize tearout on the piece, drilling before routing the top/bottom coves might be advisable though.
How many pieces did you damage before you got it right.
I agree with "rupps", I'm surprised you would drill the holes after routing the cove, for tearout. I also think you would get better results on the right and left front sides if you used a edge or disc sander ( again less tearout on the end grain ) for a much smoother and consistent finish.
rupps- That's a good point. I actually didn't have tear out problems with the forstner bit I was using, but drilling first would eliminate any possibility of it. The trick would be aligning the the cove with the pre-drilled holes. I'd probably dial in the cove set up on the router table first, then rout a scrap piece and use it to set the drill-press fence. Next time...
I am always amazed and appreciative when I see the creativity of woodworkers. For the true craftsman, your skills are a gift to be admired and inspired.
Log in or create an account to post a comment.
Sign up Log in