Building a Cherry TV Cabinet with Hand Tools – Part II
 Jan 20, 2012
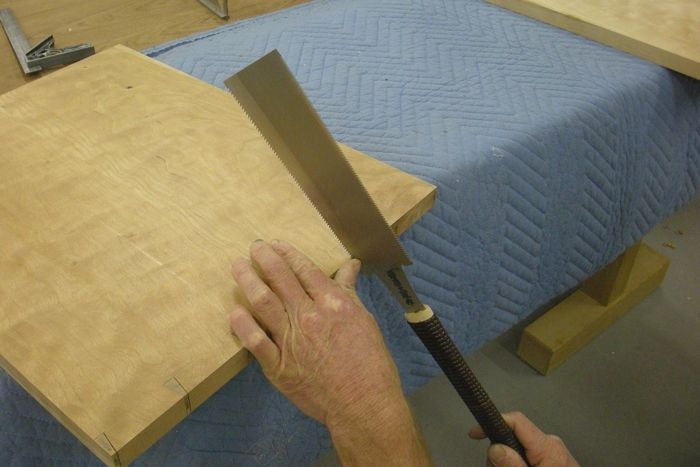
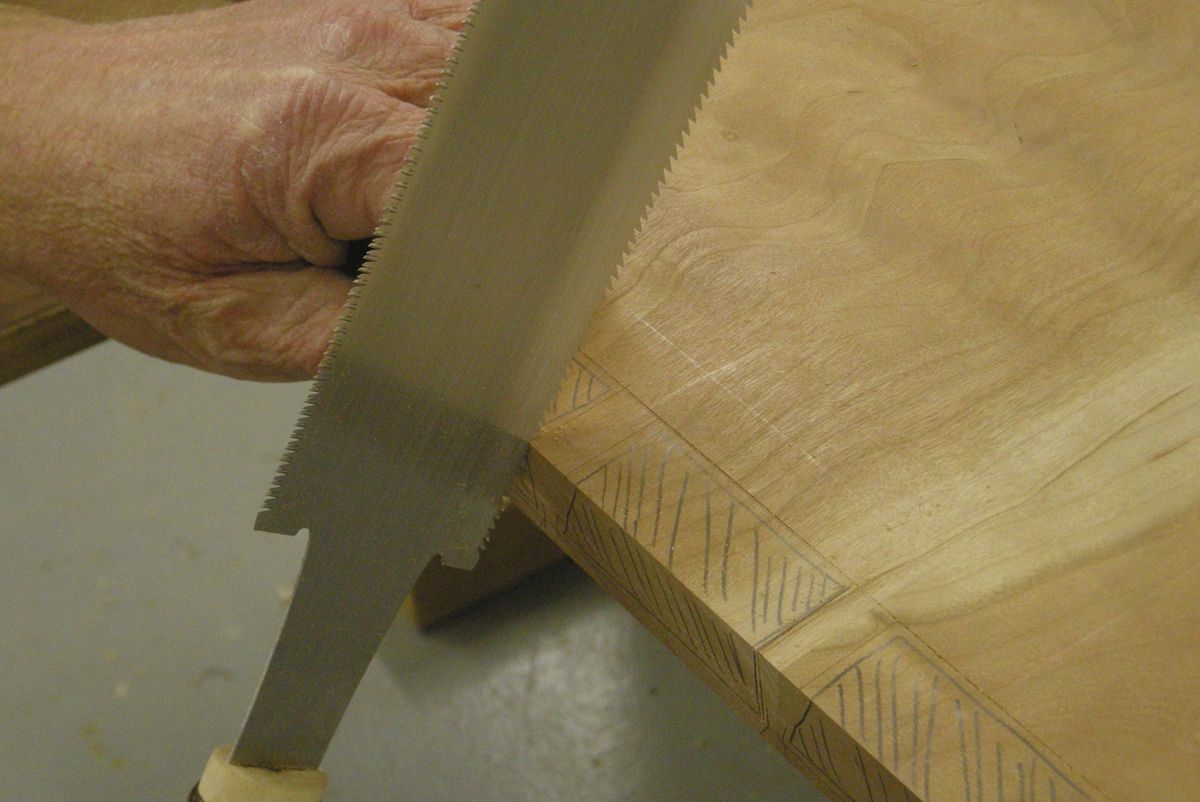
Starting the rip cut on the tail board. Begin the cut at the heel of the saw were the rip teeth are the smallest.
JAPANESE HAND TOOLS
Japanese Planes Demystified Learn how to tune up a new wooden handplane
Understanding Japanese Chisels What makes them different from the western variety
READ PART I of Building a Cherry TV Cabinet with Hand Tools
My Approach
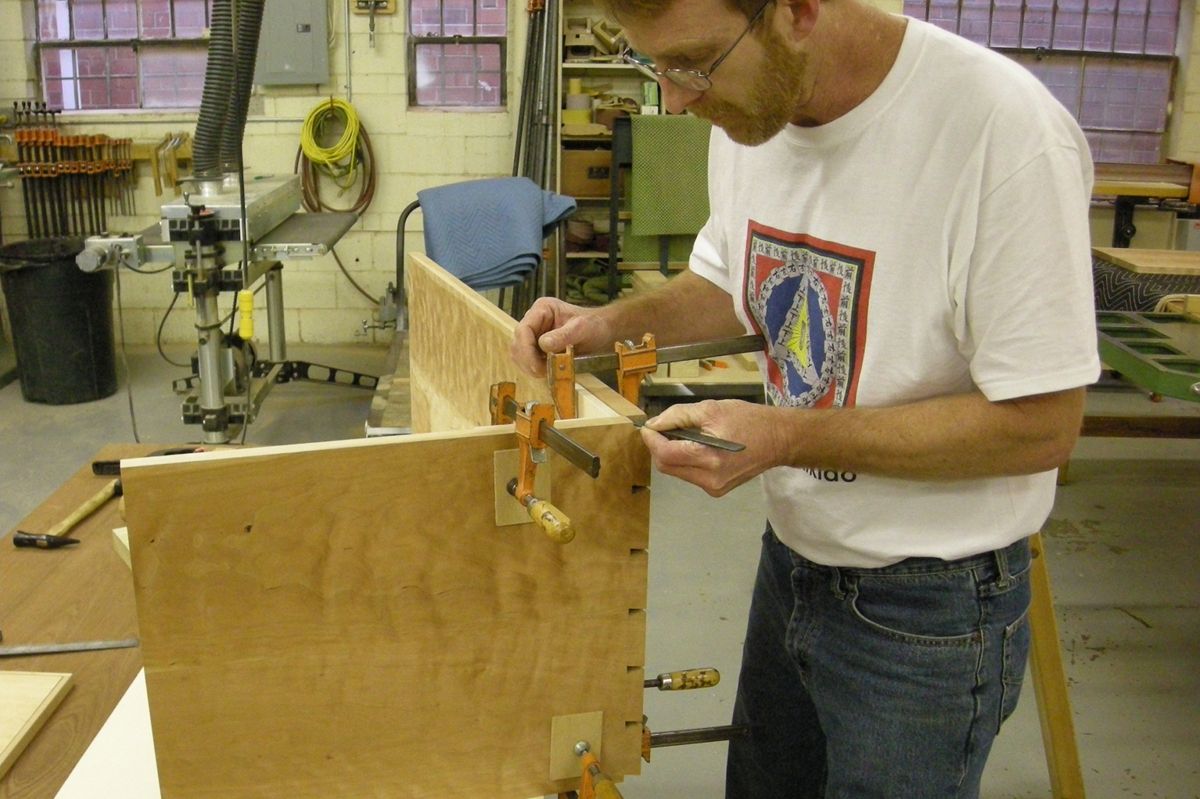
As with any woodworking process there are a host of ways to achieve similar ends. In this case the tails, pins and sockets were cut entirely with one small ryoba saw and a few nomi. I considered using a router with a straight cutter to clean out the bulk of the tail sockets but decided to stick with hand tools and chop this material away in a more traditional manner. For layout tools I used a marking gauge called a kibiki, left and right marking knives (左と右), small square, mechanical pencil and a wooden dovetail template.
Half-Blind Dovetail Layout
The design and layout of dovetails is open for expansive variation and creativity. Typically a narrow pin is considered more refined. I decided on seven evenly spaced and relatively narrow pins with six moderately large tails per joint. The dovetails are cut at an 8° pitch. I begin by laying out the tails on the outside face of the side panels, with the plan to cut right to my line. The tails are marked in pencil with the dovetail template and squared across the end. The completed tail board will be used as a template for marking the pins and tail sockets. Therefore any variation in layout or cutting will be carried forward and ultimately lost in the mix.
Sawing Tails and Chopping Pin Sockets
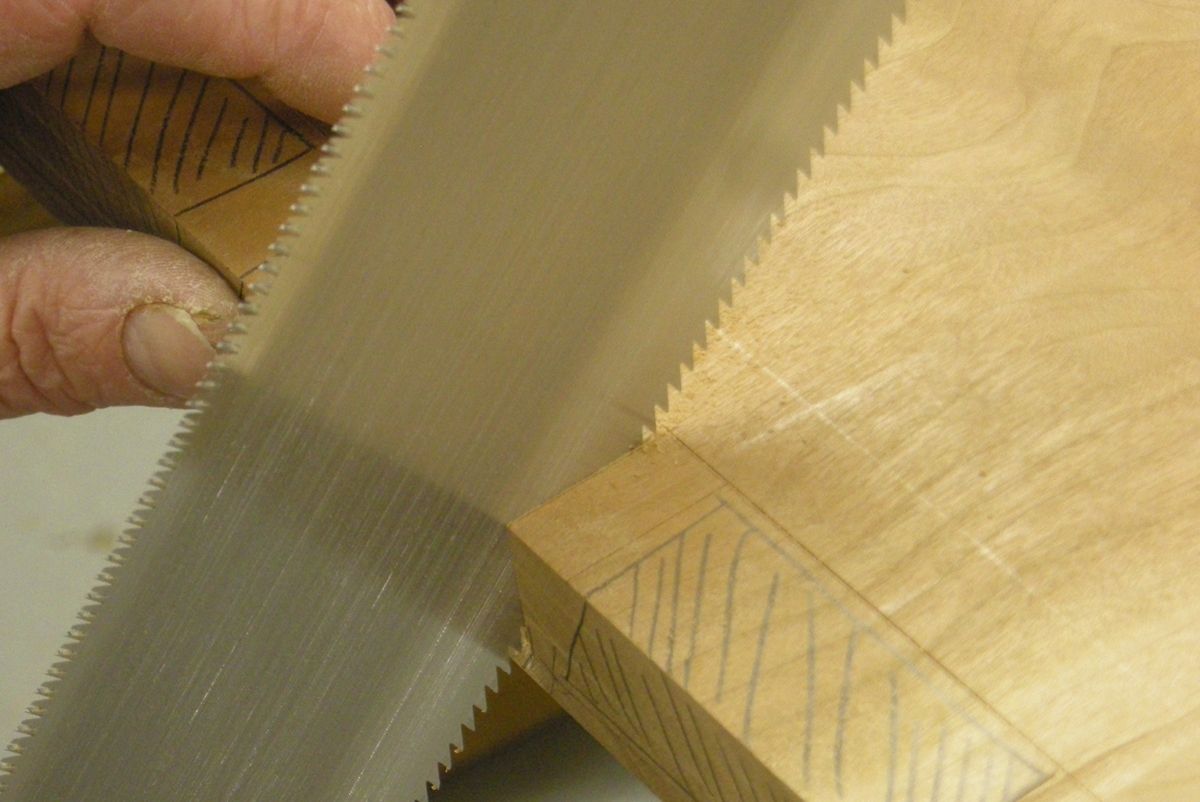
 I sawed the tails using the rip cutting edge of a Mitsukawa – 195 mm super deluxe ryoba. This is a fairly small saw that as is typical of Japanese saws also has finer teeth. I sawed to the center of my pencil line removing the half of the line on the waste side of the cut. While cutting, my aim is to cut straight, cleanly and square. I worry less about slight variations on the pitch angle of the tail.
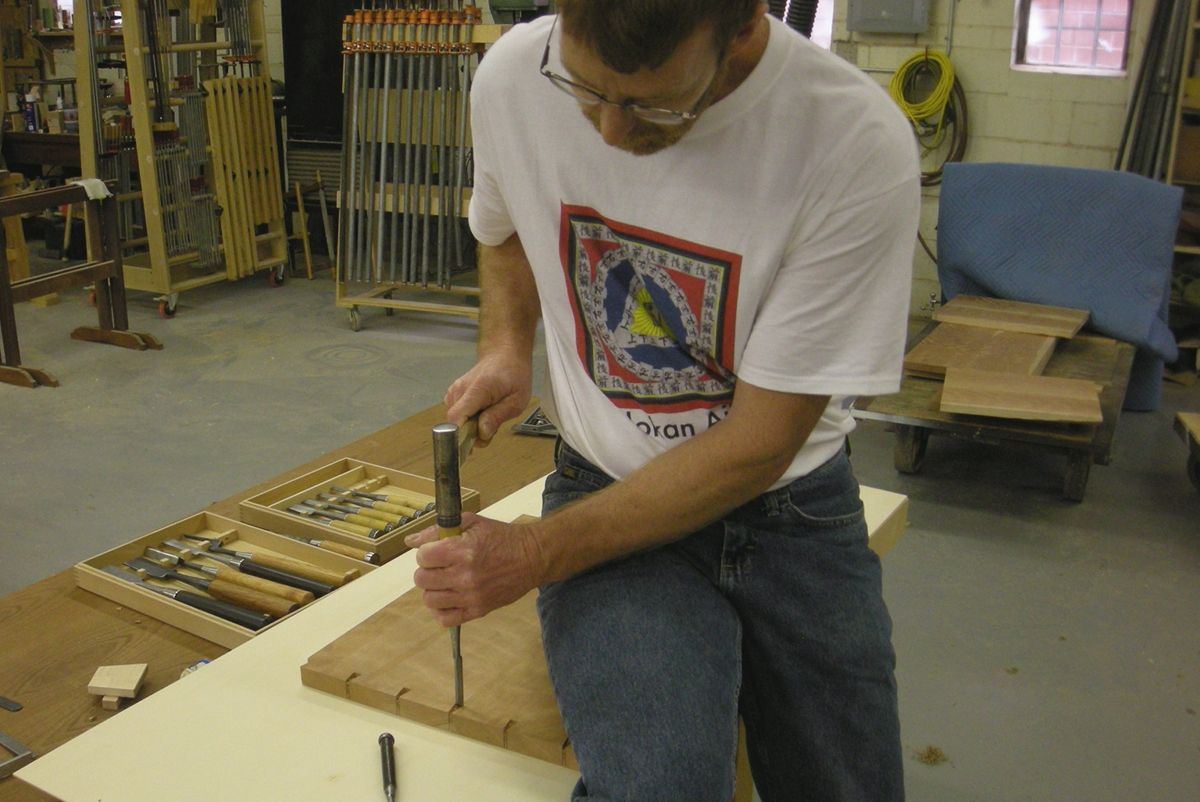
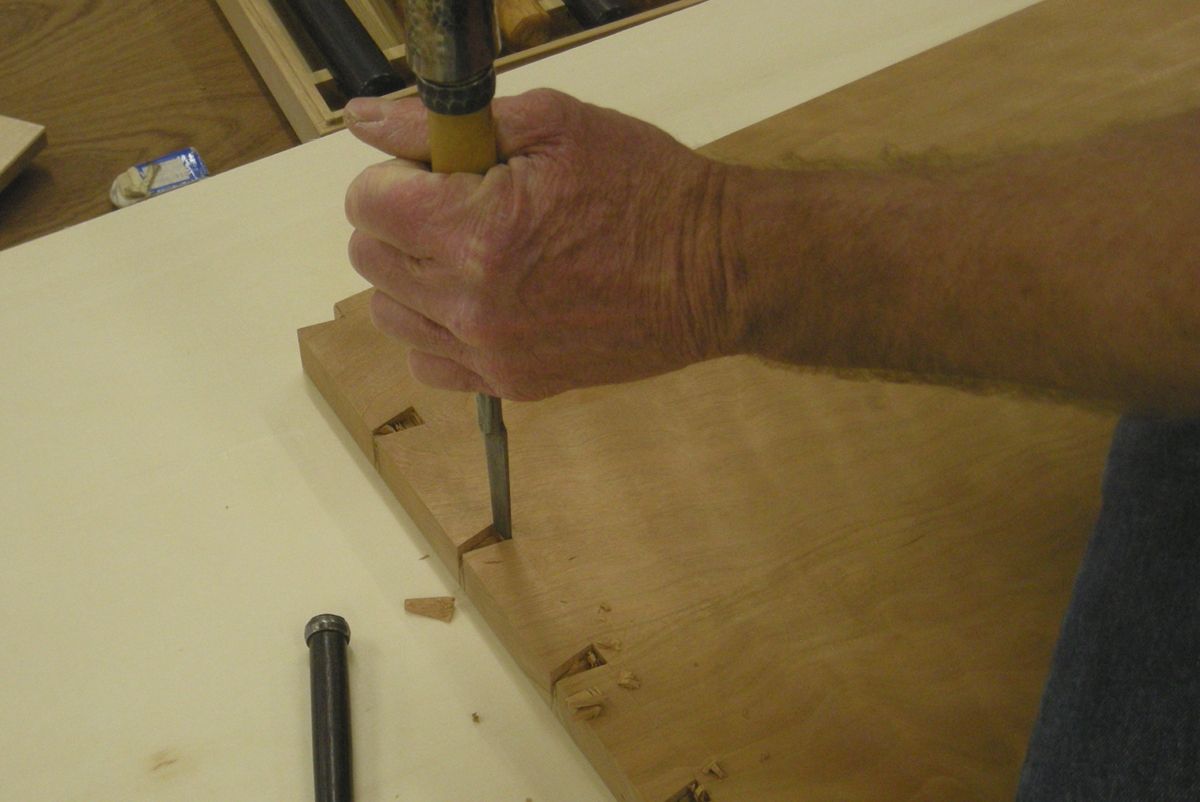
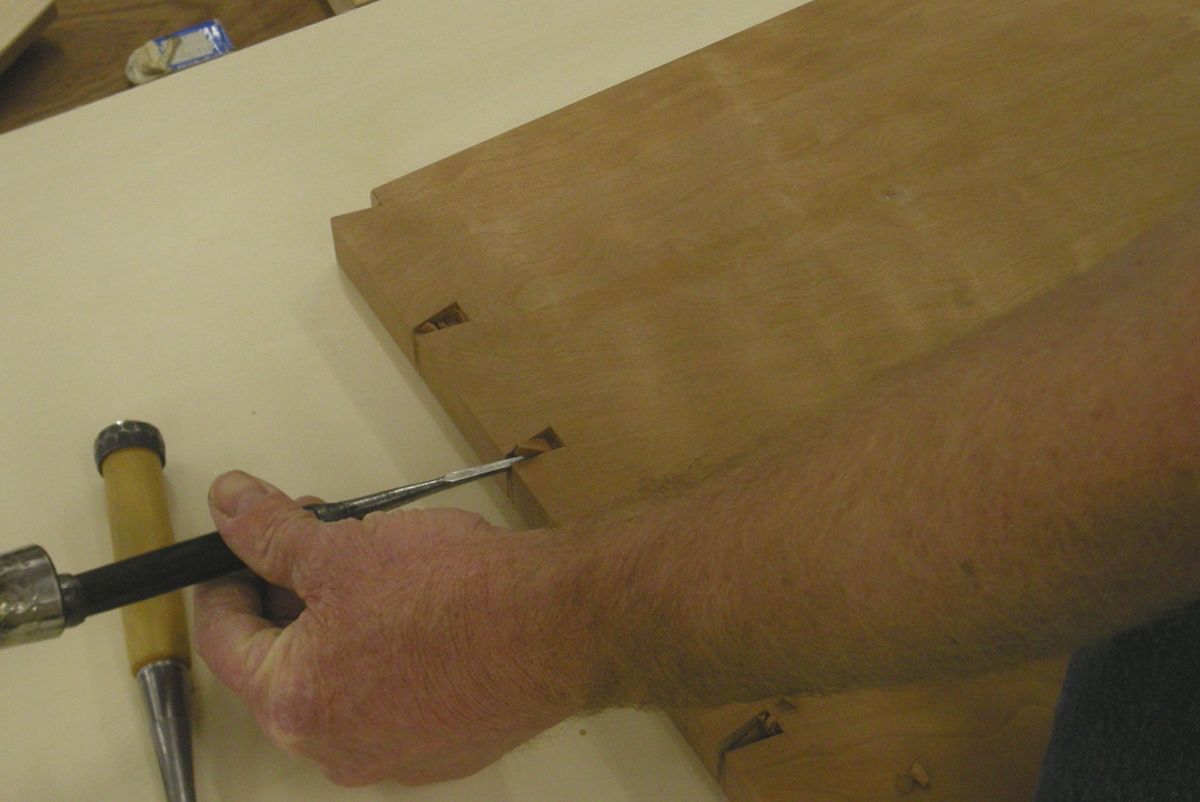
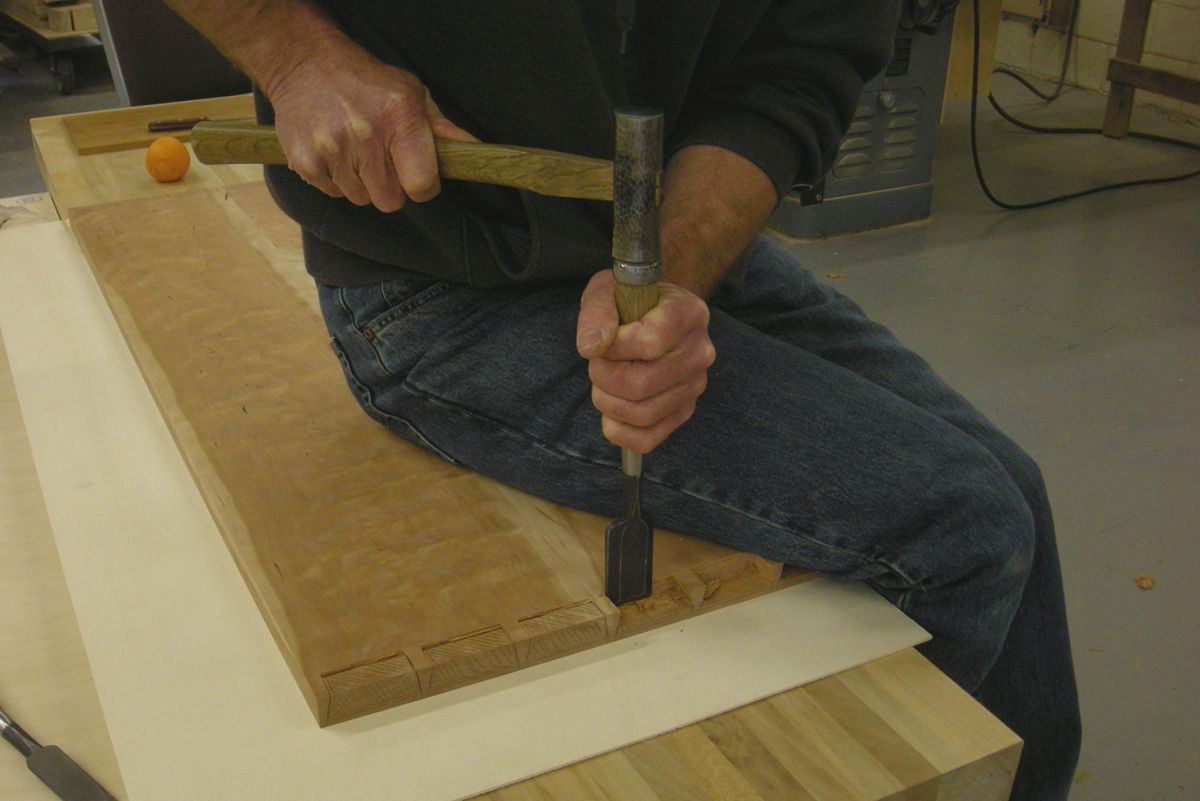
 Once the sides of the tails are sawn I score the bottom of the pin sockets with the kibiki marking gauge and chop the waste away. I typically chop from both faces leaving 1/32″ to 1/16″ for clean up depending how the material is cutting. I alternate chopping down from one face and then chip out 1/16″ or so of material from the end. I tend to cut about 1/3rd of the way through from the inside face and then take the remainder from the outside face. Once the bulk of the material is cleared I pare the bottom of the socket clean making sure that it is square from the outside to the inside. With a chisel, square and straighten the sides of any tails that require it. The tail board is now ready for transferring the layout to the pin board.
Marking the Pins and Tail Sockets
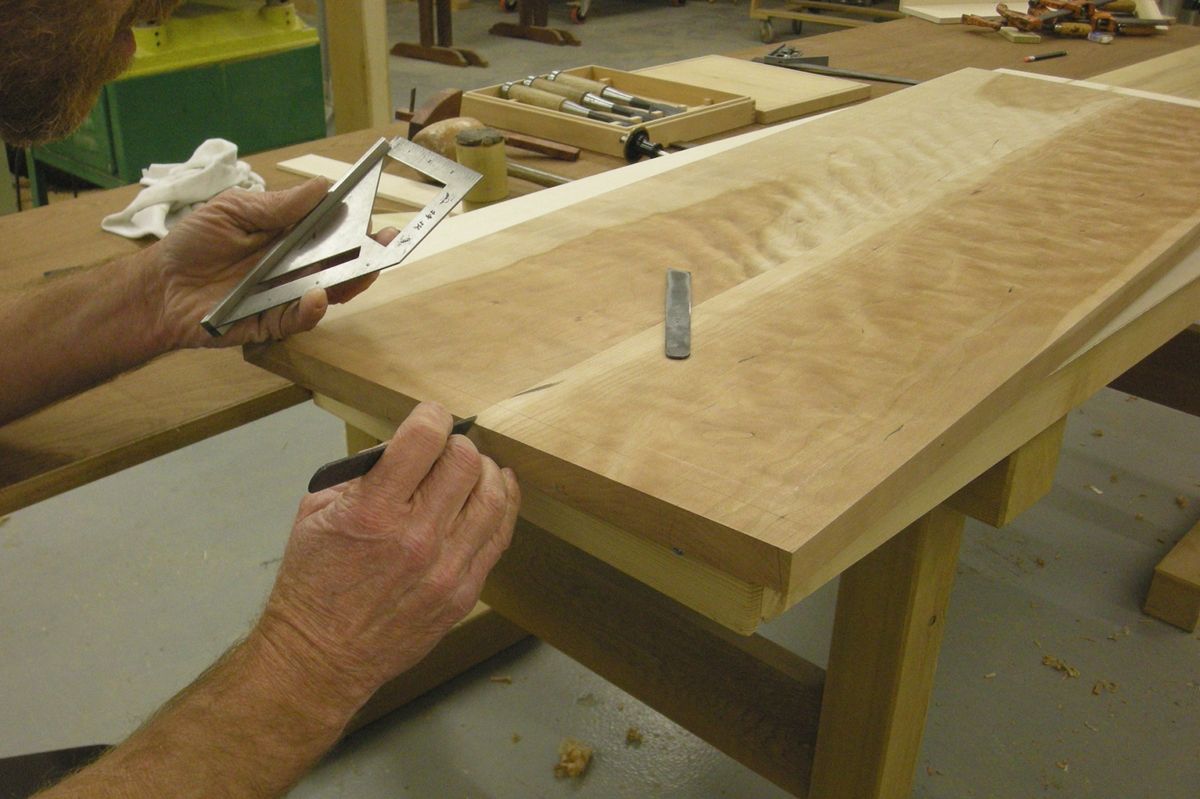
 I clamped the sides to the top one at a time using a simple plywood 90° corner jig so that I could transfer the layout. I marked as much as possible with marking knives and also traced the layout in pencil. After unclamping the top I scored the thickness of my side panels with a kibiki to the inside face of my top panel. Then I squared the layout of the pins around to that line with a marking knife. I like to locate my square by first inserting the marking knife into the end of the previous layout mark and then slide the square up to the knife.
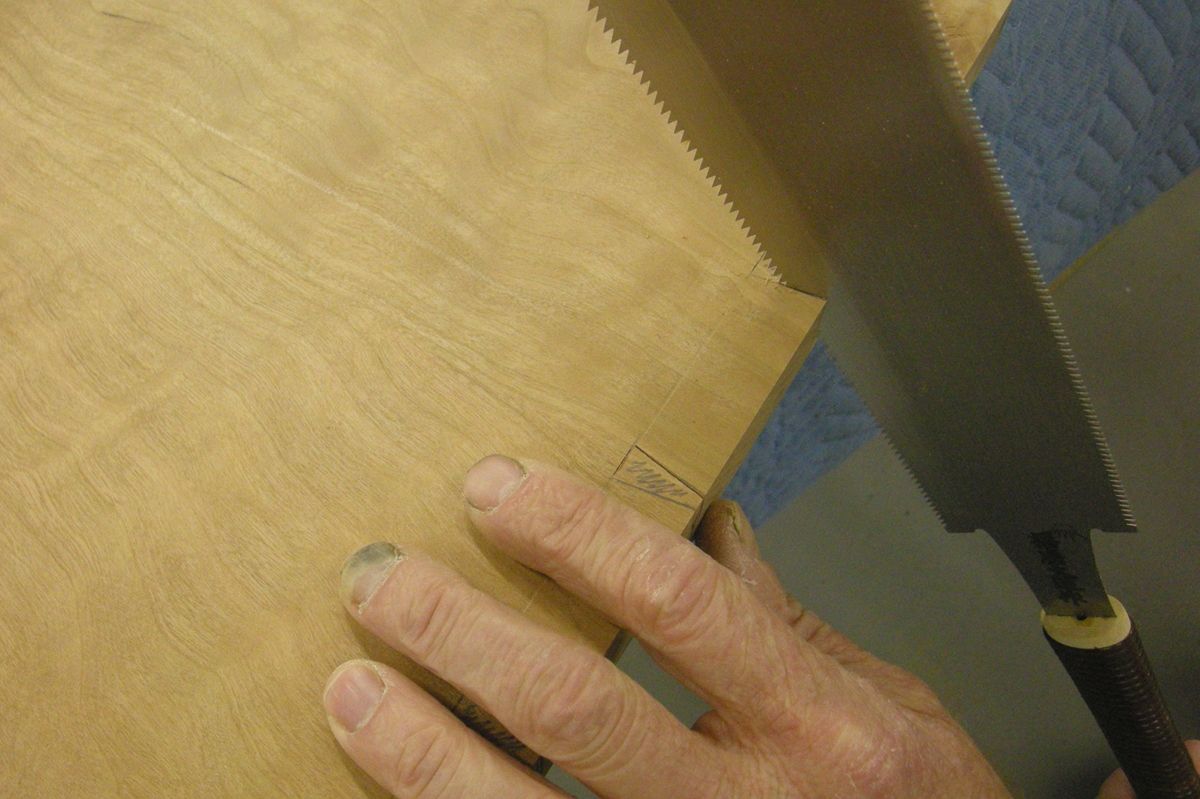
 To accurately square around to the inside face of the pin board, start by fitting the knife into the knife-mark of the pin layout. |
 Now just ease the square up to the knife and then mark the inside face of the pin board. |
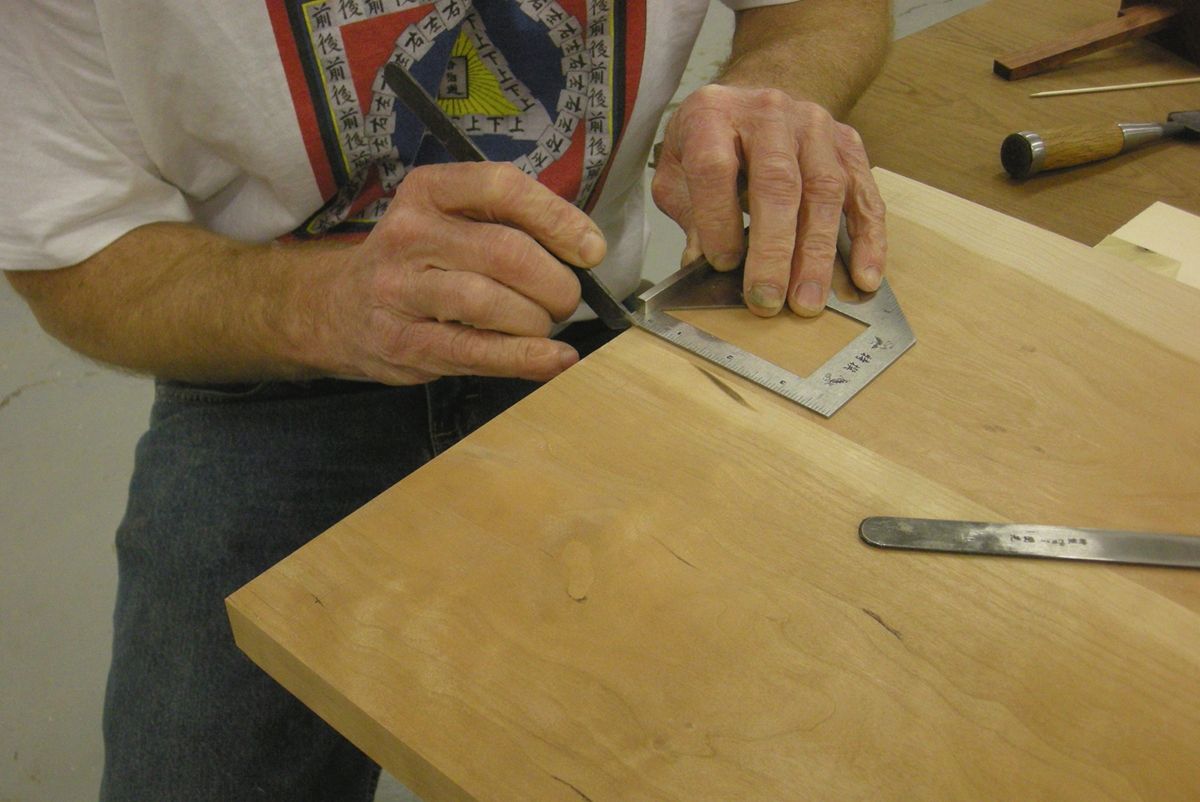
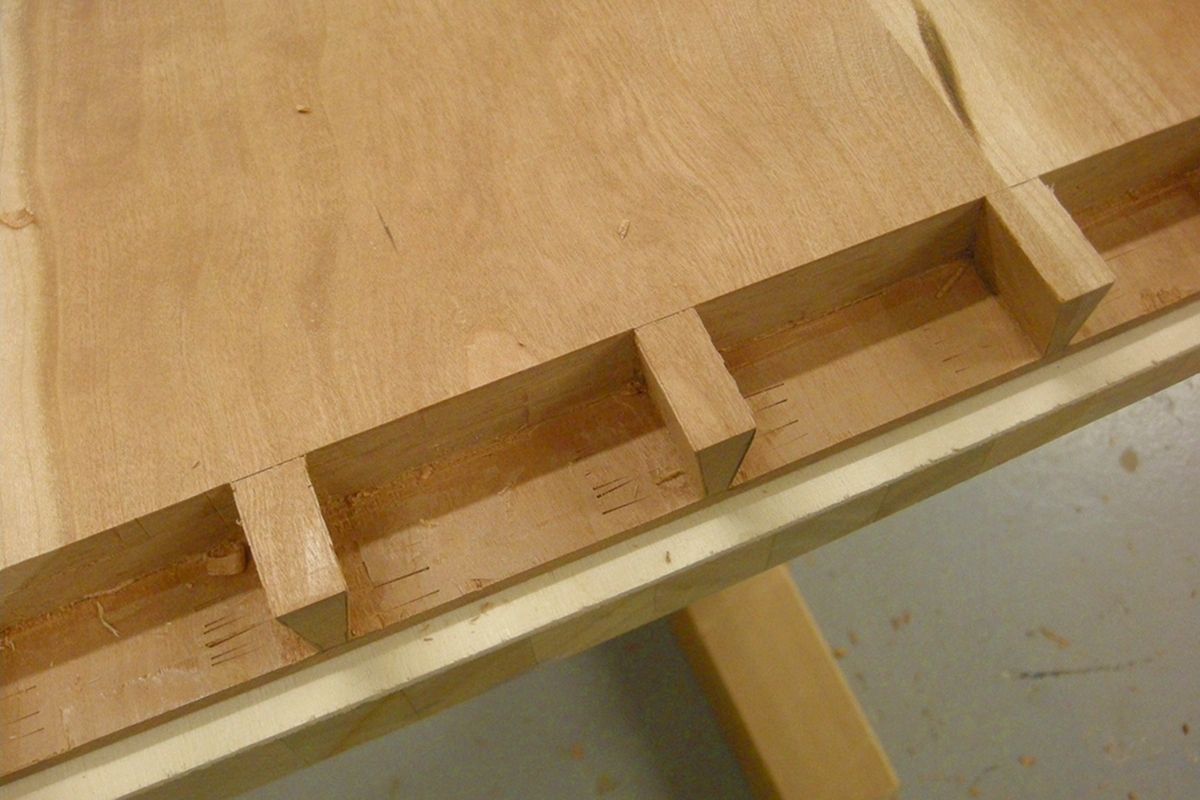
 Here you can see the final pin layout. |
Sawing Pins and Chopping Tail Sockets
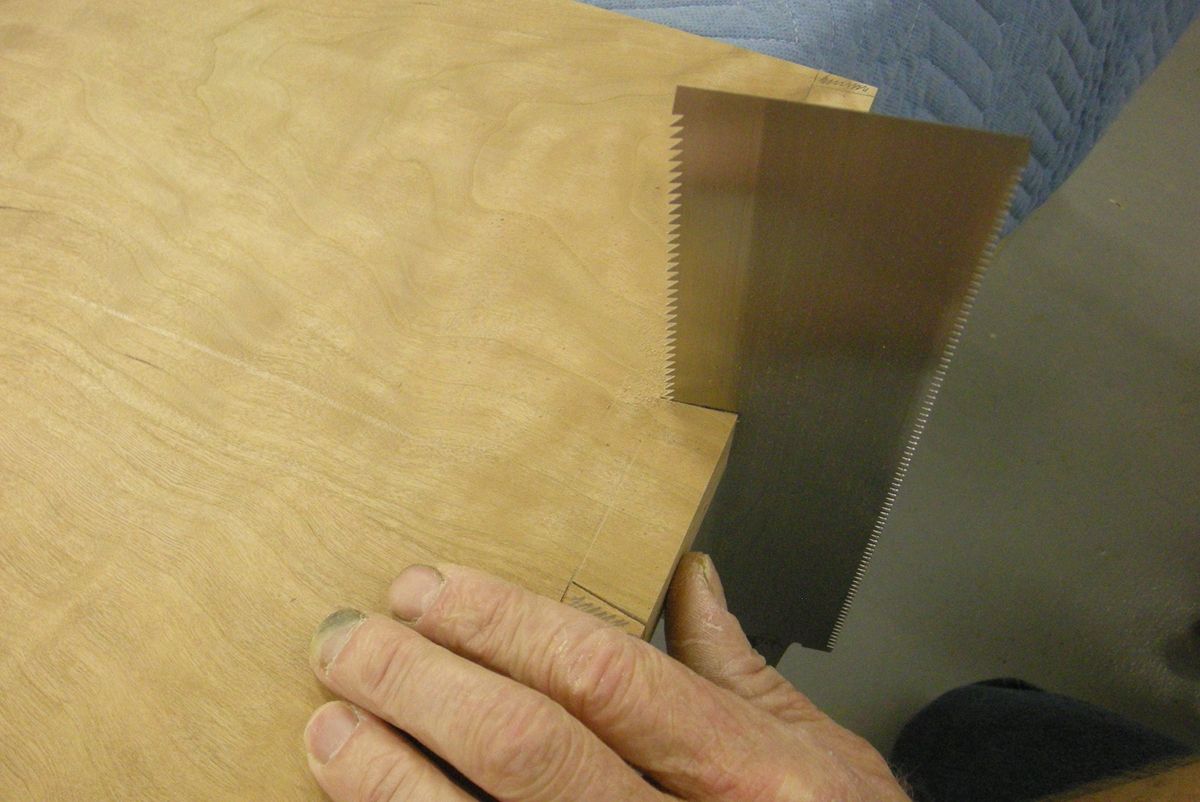
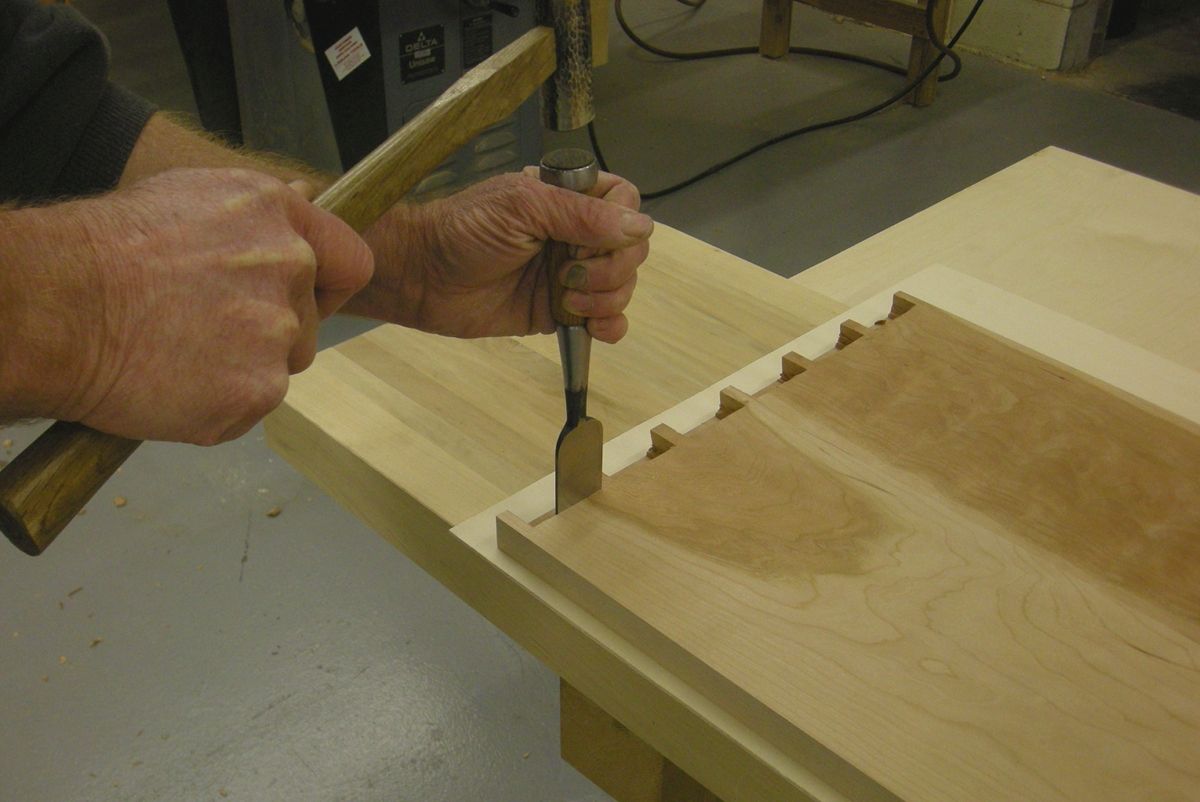
I saw as close to my marks as I dare, usually leaving just enough waste to clean up later with one or two passes of a chisel. Chopping out the waste on the tail sockets is pretty much like removing the waste on the pin sockets except that with half blind dovetails all the work is done from the inside face of the panel. Once again I chop down staying just to the waste side of the layout and chipping out the material from the end.
 |
 |
 |
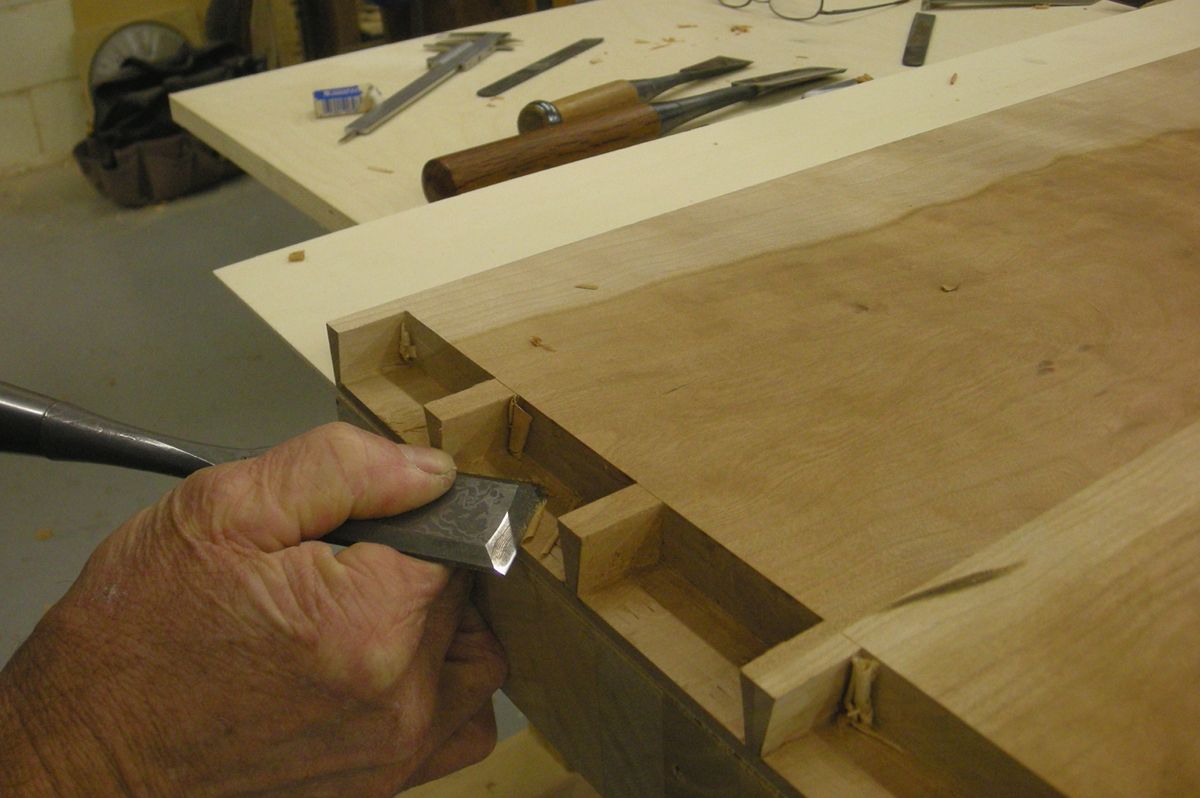
| Set the chisel for your fist cut so that the wedging action of the chisel leaves the back of the tool about 1/32-in. back from your scribed shoulder line. |
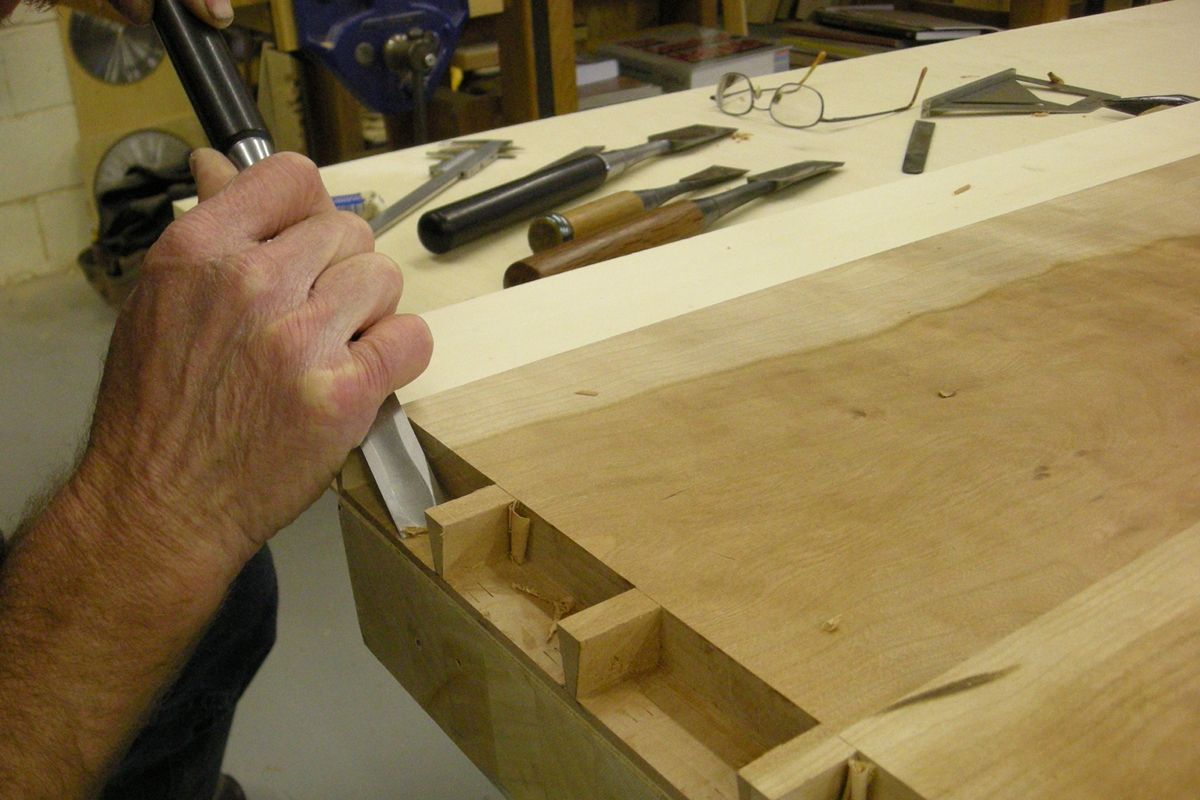
Alternate chipping out the waist on the tail sockets.
|
Clean up the final 1/32-in. on the depth of the tail sockets. |
Final Fitting
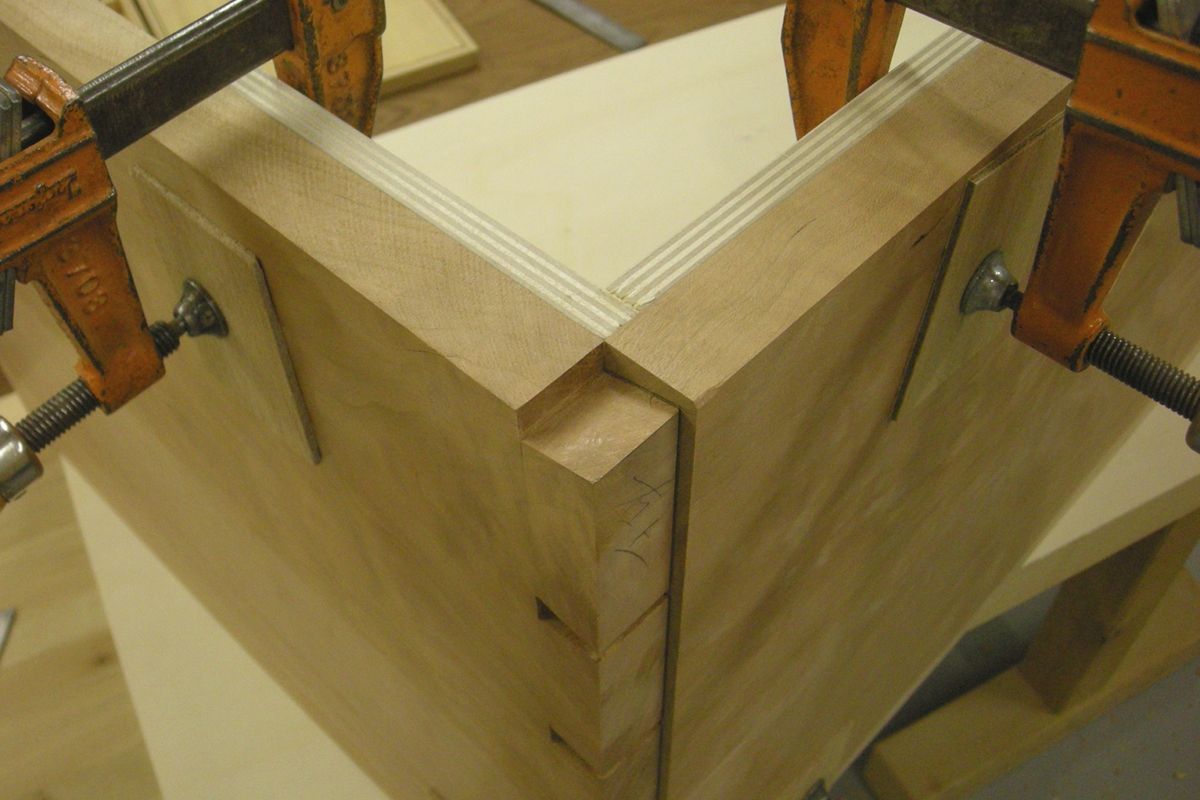
 Once all the tails and pins have been cut clean to the layout lines I chisel a small chamfer on the inside faces of the tails where they won’t show when the joint is completed. Then I test fit the joint looking carefully and feeling for tight fitting areas. Burnished or scratch marks can be clues to where the joint needs to be eased. With hard or brittle woods I like to be able to easily tap a joint like this at least three quarters of the way home. Softwoods that compress well can be test seated less deeply.
Next Post
In the final installment I will discuss fitting the sliding dovetails, glueing up and assembling the case in steps. Additionally I have a note or two on the final surfacing and the fitting of the sliding doors.
-
Starting the rip cut on the tail board. Begin the cut at the heel of the saw were the rip teeth are the smallest.
-
Progressively using the full length of the saw once the rip cut is started
-
Finish up the rip cut with the saw cutting vertically.
-
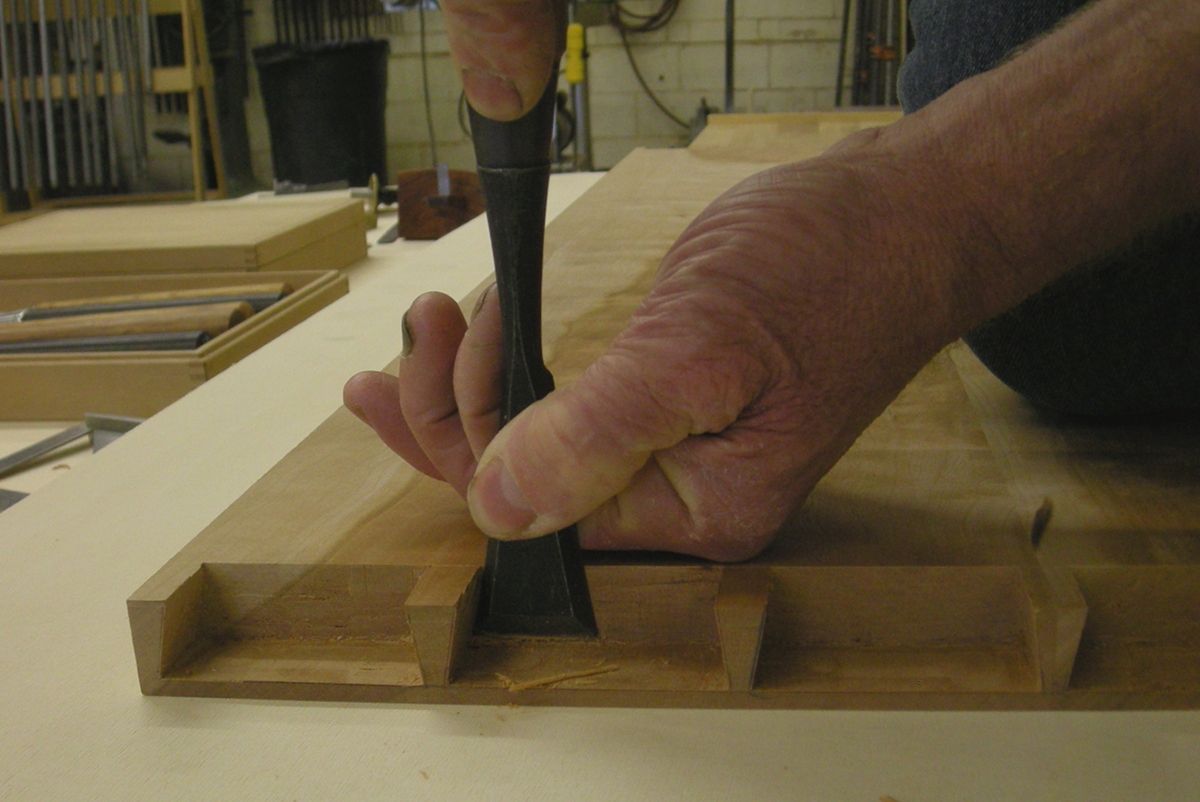
Chop out the pin sockets between the tails. Leave 1/32" to be cleaned up after the waste is removed from the full thickness of the board.
-
Close up on chopping out the pin socket.
-
Alternate chopping and splitting out the waist between saw cuts.
-
Clamp the tail board to the pin board at 90° to mark the pins.
-
Use marking knives to precisely transfer the size and shape of the pin sockets to the end of the pin board.
-
To accurately square around to the inside face of the pin board, start by fitting the knife into the knife mark of the pin layout.
-
Ease the square up to the knife and then mark the inside face of the pin board.
-
Closeup of pin layout.
-
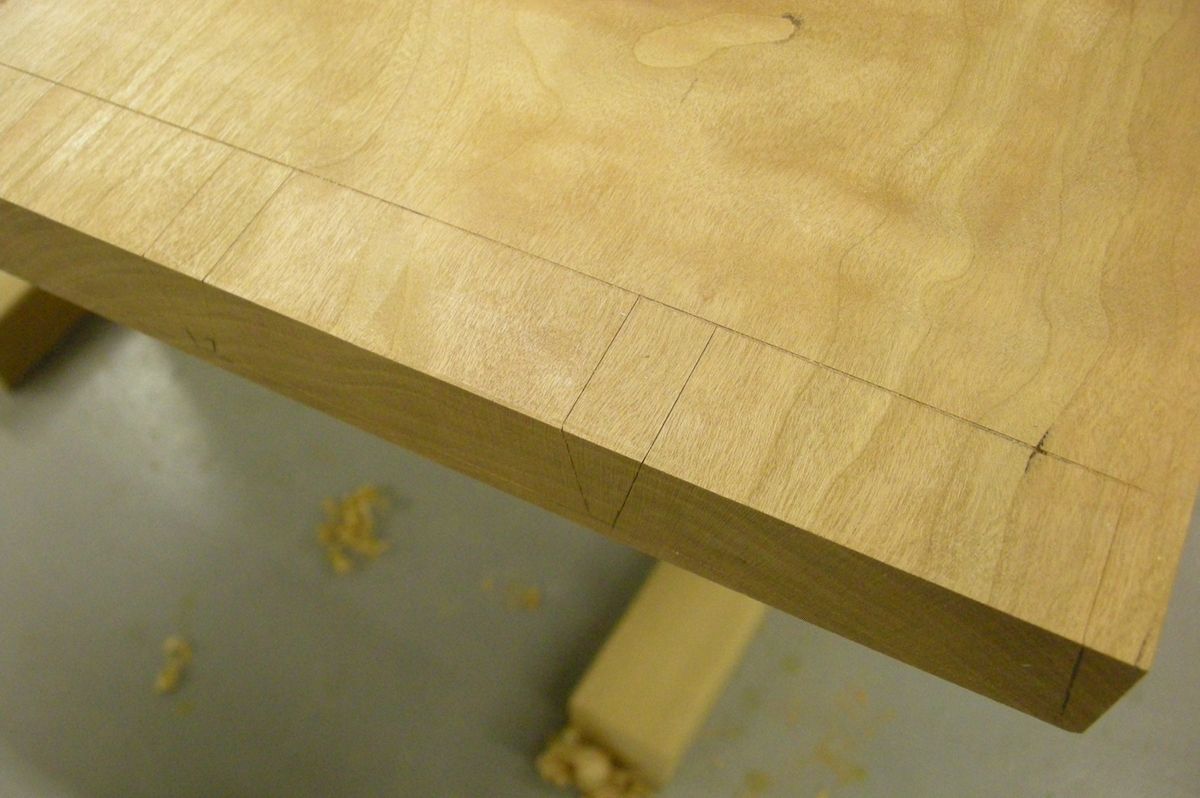
Rip as close to your line as you dare.
-
Closeup of the rip cut of the pin.
-
Chopping out the tail sockets on the pin board. Set the chisel for your fist cut so that the wedging action of the chisel leaves the back of the chisel about 1/32" back the line that marks the thickness of the tail board.
-
Alternate chipping out the waist on the tail sockets.
-
Clean up the final 1/32" on the depth of the tail sockets.
-
Pins and tail sockets fitted and ready to assemble.
-
Bachi nomi are nice for getting into undercut areas.
-
Usu nomi or paring chisels make putting the final surface on joinery a pleasure.
-
Various grain orientations will require a variety of chiseling techniques.


Comments
A nice article but, really,
"Chop out the pin sockets between the tails. Leave 1/32" to be cleaned up after the waist is removed from the full thickness of the board."
I have a waist because I am a woman and an English woman, to boot, but why waste words...
Yeah, when you have a couple thousand dollars worth of Japanese Chisels it is very easy to build things with hand tools.
Yep. Indeed, really nice work. But I'm affraid I have to agree with Zaac, at the point I wish I could ever have access to buy the mentioned tools.
I really would like to know how would it be with worldwide commercially available tools, off the shelf planes and chisels...
Nevermind. At last, I`m just jealous I guess... Please keep posting.
I really like the article so far. I have learned some interesting things about japanese tools. (you might want to check spelling and usage in the captions, though!)
Obviously the proof reader was on vacation for this issue of the eletter. Way too many spelling errors...not only in this article, but others as well. I hope this isn't the dumbing down of America.
I'm not sure where all of you are from, but at least in North America it's really easy to get Japanese hand tools, and they aren't overly expensive. I tend to order them from Lee Valley. I don't tend to use a lot of Japanese techniques, but a lot of their tools are really useful. I cut my dovetails with a small dozuki and it couldn't be easier. I paid half of what I'd pay for even the lowest priced western dovetail saw.
I have to agree with Clay. Zaac, Bravo, check out Japan Woodworker. Tools there range from very reasonably priced to only in my dreams. You can pick up 5 Dozukis at Woodcraft for the price of one Adria dovetail saw. (you can take my Adria when you can pry my... blah, blah blah.)And, their Japanese chisels are only slightly more than Crown.
I concur with the previous comments regarding the prices of Japanese tools: you can get very reasonably-priced Japanese tools from a number of vendors.
But I think that's all rather beside the point. None of the work shown here is dependent on the use of Japanese planes, chisels and saws.
-Steve
I appreciate the proof reading. I would agree there were a few too many typo's.
As far as the cost and values of various tools is concerned. Everyone needs to determine what works best for themselves. I am drawn to use Japanese tools for a variety of reasons. As a professional artisan I am inspired to strive to work to the best of my abilities when using a fine hand made tool. Beyond that I like the idea of supporting craftsmen that still make tools in much the same way as they have for ages.
Japanese tools are available in a wide variety of qualities and prices. Many production made tools, especially replaceable blade saws, function just fine. On the other end of the spectrum are tools that are highly valued because the maker is renowned and or retired. However, as is true of many things, the price of most Japanese woodworking tools is driven by quality which includes the quality of steel, skill of the blacksmith and sophistication of design and execution.
My first half blind dovetails were made with a cheap japanese cross cut saw and a set of irwin cheap chisels. They came out perfect. It is a poor craftsman the one who blames his tools.
Hello sir, I got you by Google search.
It is very nice and helpful information, success for you.
If you are mind, please give me a comment or advice on my blog, an English language blog. A billion thanks for you.GPFS Franchise, Inc. has been approved by California Department of Corporations to start the sale of Franchise Opportunities.
Thanks For Only You Create That cute Article.
Log in or create an account to post a comment.
Sign up Log in