
One big sappy mess. About 60% of the pine I'd bought for a recent project was covered in thick globs of sap. There was no way I could machine the material in this state.
A few months ago I fell upon a heck of a good deal on some locally-milled white pine I wanted to use in the construction of a simple Shaker writing table. A fellow Taunton Press staffer had taken down a massive tree on his property and had it kiln-dried by a local outfit, which subsequently sold the material off to us at a great price.
You Get What You Pay For
Trouble was, some of the wood may not have reached the critical temperature necessary to set the sap while in the kiln. The lumber had been air dried and subsequently heated in a kiln, but something was wrong. After only about a week in the FWW workshop, about 60% of the wood I’d paid about $100 for began to weep sap like nobody’s business. I needed a game plan, and fast. Luckily, the wide boards for my tabletop and front/rear aprons were largely heart wood and thus, totally sap-free. The rough boards I planned on using for the legs, drawers and short aprons, however, had enough sapwood in them to render them almost unusable.
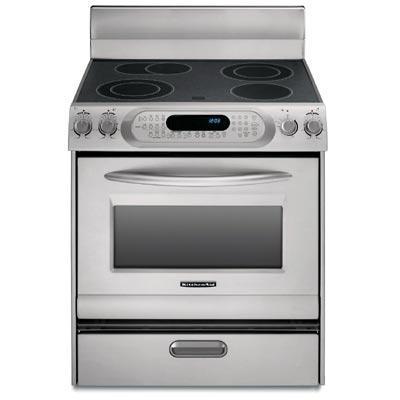
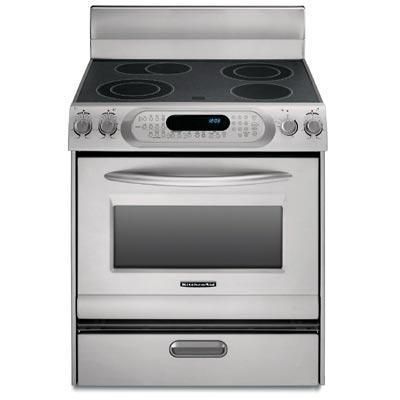
My Kitchen Provides the Perfect Solution
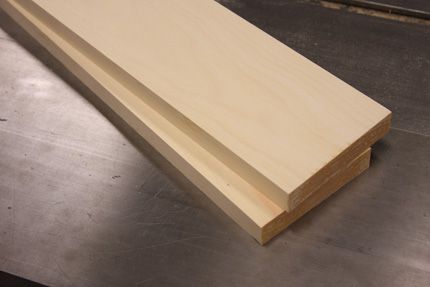
 Here’s how I got around the sap problem: I began by scrubbing off as much of the sticky stuff as possible using rags and mineral spirits. Then, I cut off as much of the sappy edge grain as possible at the bandsaw and rough-cut my smaller components to size. From there, it was just a matter of baking the wood until the sugary sap crystalized and then hardened. I baked the pine at 160-degrees for a little over an hour–keeping a close eye on the oven for safety reasons. I found that the high temperature actually did two things: 1) it drove most of the sap up to the surface, where I could easily remove it with hand tools, and 2) it hardened any sap left behind in the wood, thus preventing possible “weeping” through my final finish in the future. In the photo at left, you can clearly see how the sap migrated to the surface, particularly via the end grain.
 With the sap now dried and hardened, I worked the boards with a handplane to get rid of all the sap that had migrated to the surface while in the oven. Hardened sap will dull your planer and jointer knives super-fast, and it’s easier to re-sharpen a plane iron than a set of jointer knives.
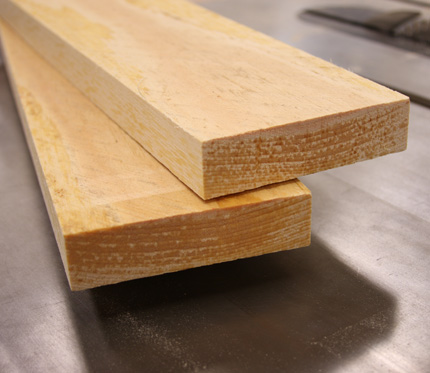
With the boards now sap-free, I was able to mill them to thickness as usual, using my jointer and planer without any trouble. I came away with smooth, clear boards and my shop machinery wasn’t any worse for wear! As for the table, I’ve now got the legs nicely tapered and mortised, and today I’ll head back into the shop to mill all my aprons to final size and cut the tenons. I’ll be sure to post the piece in FWW’s online gallery once it’s all assembled.
Final Product
After baking, handplaning, and surfacing my pine components, here’s what I’m left with; beautiful, clear boards just perfect for my table’s aprons. Sometimes life gives you lemons, and when that happens in the woodworking shop (and you’ve got a limited budget to work with), you’ve got to engage in some creative problem solving. If anyone else out there has more tips on this subject, I’d love to get the word out in the comments section at the bottom of this post. Happy building!

-
One big sappy mess. About 60% of the pine I'd bought for a recent project was covered in thick globs of sap. There was no way I could machine the material in this state.
-
-
-
-
The solution lay in my oven. By baking my pine furniture components, I was able to set the sap and make it safe for machining.
-
The final outcome? Smooth boards with hardened sap that are ready for final milling and cutting into various components for a Shaker writing table.


Comments
Please be mindful of the temperature at which you 'set' the pitch. Many power sanders today will heat the wood to a higher temperature (sometimes as high as 180+ degrees) than you used. If the wood temperature is raised above the 160 degrees, the sap will become fluid again.
jdgoodwin: Thanks for the tips! Keep 'em coming folks - this is a great little topic for anyone who has ever been handed this sort of a headache.
Hi Ed,
I enjoyed your article very much, I have a similar issue. I have about 1000 bdft of 250+ year old Long Leaf Pine from a local mill building. This building was built about 159 years ago and was recently renovated. I purchased large 9x16 and 16x16 beams, de-nailed them and had a local mill re-saw the boards into 1" thick slabs and turning stock. This lumber is rich in sap and actually has an amber glow to it. I am assuming that the beams were only air dried before being installed in the building. Since these boards are 8' long I can not practically place them in my oven (my wife was glad to here that). What would you recommend? I love the rich color these boars have and do not want to change that. Will kiln drying change the color of these boards has it does with other woods?
Never knew this before. Great learning for me. Thank you.
If the sap drips onto the oven would cleanup be a problem? I don't imagine you'd want to use shop solvents in an appliance used for food prep.
I liked the overall Sap solution - rough-cutting to fit the pieces into a home oven. However the removal of the sap beads done with a good hand plane?? My hand planes lead a rough enough life without gross sap abuse. Maybe there is more to it but I have used a Paint Scraper for this task. A paint scraper is easy and quick to re-sharpen and way easier to wipe clean.
I wonder if you could just take the wood into a dry sauna for an hour or so. temperature would be about right (180 degrees). The pieces wouldn't have to be cut to fit into a kitchen oven, and you wouldn't have to worry about sap in the oven.
I owned a tree service for over 10 years and pine sap was a constant bane to my work and my wife who hates sticky furniture and clothes. I was up a tree once and my climbing line got so coated in pine sap I could not repel down the line. After trying everything from harsh solvents to rubbing my hands in dirt to kill the sticky factor and letting the sap stain stay until it wore off, I discovered 2 solutions so simple I had to kick myself for not discovering them sooner. Baby oil and vegetable oil both do a great job dissolving pine sap. They work so well I kept vegetable oil in my shower and my work trucks. Whether you need to clean it off the inside of your oven or remove it from the boards both should work great without adding moisture to your lumber. Also both are non toxic and cheap.
PS. My wife loves how soft they make my hands.
Ed,
Interesting timing on this one. I just put up a post on my sawmilling and woodworking blog at wunderwoods.wordpress.com about sticky white pine. I cut as mush white pine as I can since I love everything about it, except the pitch. I have found that white pine will range dramatically in the amount of pitch. Some have a lot and some have very little. I put up my post because I was getting ready to work with some white pine that was only air-dried and expected everything to be sticky. That particular tree cooperated and it wasn't sticky, even air-dried. I have found that if a tree is sticky, it is still sticky inside after going through the kiln at 160 degrees, which is as high as I push my dehumidification kiln. The sticky ones just seem to have pockets of pitch. In your case, it looks like there was a million little pockets. There are also times when larger pockets will be the size of pencils and just ooze. I think it comes down to the luck of the draw on the pine and whether your tree/lumber will be too sticky to easily work. As you said, turpentine or mineral spirits works great to keep everything clean, including power sanders. I am glad that I am not the only one dealing with this sticky situation. Good tips!
NHAccents: That is wild! You're saying that 160+ yearl-old lumber is still weeping?! WOW! Just goes to show, you can't stop Mother Nature!
I had spoken with one of my colleagues about the possibility of setting the sap in longer front/rear aprons. Luckily, I was able to find two boards that were just fine as-is but, we came up with the idea of potentially taping together a mini-oven using foil-coated rigid foam insulation and placing a heat lamp inside. I haven't done the experimentation yet to see what kind of temperature I could achieve in such a rig and if I were to do it, I would most likely do it outdoors - just in case. I don't think ignition would be a possibility but I'm no engineer and wouldn't want to mess around! So: perhaps building a long oven sized to just fit the components you desire and placing a heat lamp or two inside might be in order? My two cents.
Best,
Ed
elkhaircaddis: You are correct - at least I think you are! I allowed those mineral spirits to dry out of the board for a good few days before I baked them. Good point!
johnny p: absolutely - it just depends as to whether or not you mind having to go through the re-sharpening and honing process. It didn't bother me at all.
Best,
Ed
OtherPeoplesTrash: I often use olive oil to help dissolve bits of oil-based poly from my hands. Works like a charm!
Best,
Ed
Given the relatively low temps involved and the large amount of space needed you might be able to build a make-shift solar heater. For the cost of some thin plywood and a roll of foil, with a design based on solar ovens, you might get the temps you need to set the sap in boards too large to fit in the oven.
james3one: Funny you should mention that. A couple of us were talking about that very same idea in the shop about three days ago - great minds:)
Best,
Ed
http://www.builditsolar.com/Projects/WoodDrying/wood_kiln.htm
You can also add a portable space heater and fan inside to move the air. If you really want to speed up the drying time, add a portable dehumidifier and put a tube in the bottom of the pan to send the water outside the unit.
It has been some years since I have done anything with pine but it seems that we used to treat it with it own juice - turpentine and it would dry it to a white powder that could be scraped off - it usually took two applications to stop the weeping then a finish could be applied.
It seems to have been successful. Been a couple of weeks now and none of the pieces I baked have shown even the slightest signs of weeping. Phew!
Tried this once on smaller pieces in a microwave- DO NOT try this- had to buy a new microwave, after picking the shrapnel out of the plaster.
Hello people! My name is Tileromix. I from in Russia.
epirnik,
I build furniture now (tkellyfurniture.com) but for 12 years prior I ran kilns that dried east. white pine. The theory is that at 160 the turpins (think turpentine) are driven off, leaving the crystal amber behind, the sap in effect loses it;s vehicle. Some people think that if you heat it to say 140, then the temp. has to exceed 140 for the pitch to bleed. This is not the case. At 160 or above the turpins become volatile and will be driven off. I wonder if you cooked the pine long enough. I used to dry it at 160 for 12 to 16 hours. Another consideration is that you simply can;t heat the wood without some way to control the humidity, as you will create drying stresses in the wood (warping, cupping). Many kiln operators do not set the pitch because of this reason. Also, the grade will play a factor as clear wood has more sap than lower grades. Like everything in life there is a trade off.
Thanks for this timely info. I just tried your technique on some Douglas fir drawer fronts which had pockets of sticky sap along the bottom edges of the boards. After cooking for just over an hour at a temp somewhere between 150-200F, the sap has set and is no longer sticky. My oven knob only goes down to 200F so there was much guesswork, but it did the trick. Also, there was no discernable wood movement or change in appearance on the faces of the boards (which had already been planed). Anyway, thanks again. Cheers!
Log in or create an account to post a comment.
Sign up Log in