
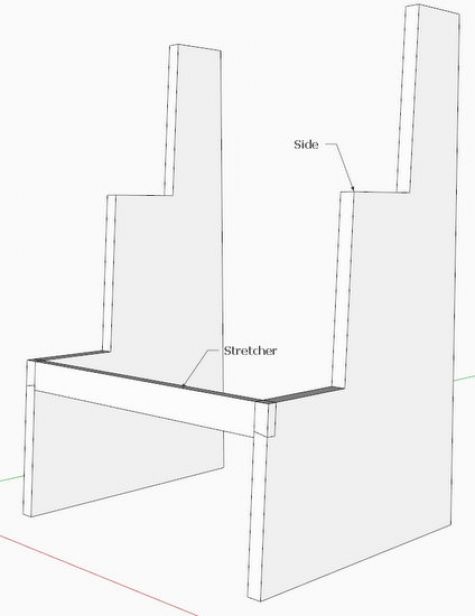
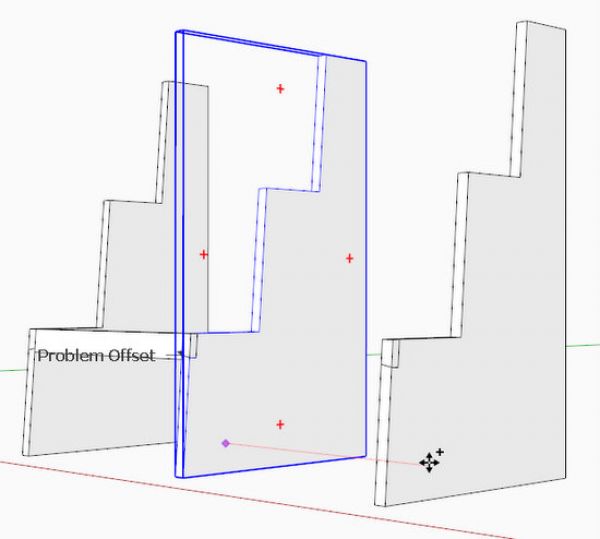
In Chapter 12 of my book, I show the modeling for a Shaker Step Stool. A reader sent me a note with an attached SketchUp file showing the step stool at Step 8, page 82. At this stage of the drawing process, the Stretcher is complete with the half-dovetail at each end. The reader was having trouble pushing out the waste matching dovetail in the Side component. Here is the drawing as sent…..
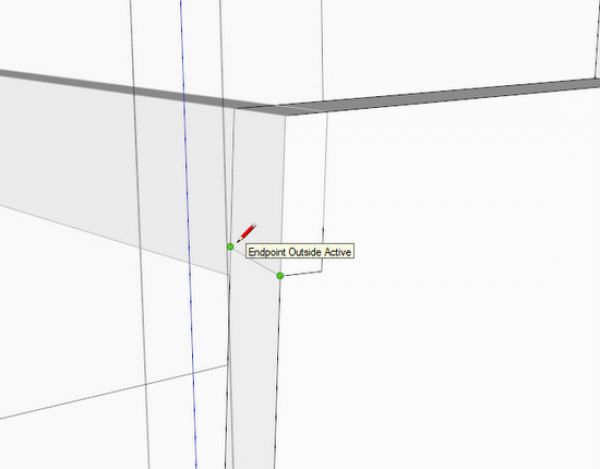
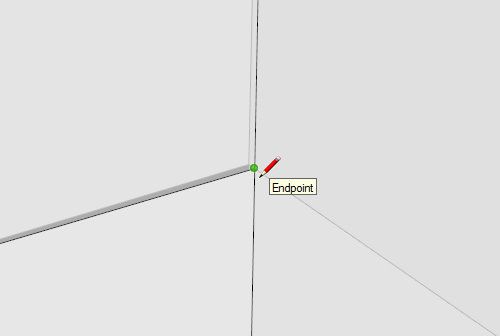
Step 8 in the book says to open the Side component for editing and with the Line Tool, trace over the angled line at the bottom of the dovetail. This operation is shown below. Unfortunately, the line was not placed precisely at the correct endpoints.
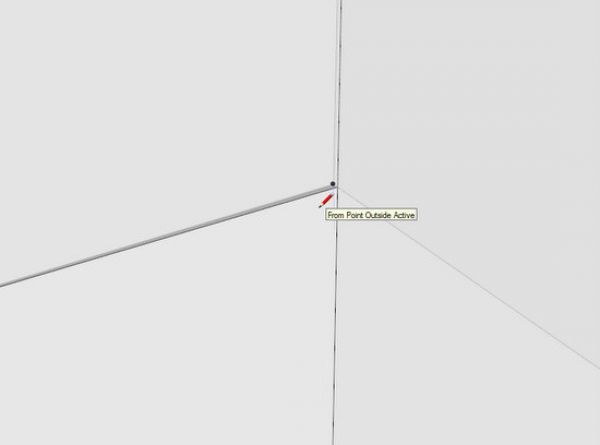
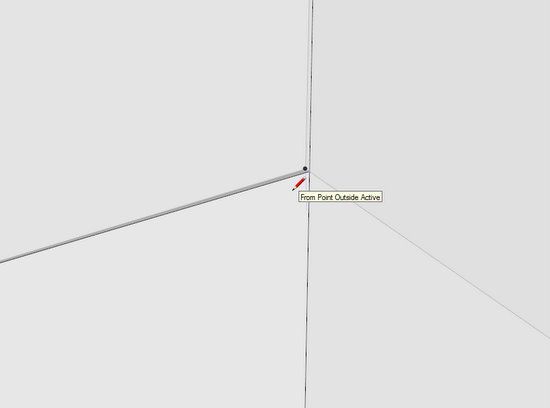
Note the flag or labeled tag that SketchUp displays when placing the line – “Endpoint Outside Active”. This is an important indication of a problem, but sometimes not recognized.
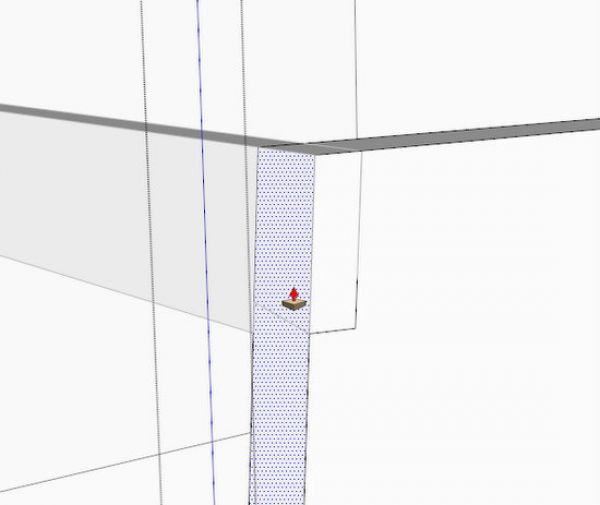
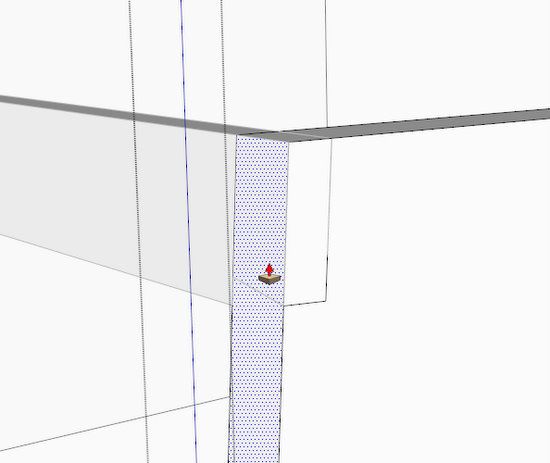
Although the line “looked” good, it was not good enough and when trying to push out the waste material with the Push/Pull Tool, the entire front edge of the Side highlighted as shown below. Therefore, the matching dovetail waste could not be removed.
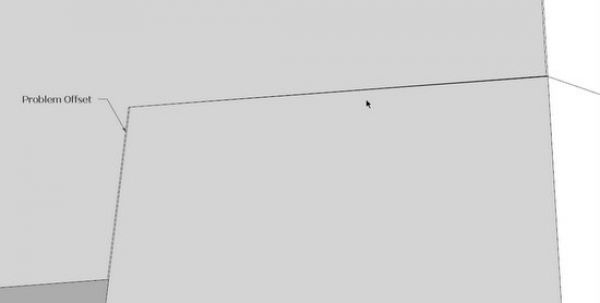
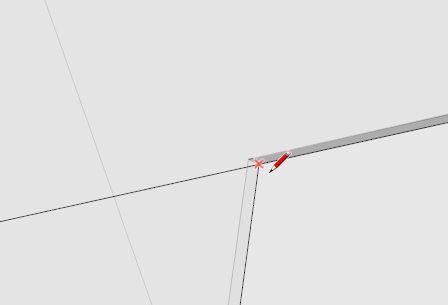
So what happened here, and how do you find the problem? This is when you should put on your glasses and begin a close-up inspection, zooming in very close and orbiting around the problem. Here you can quickly see what happened. The Stretcher was installed so that its front face was not flush with the Side, leaving a very small offset. When placing the line, SketchUp grabbed onto the endpoint on the Stretcher not on the Side. (There was an indication of this earlier when placing the line – the flag and label telling you that the Endpoint was Outside Active.)
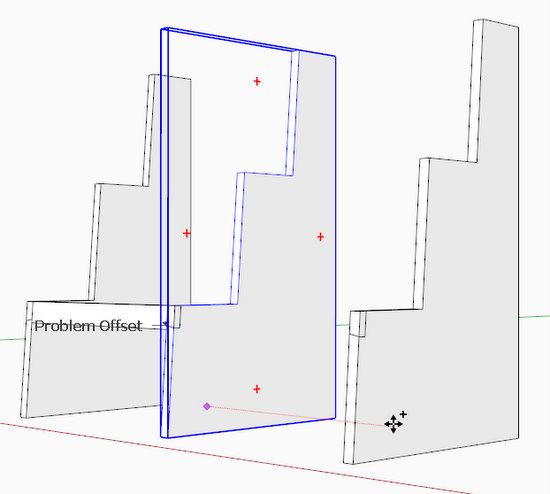
Often when I’m doing an inspection, I will make a copy of the component and pull it away from the assembly.
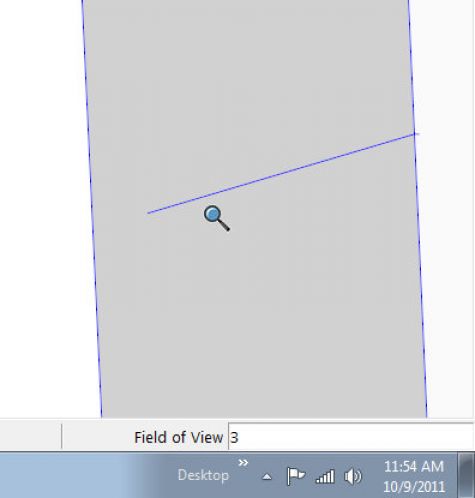
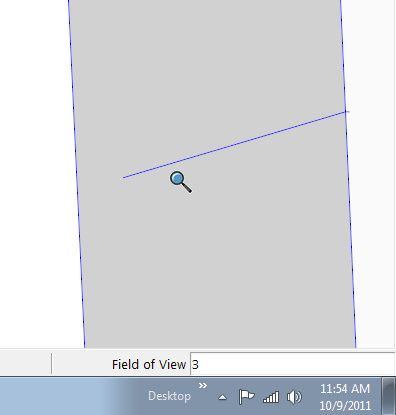
Since close inspection is critical with the Zoom Tool, you may need to change the camera’s Field of View. Often, you can experience “clipping” of the view as you zoom closely. Changing the Field of View to 3 degrees, rather than the default 35 degrees, solves that problem.
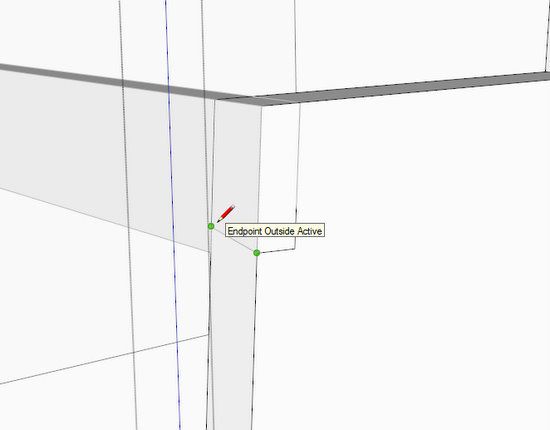
Here is the angled traced line that was placed earlier on the front edge of the Side. Note the failure of the line to intersect with the left edge. Here is the problem and it is quite evident under close inspection.
To place this line properly requires zooming in closely. Below the Line Tool shows that it is connecting to the wrong endpoint (Point Outside Active). Again the flags will help.
Now I’m connecting to the right endpoint.

And here is the proper endpoint at the other end of the line. This line will now allow the removal of the waste material.

Often I catch new students trying to draw in SketchUp with the model zoomed way out, and getting very poor results. Once students get on to zooming with the mouse scroll wheel, they have much better success.


Log in or create an account to post a comment.
Sign up Log in