The Perfect Marking Knife, at Last!
 Aug 25, 2011
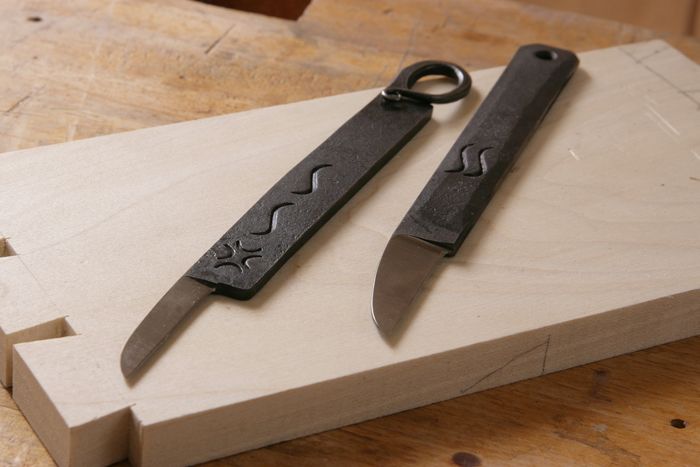
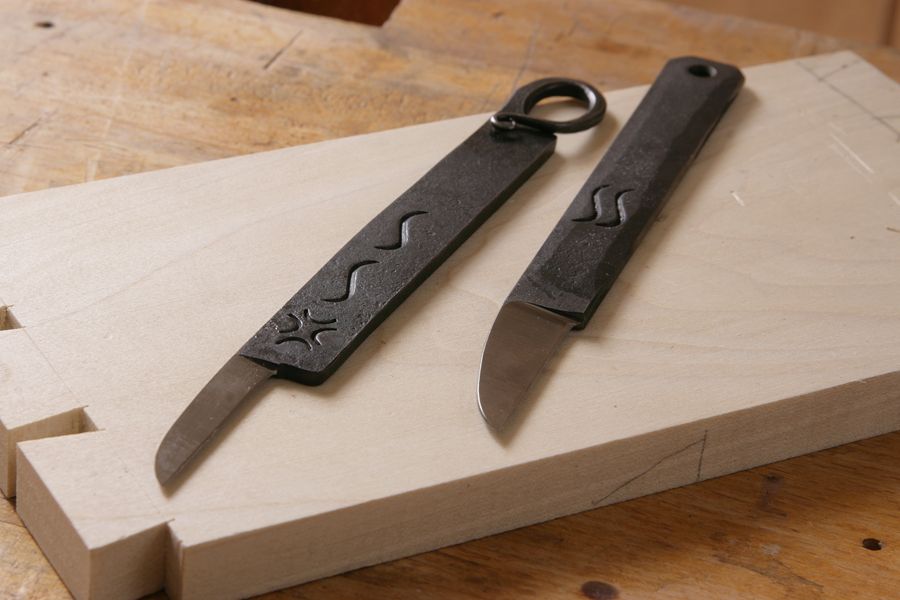
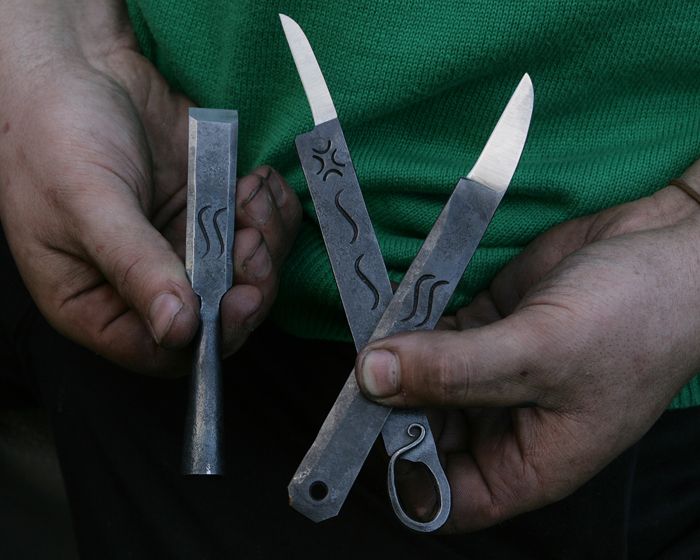
Beautiful and functional. These hand-forged knives combine great looks and balance with the perfect blade profile.
The perfect knife for me, anyway. That’s because I helped design it (how cool is that?). Last week, while teaching hand tool skills at Peters Valley craft center, I had the great fortune to meet Sam Salvati, the assistant blacksmith. Sam is a young, passionate blacksmith and a fantastic knife maker who mixes a rustic hand forged style with razor sharp edges. While looking at one of his creations, I asked if he might be interested in making a marking knife.
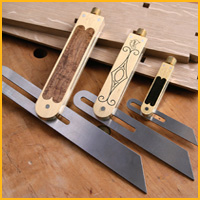 Australian Ingenuity – Aussie tool maker Chris Vesper‘s wares are beautiful, but pricey! |
 Master of the Mark – Learn how to build the same marking gauge we recently gave away. |
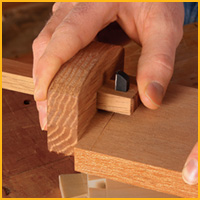
 Feelin’ Groovy – These beautiful beech planes were a big hit at the office of FWW. |
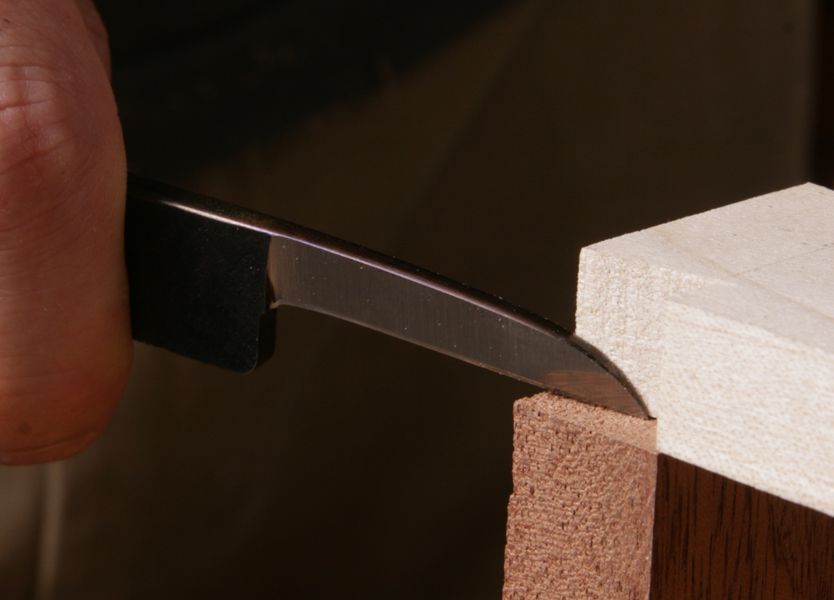
I had tried a lot of different styles over the years; double bevel, single bevel, spear point, x-acto. All of them had shortcomings of some type. I always went back to my first purchase, a simple chip carving knife. It wasn’t mere sentimentality, I finally realized, but the geometry of the blade that had won me over. The secret to the great results I get with that knife is its triangular cross-section. That feature allows me to lay the blade flat against the workpiece I’m scribing for an accurate line no matter which side of the blade I use.
I thought it would be really cool to combine that blade profile with the heft and quality of one of Sam’s knives. Also, there’s something special about using a handmade tool to do hand work. Especially when you know the person who made it.
Engineering the Perfect Knife
Sam stopped by the wood studio one evening and I explained what I was looking for. He showed up at lunch the next day with four different designs he had worked up the night before. Trying them out, I realized another important feature of the chip carving knife- its rounded nose. The blunt profile increases the blade height near the tip making it easier to register against the workpiece, especially in tight places like when scribing dovetails. Armed with this information, Sam headed back to the forge returning that evening with two finished knives, one that matched the original profile and one with a wider blade.
Both designs are fantastic and it will be a while before I decide which I prefer more. One thing is for sure, I will find a reason to hold onto both. They are finely crafted tools that fit the way I work and embody the soul of its maker. Between them I have the perfect marking knife and they will add to the pleasure and quality of my work every time I pick one up. Thanks Sam.
-
Beautiful and functional. These hand-forged knives combine great looks and balance with the perfect blade profile.
-
The triangular cross-section of the blade allows you to lay it flat against the work for a tight scribe line.
-
Sam is the man. I worked with Blacksmith Sam Salvati to create these knives. I helped out with the design, but he did all the hard work.
-
The hands of a blacksmith.


Comments
I was a student at Mike's workshop. The workshop was intense and extraordinarily good, and I watched Mike and Sam work out the design of the marking knives. I bought one and will probably never have to buy another. It works well, feels good in the hand and is beautiful.
Mike, you need to post Sam's contact information!
OK, OK. They are awesome. How much?
Jonathan
===========================
Sam charges $80 for his marking knives. You can contact him at [email protected].
-Mike
Very cool!
I've been making these for quite awhile now. Usually out of milder steel (railroad spikes) but easy to do in higher carbon steel or damascus. Sam is an outstanding knifemaker with a gift of creative flair but this is his basic work. Sam's bevel work by forge is one of the best I have seen and his designs are remarkable. These are handy but you should see his real work.
Yes, these are beautiful tools. However, as much as I like being able to use some of my grandfather's and father's tools, the feel of sharp new planes, the smell of freshly-cut wood, and being able to create a piece of molding out of a rough hunk of wood, I think it is the human body that is sexy, not a couple of incredibly finely-crafted tools.
Please don't sell out with the rest of the "Top 25 This" and "Top 50 That" magazines, that refer to all sorts of crap as 'sexy'; just use your own resourceful vocabulary to describe them.
Lawrie
Ok,
So, what are the dimensions? The blade length and thicknesses of the 2?
This IS after all a magazine that celebrates making it ourselves, so tell us what Sam did in enough detail so we can do so too, or make it so it fits us better.
And,what is the metal hardness? Where can we get the blank?
In reply to comets' questions: And,what is the metal hardness? Where can we get the blank?
I use old files for blanks. Since file are so hard, they need to be annealed slightly before grinding and shaping them into tools. That's easy enough to do in a standard kitchen oven. There are articles here online at FW and everywhere on the web about how to do that.
Also, "making your own tools" is an excellent resource even for those with no blacksmithing experience. You can get started very cheaply and do fine work with tools most woodworkers already have. You can use a junk brake-housing from a car or truck as your forge, and regular propane as for a gas grill works for heat. Plumbing isn't expensive.
Hardness? Well that depends on what you do with the tool after it is shaped. For chisels, i will sometimes re-harden them, but for knives or temporary tools, I leave the annealed file-steel alone. That make the edges less brittle and makes sharpening easier. You can also temper steel to any hardness needed with a blowtorch and a bucket. Depending on the type of steel you might need sand, salt, oil or water to quench your steel.
My cheap portable durometer is not very accurate, but generally, I make knives that are around Rc 58 to 61 and chisels that are nearly Rc 68 for certain applications... cutting end-grain in soft woods for instance.
So, DONT throw away old files. They can reincarnate as useful tools!
Lastly, if you look at the curved loop on one of these marking knives, it seems as though the maker used a file tang for that loop, so I guess he might know what I know about files for knife-making too.
Another excellent marking knife is at dilegnosupply.com
It is HAND MADE and costs $50.00. I would not be without mine.
The triangular shape of the blade face(s) makes perfect sense. I would prefer the model on the right -- more surface to register against the work without wobbling.
Let me guess, 50 bucks a hit?
Mike,
While on the hand tool subject, I noticed in your video on the Glass Front Cabinet series that you used two different marking gauges. Can you tell me what brand and model they were as each was different. One looked like a Veritas, but the other I could not tell. Appreciate it.
thanks
Greg
When clicking onPeters Craft center I got a diet center?????
Log in or create an account to post a comment.
Sign up Log in