

So you’ve designed the inside of your your Dream Shop. Now where are you going to put your new shop building? You could use SketchUp to help you decide. To do this, you’ll want the Google toolbar. If you don’t already have it displayed go to View>Toolbars and select Google from the list. You’ll also need an internet connection for this because SketchUp will be accessing Google Maps.
Then click on the Add Location tool (above). A new window will open showing a map of the world. At the top left, enter the address of your location. You can zoom in and drag the image around to show the region you want to use. You might find it helpful to adjust the size of the window, too. When I first used this feature, the windo that opened was rather small. I made it the full size of my screen which helped with the quality of the image I was able to get.
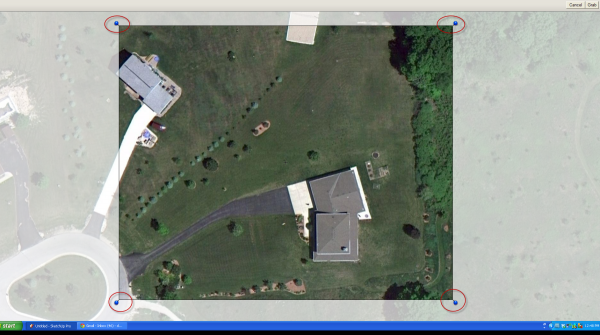
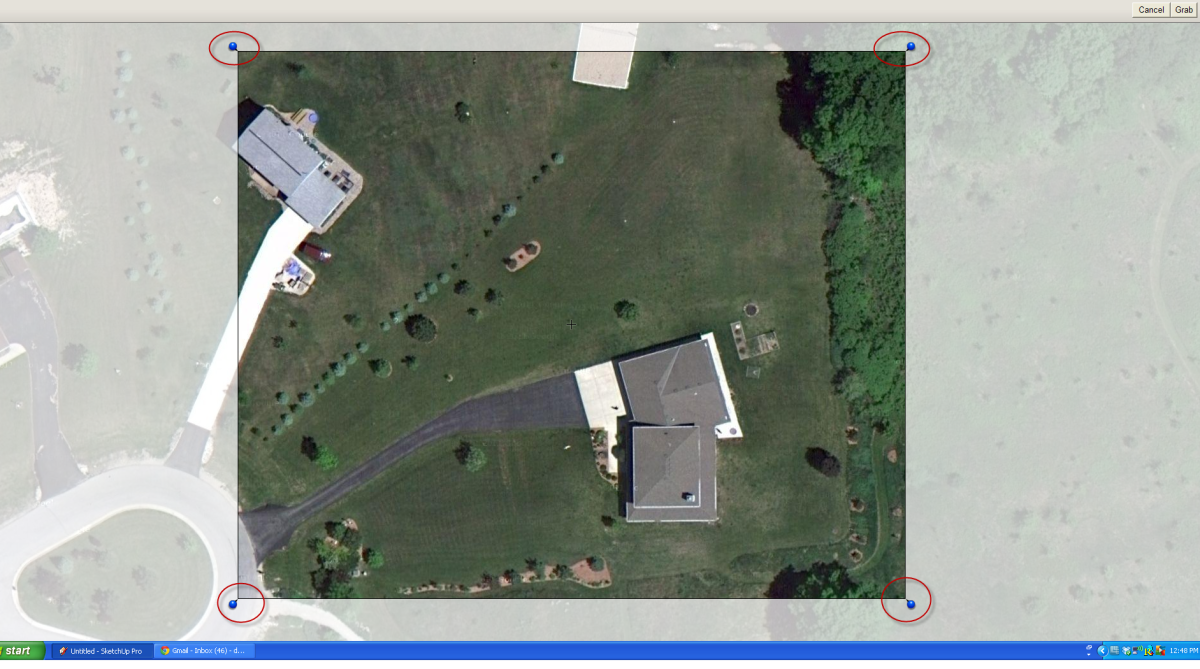
Click on the Select Region button in the upper right corner. You’ll get a sort of frame around the window with blue headed pins. Drag those pins around to fine tune the size of the region you want. Then click on Grab. The area you’ve selected will be copied and pasted into SketchUp. It’ll be at the proper scale and oriented correctly with north along the green axis.
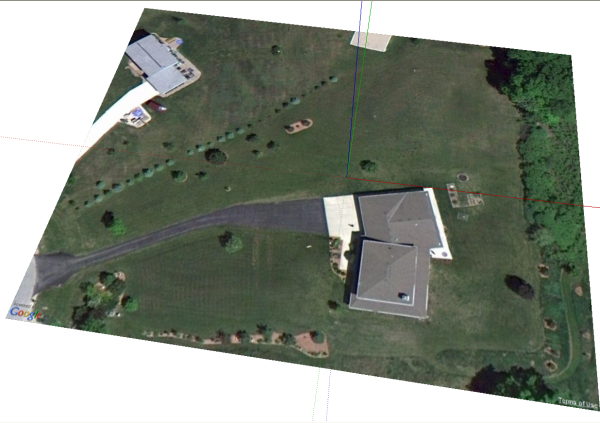
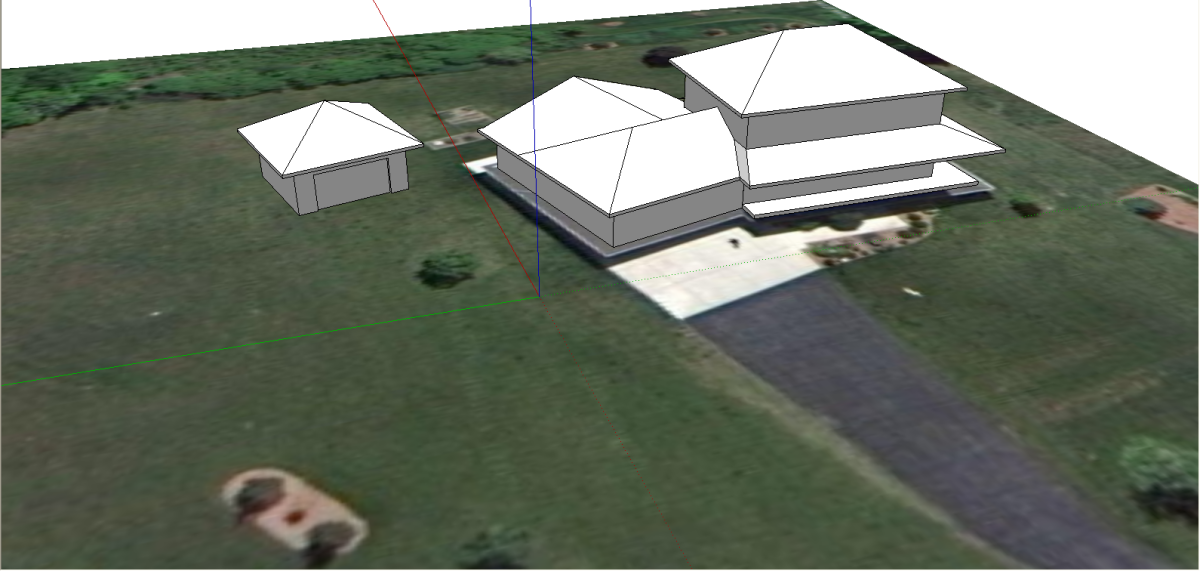
Now you can either draw the buildings on top of the image or, if you’ve already drawn them, you can import them into the model and place them where you want. In the example I haven’t added any materials but you could have materials and any sort of detail you want included in the building models. You could also insert trees, vehicles, people and anything else that might help to show the context of your shop.

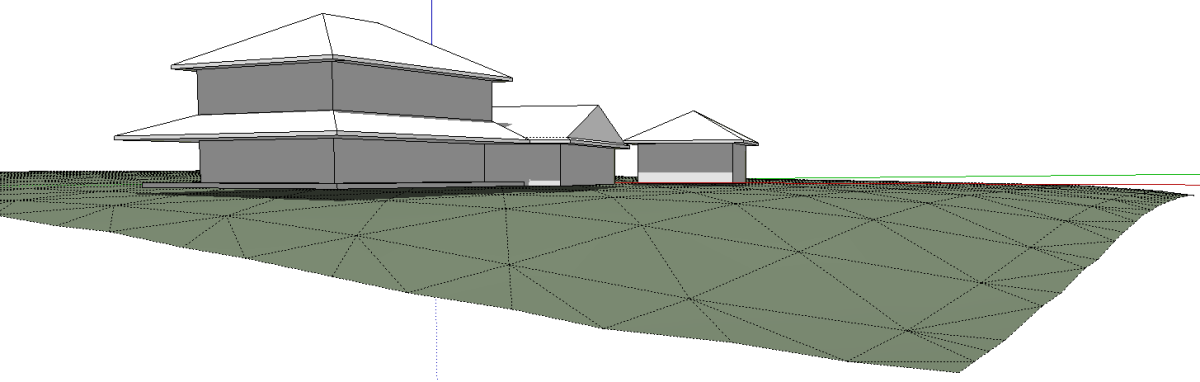
If you want to see it, you can view the terrain by pressing Toggle Terrain.

The accuracy of the terrain varies from area to area. Some areas have newer imaging and better elevation data than others.
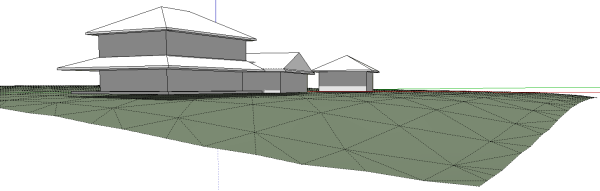
In the view above I set the style to Shaded without Textures so you can see how the surface of the ground is triangulated and shows it is not flat.

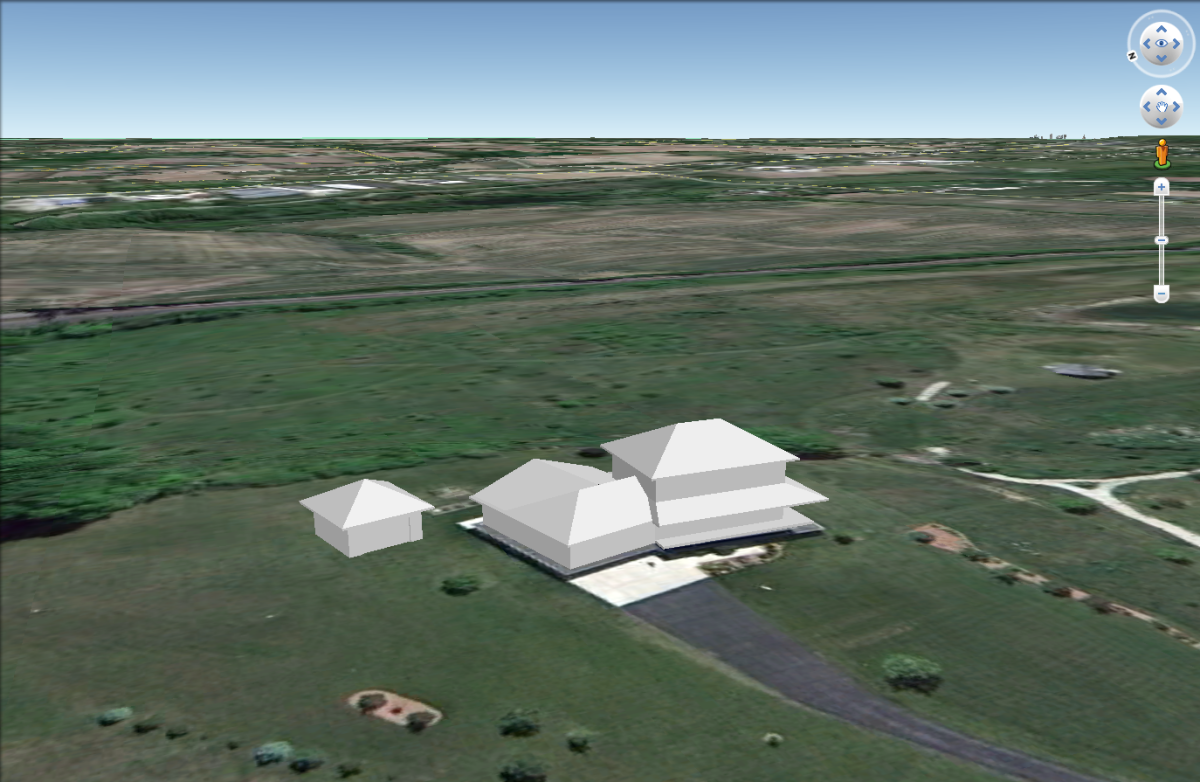
If you’d like, you can look at your work in Google Earth. Click on the blue ball icon and watch.

Google Earth will open and take you right to the location of the buildings. You’ll be able to navigate around in Google Earth and look at your model in context of all of your neighbors. Keep in mind, this is only a local file and it won’t show for anyone else. You can save the KMZ file from Google Earth and e-mail that to others so they can see it on their installation of Google Earth.
Google does accept building models for display as 3D Buildings in Google Earth. You can submit building models of existing buildings through the 3D Warehouse. If the building hasn’t already been drawn and it meets their criteria, they might insert it for everyone to see.


Comments
Great job Dave,
Thanks
Nice tips, Dave. Too bad where my shop is going, out in the country, google maps or earth doesn't have the level of detail I would like. My shop ends up a small spec on top of a hill but it still might be useful for establishing scale relative to other structures I have in mind.
Log in or create an account to post a comment.
Sign up Log in