
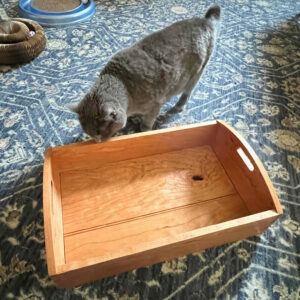
In starting the design for a Shaker Chip Box, I thought how easy it looked – but soon was surprised by the complexity of the bent handle or Bail. This component is not so simple with its right angle bends and subtle irregularities in shape. This is when I would like to reach for a File and Spokeshave Tool in SketchUp. But of course, there is no such thing, so we have to resort to “Intersect”.
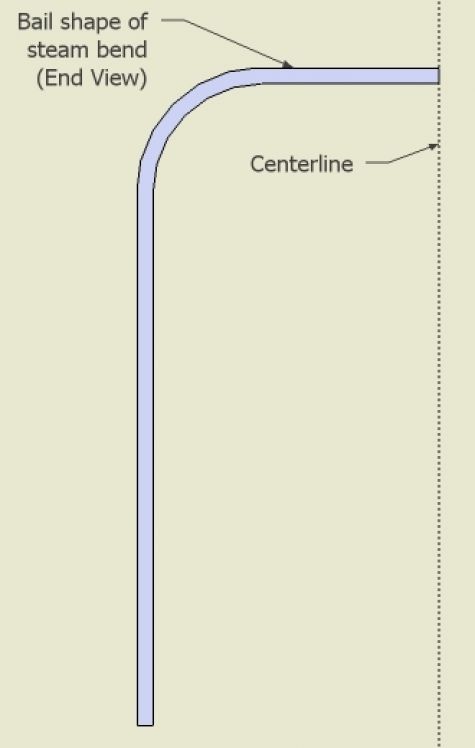
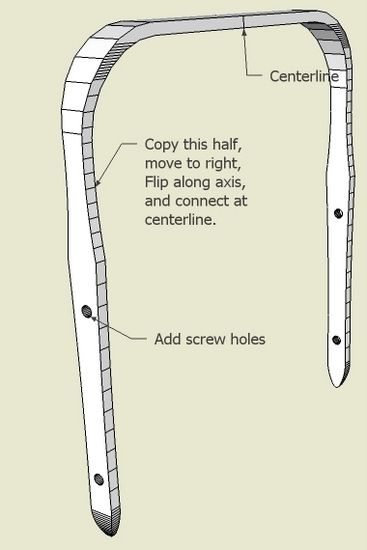
Here is my method of creating the Bail (I tried a couple ways and found this to be the easiest). First here is the piece I will be reproducing.

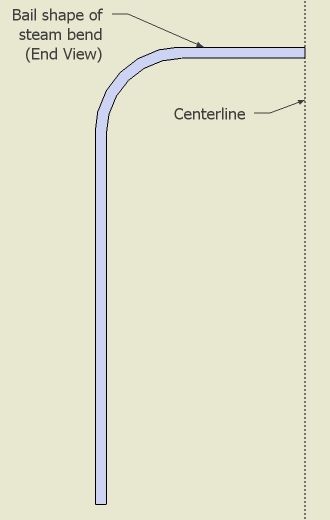
Step 1: Create the Bail shape for the steam bend. I use only one-half of the Bail for the shaping process, then later copy and complete the other half. I had an orthographic drawing of this piece, which I scanned and imported into SketchUp. I traced over the bend shape with the Line and Arc Tools.
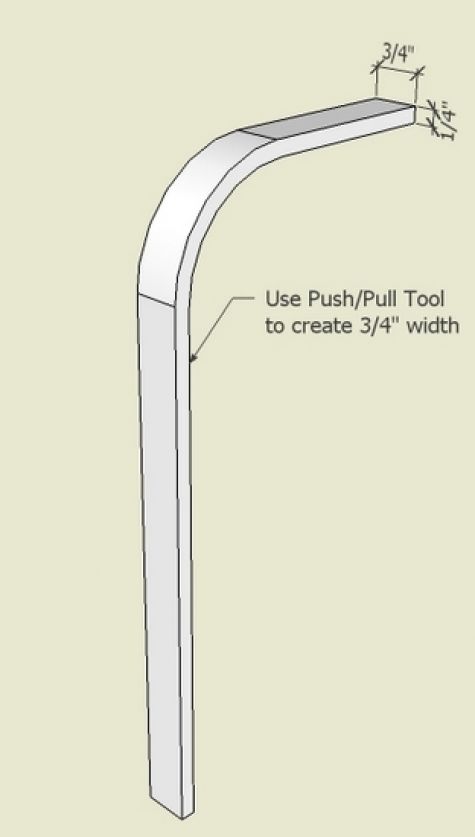
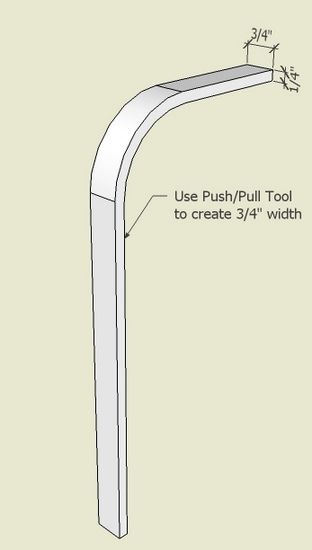
Step 2: Give the shape a width of 3/4″ with the Push/Pull Tool.
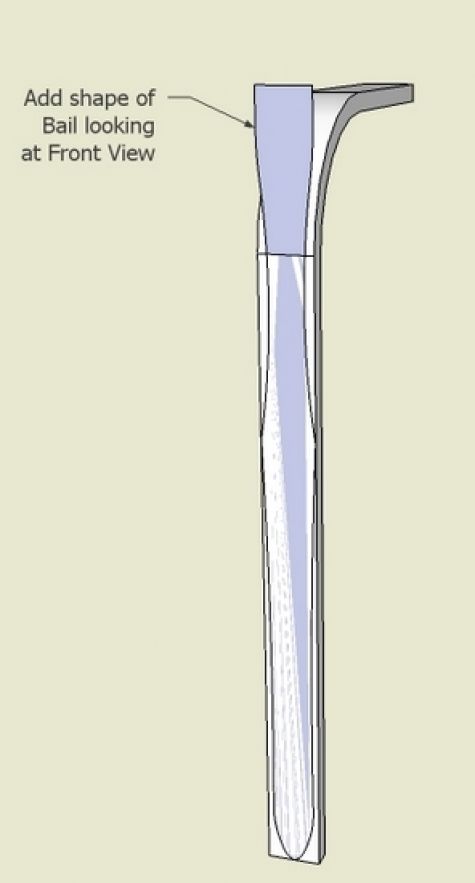
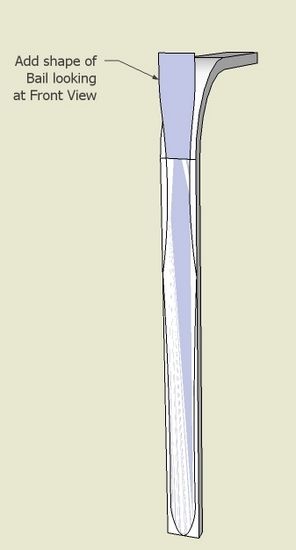
Step 3: Create the undulating shape of the handle and place on face of the bend shape. Again I used the scanned image to help with an accurate shaping.
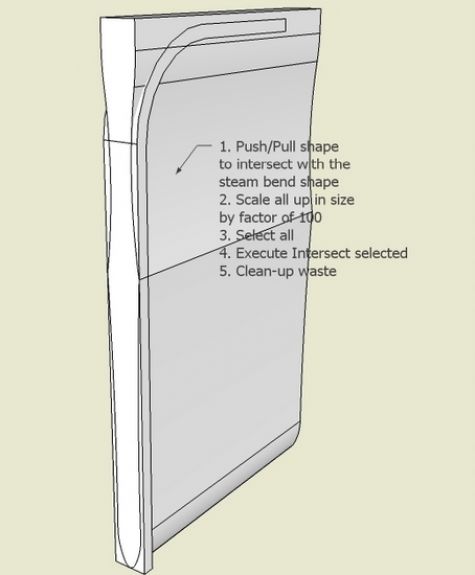
Step 4: With Push/Pull Tool, push the undulating shape into and through the bend shape. In preparation for the Intersect function, scale up the combined graphics by a factor of 100. Sometimes I can get away with Intersecting without scaling. But in this case it is very doubtful that a quality intersection would occur because of the smallness of the components. After scaling, select all and execute “Intersect selected”.
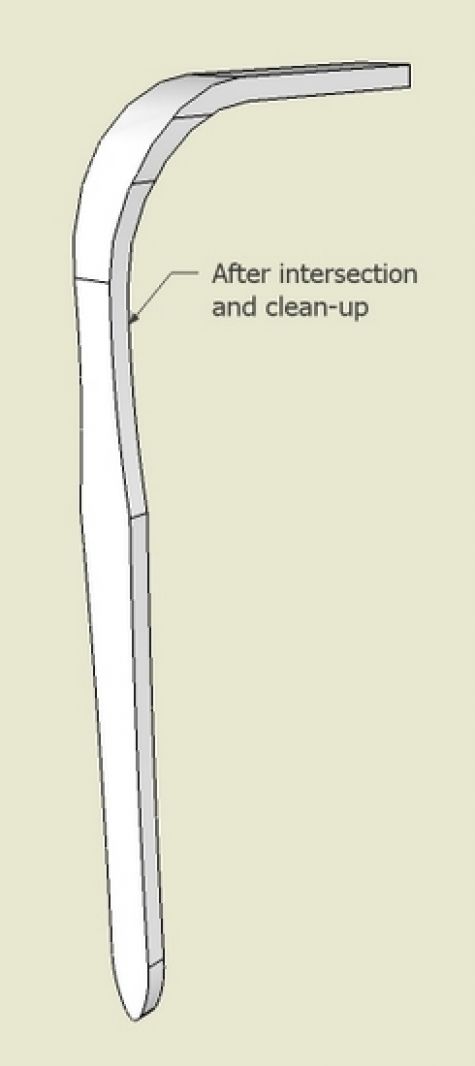
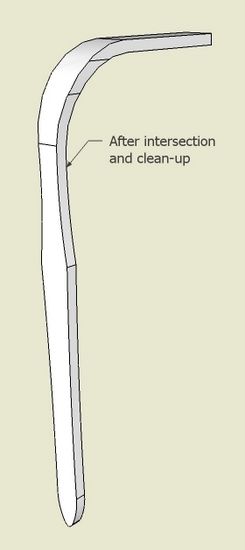
Step 5: Here is the resulting component after cleaning up the waste with the eraser.
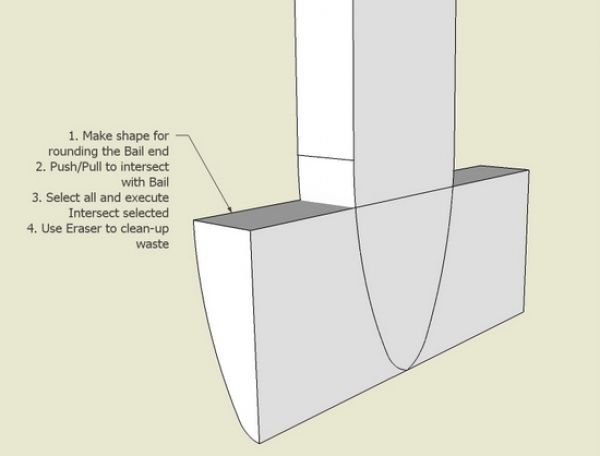
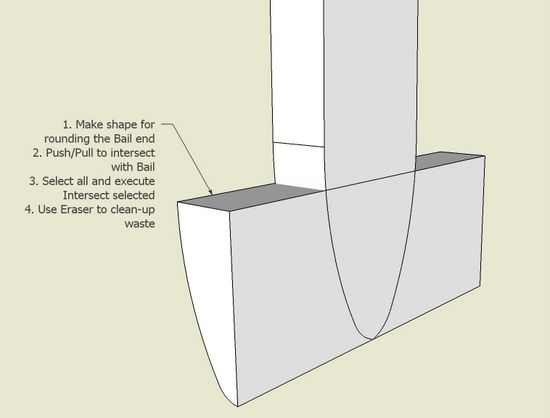
Step 6: We still have another shaping requirement for the lower end of the Bail. There is a rounding over of this pointed end. Make the round-over shape, push/pull, and perform an Intersect.
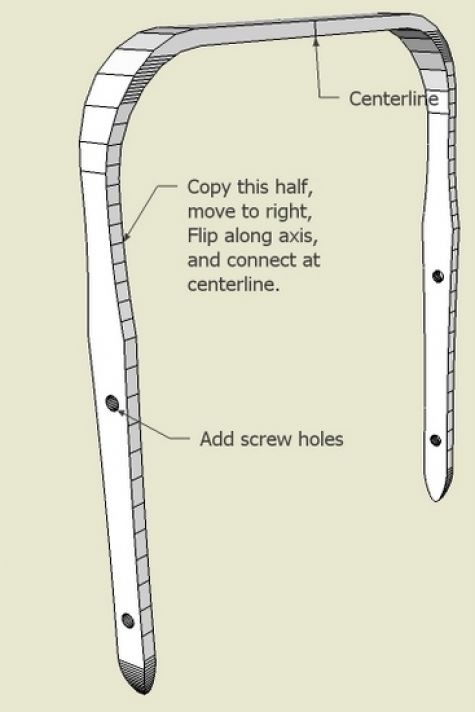
Step 7: Scale back down by a factor of 0.01, and copy over the other half of the Bail. I also added the fastening screw shank holes.
Step 8: Use the Soften/Smoothing function to remove unnecessary lines and move it over to its final placement on the Chip Box. I also had to do some “hiding” of lines. I do these operations with the Eraser combined with the Shift or the Cntrl Keys. The Cntrl does “smoothing” and the Shift does “hiding”. Note that the real handle will rounded over on the top surface for the vertical section, and rounded over on the bottom surface for the horizontal portion.

I hope to make a few of these over the holidays using fresh wet ash for the steam bent Bail. I’ll have more fun shaping the ash in the shop, than shaping with SketchUp on the computer.


Comments
Hi Tim
I am brand new to sketchup but I have used autocad so I'm catching on ok. However I have a similar problem where I want to be able to "push/Pull" on a curved face but can't. So the logical step is to intersect and subtract, but the intersect is unavailable for me. Is that because I don't have the sketchup pro? Is there another way to get around it?
So after playing around for a bit I figured out what I was doing wrong and was able to use the intersect with model function. After I intersected it though I had to explode the component so that I could clear the waste away without erasing things I didn't want to. Also the face that I ended up with turned a blue color. I am just wondering if that is signifying that something is wrong or if everything is ok. Everything seems ok but I guess I'm just looking for conformation that It's done right and it won't cause me problems later.
1bri, you could just double click on the component to open it for editing rather than exploding it. Or you can right click on the component and choose Edit Component.
the blue face is the back face color. Select the blue faces, right click and choose Reverse Faces or select the white or light gray face, right click and choose Orient Faces.
Dave
To 1bri: Let me try to respond to both your notes......
1. Push/Pull does not work on curved faces. You can use the Move Tool to pull a curved face (with careful selection of the entities.
2. Intersect functionality is totally available in the free version
3. When I'm using Intersect, often I explode the components or groups involved. Then I can easily Select All and do Intersect with Selected. This seems to give me better results than doing the Intersect Model option.
4. SketchUp uses two different colors for each side of a face. The blue color indicates that SketchUp thinks that is the inside face. Often I find that SketchUp makes the wrong decision on inside or outside face. So I'm making frequent use of the function (right click on face) Reverse Faces.
You are doing great, and let me know of other issues. I remember how frustrated I was in the beginning with SU.
Tim
Thanks for the advice it helped me greatly. Now I'm trying to use the same idea to make a mortise in my newly curved face and everything looks great in x-ray mode but when I put it back to shaded there's only a square on the face where the hole should be. It's as if I need to erase the face inside the square to see the mortise. (but I tried that and it didn't work). Also I followed the advice about scaling up by 100 but then when I scaled back down I seemed to have a lot of trouble zooming as fast as usual and the box that surounds the component stayed the scaled up size. I hope you can make sense of everything I'm trying to say! Thanks again
To 1bri:
I'm suspecting your issues relate to "editing" the component. If you've used components, make sure that you do an "edit component" before making changes. Also, I'm suspecting that you scaled on the basis of editing the component, then de-scaled without editing????
Not sure about all that, but I can be sure if you send your file to my email.
Tim
I scaled it up so that I could do the intersection and after I did the intersection and cleaned up the waste I did not think that it needed to be scaled up any more so I tried scale it back down. I did click on edit component to edit it, but I was fiddling around with it for quite some time trying to get things to work so I might have done something I shouldn't have. If you give me your email address(I can't seem to find it on the website) or tell me where to find it I would love to email the file to you.
Thanks again.
1bri: my email is [email protected]
Tim
Log in or create an account to post a comment.
Sign up Log in