
There are a number of new features in SketchUp 7. One of them is called Combine Textures. I think this one is somewhat overlooked but it can have some uses for us woodworkers. The description for Combine Textures in Google’s What’s New in the Release document is this:
“The Combine Textures menu item combines separate textures on adjacent co-planar faces into a single larger texture. This feature also, optionally, removes edges between co-planar faces to reduce the polygon count for the model as a whole. Context-click on multiple selected parallel faces, with at least one face having a texture, and select “Combine Textures” to create a texture which is unique to that set of faces.”

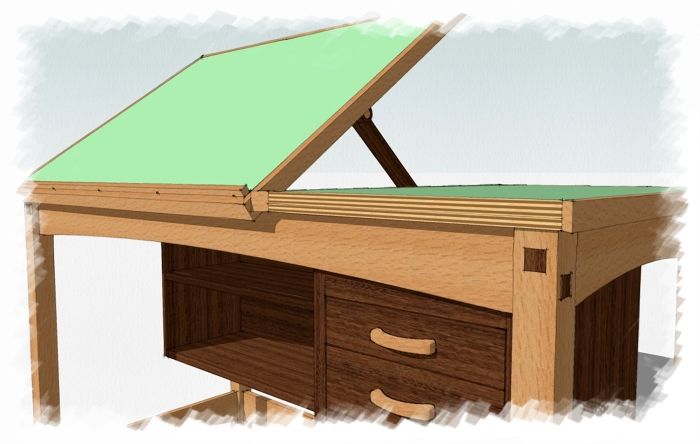
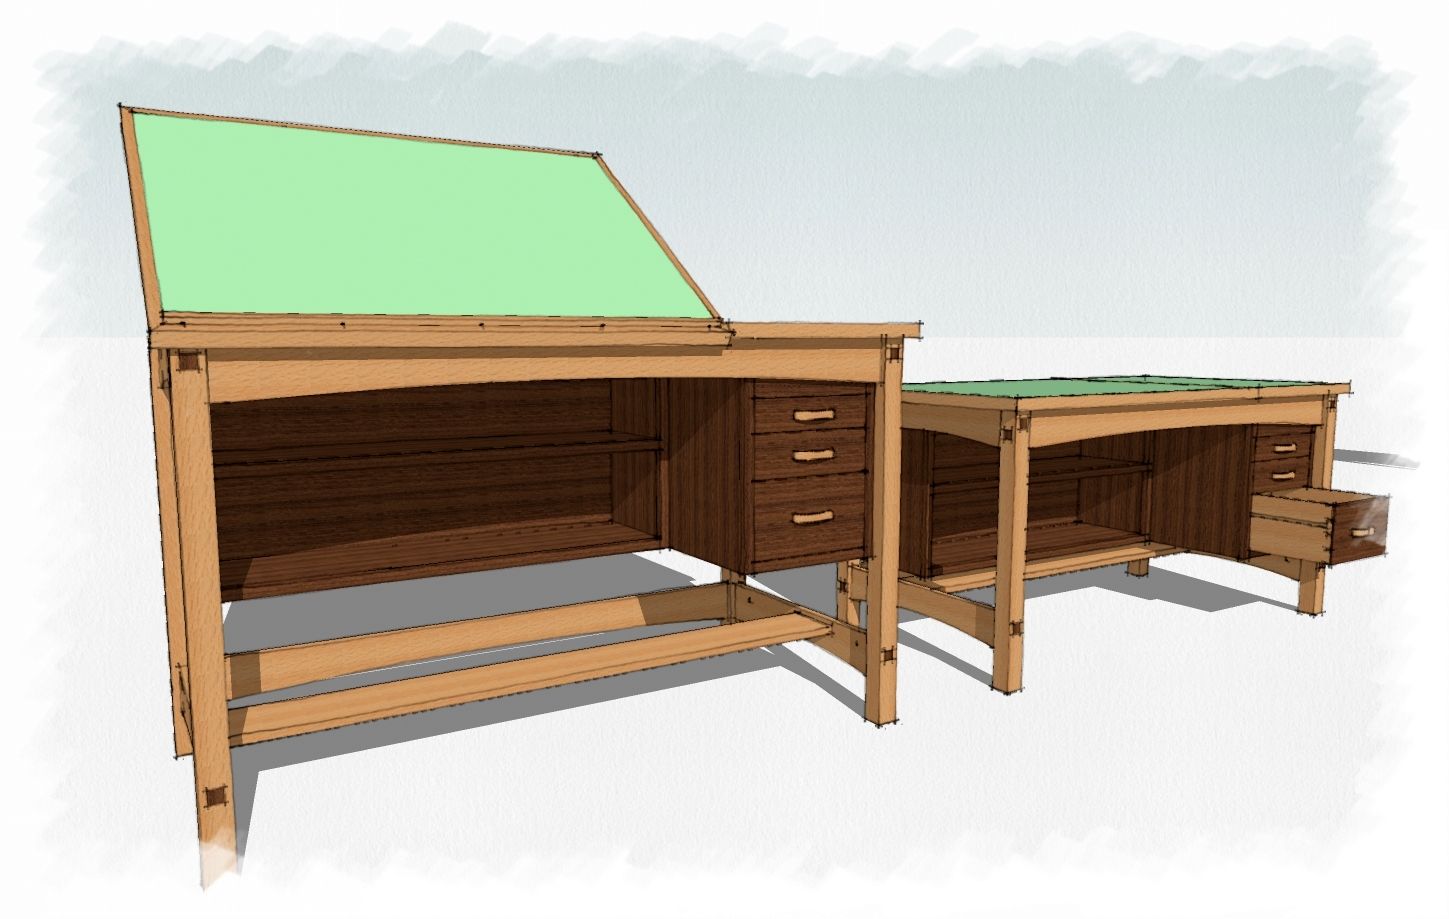
I used this recently for a split top drafting table I’ve been working on. I needed a plywood edge material and rather than searching for one I made it in a few seconds. Here’s how.

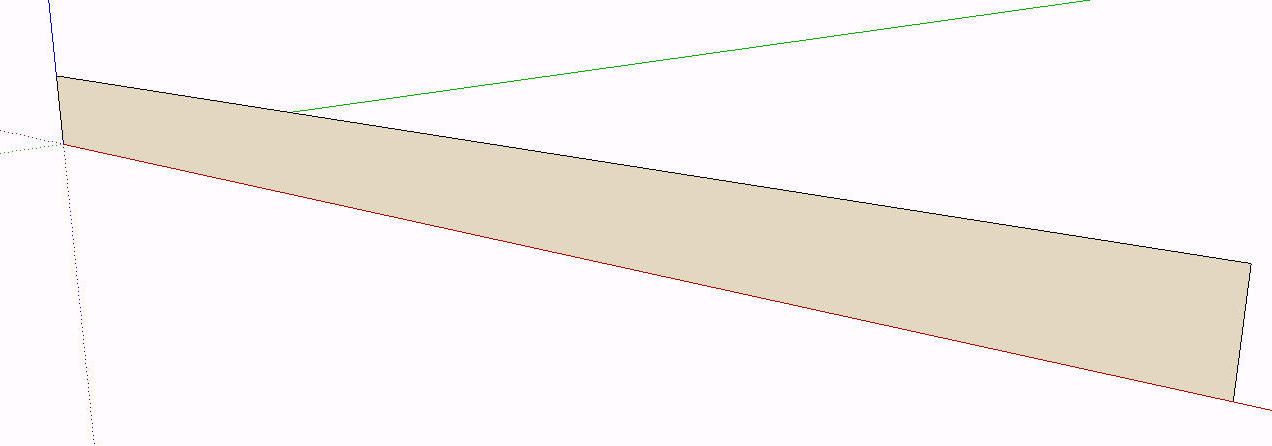
I started with a rectangle that I drew as 3/4″ high. The length is unimportant in this case. I wanted the final texture to fit 3/4″ plywood so I laid it out to scale. The material can be scaled later but in this case it’s easy enough to draw it to size which will make it simpler to use later.
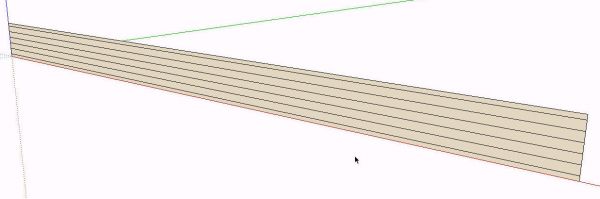
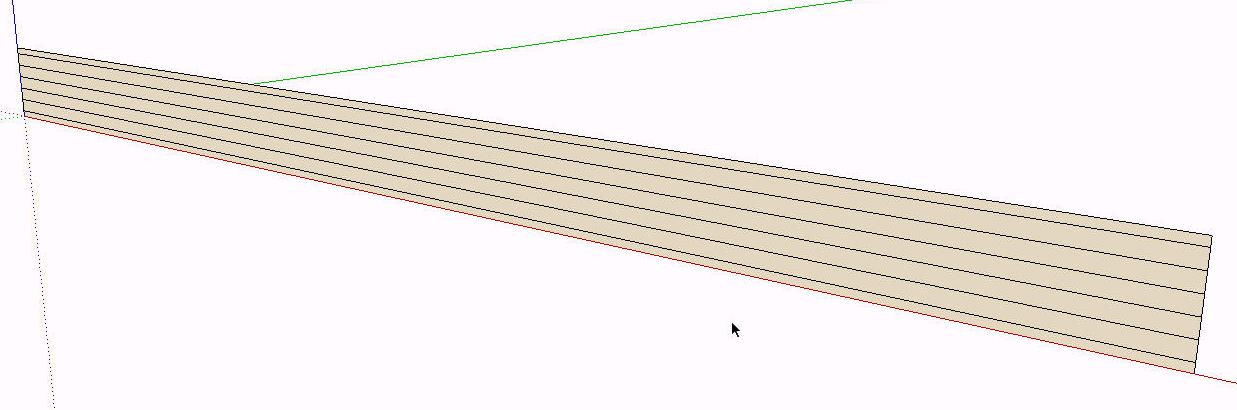
Using guidelines, I laid out the limits for the layers of the plywood. Then I drew in horizontal lines along the guidelines. I went so far as draw the outer layers as thinner than the inner ones. I also made an odd number of plies.
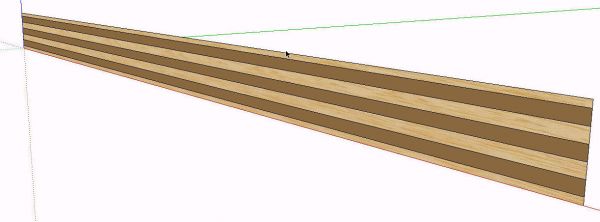
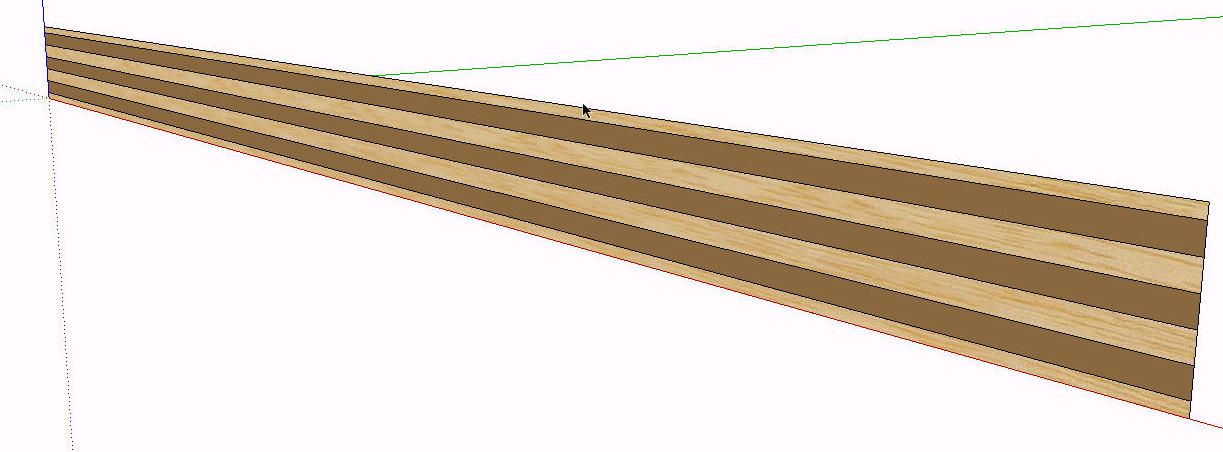
Then I applied a light-colored wood grain material to alternating layers. Then I used a brown color on the remaining layers. One of the materials needs to be a texture. Combine textures doesn’t work with only colors.

I selected the faces and then right clicked on one of them to get the context menu. I chose Combine Textures and then clicked on OK to have the coplanar lines removed.
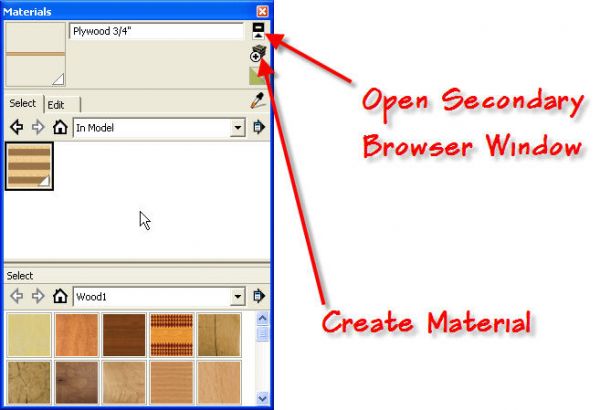
At this point the new material shows with a thumbnail in the In Model section of the Materials browser. I gave it a name and clicked on Create Material. Then I opened the secondary Materials Browser. I set the secondary window to the desired library, Wood1 in this case, and then clicked on and dragged the new material from the In Model library to the Wood1 library.
That’s all there is to this one. It probably takes longer to read this than to do it.


Comments
Excellent information and a truly superb looking drafting table!
The wood textures look nicer than the standard ones in my SolidWorks 2009 software.
I am truly amazed at what Google Sketchup offers you for so little cost (I am assuming you are using the paid professional version)
Best Regards
Adrian Dunevein
http://www.aaadrafting.com
Adrian, thank you.
Yes, I am using the pro version but everything I've done could be done in the free version as well.
The wood grain materials I used aren't standard SketchUp textures. They are textures I found doing image searches. You can import any JPG and use it as a texture if you wish.
Dave
Dave, I continue to learn from you. You really should write a book on sketchup for woodworkers!
Jim
May I suggest sprinkling occasional extra "power user-isms" into posts to assist those still learning SKP? For example, this post's "creating the plys" step would be a perfect place to sneak in the "/n" VCB shortcut, to avoid any nasty ply thickness mental math :-)
For veneered plywood:
0) Create a rectangle defining an edge of the plywood sheet.
1) Draw a line across that plywood edge rectangle to define the top veneer ply.
2) Select that line.
3) Select the "Move (m)" command.
4) Hold down the Control key and drag the new line copy to a position defining the bottom veneer ply (i.e., copy the top veneer line to where the bottom veneer line should go.)
5) Before selecting any other objects, commands, etc., type "/5" to create both the new line for the bottom veneer ply, and 4 additional evenly spaced lines between it and the original line.
This will give you two (2) veneer plies and five (5) uniform interior plies, for a total of seven (7) plies. The only measurements you need to know are the thickness of the sheet, and the thickness of the veneer.
For plywood with uniform plies throughout (i.e., no veneer):
0) Create a rectangle defining an edge of the plywood sheet.
1) Delete the bottom line of the rectangle.
2) Select the top line of the rectangle.
3) Select the "Move (m)" command.
4) Hold down the Control key and drag the new line copy to the bottom of the rectangle, replacing the deleted bottom line. It should snap into place, closing the rectangle and making it a "surface" again, instead of a mere collection of lines.
should go.)
5) Before selecting any other objects, commands, etc., type "/5" to create both the new line for the bottom of the rectangle, and 4 additional evenly spaced lines between it and the top line.
This will give you five (5) uniform plies. The only measurement you need to know is the thickness of the sheet.
I don't have SKP installed on this machine, so I'm kinda doing this from memory, but I'm pretty sure these sequences work ;-)
There's a nice tutorial video of the "/n" VCB shortcut here:
http://www.youtube.com/watch?v=eBUVOTF-hEs
Hi Dave, thanks for this article. It's exactly what I've been looking for, although I can't actually get it to work and I'm pulling what little hair I've got left out!! Everytime I select the faces and use the combine texture command, the dialog asks if I "want to delete interior edge". I click yes and it turns into a solid face on one colour. I'm fairly new to Sketchup and can normally pick things up quite quickly from tutorial etc, but not this time. Please can you suggest what I might be doing wrong or where I can get an edge material so I can get this design finished before I'm totally bald. Cheers
Ed, I'm sorry you're having trouble with it. Is it possible you used two wood grain materials instead of a wood grain and a color?
I did a quick little video grab showing what happens when I used a texture and a color. You can see it here: http://www.flickr.com/photos/8294157@N08/3731366419/
If you don't get it sorted out soon, send me the SKP file and I'll take a look.
Tried again but same result. The outline to my drawing looks different to yours so I imagine I'm totally missing some basic aspect of sketchup. Would happily send you the little playwood skp Dave but can't see a way of e-mailing you. I can use a computer honest!!
Sorry. I usually include my e-mail address at the end of my blog posts. Here it is: [email protected]
will materials made this way show up in the cut list mine did not show in the cut list is ther some way to do this
Sam, in order for the components to show in the sheet goods portion of the cutlist you need to use one of the sheet goods words in the material or in the component name. Refer to the first cutlist dialog box for those names. Or you can add your own names to be recognized as sheet goods in that window.
Dave
Sam, I thought of something else. Having two materials applied to the faces in a component (plywood edge and a face grain) may cause some problems with the cutlist. I would suggest that you add one of the sheet material words to the component's Definition Name instead of adding it to the Material. I use the Definition Name for this because I generally don't apply materials when making drawings for cutlists.
David,
I have been learning Sketch Up for the purpose of designing to build a Split Top Drafting Table for my son. In the process I came across your contributions and have learned some neat things about the program. And too I find this beautiful design by you. Somewhere in the blogs I think I saw you had plans; are they something that is available? It is very good looking, very open which is what he is looking for. He wants to incorporate into the top a Plexiglas tracing surface that we want to back light with a strip of LEDs around the edge and I think I have that pretty much figured out. One thing I have tried to do is hide the plywood edges but after seeing this they would look great exposed and a lot less work.
I'm sorry. There are currently no plans for this table. It was all lost in a hard drive crash. :(
Good luck on the build.
-Dave
i am also tearing my hair out over this the same as @EggroomEd
im following every step and i just end up with a white rectangle with a brown stripe through it
@jtmackin, perhaps you can send me your SKP file so I can see what you've got going on. What version of SketchUp are you using?
Log in or create an account to post a comment.
Sign up Log in