Several blog entries here in Design. Click. Build. provide more information on sections and procedures in my eBook, “Google SketchUp Guide for Woodworkers”. Below I’ve idexed these references (URL’s) to specific pages and subjects in the eBook.
Hopefully this helps readers find additional instructions and information relative to procedures in the eBook. Also, don’t overlook the Q&A items at the end of each blog entry. These give-and-take questions/responses can also help you identify your modeling issues. Note that many of the Q&A items discuss issues that are not the prime subject of the blog.
eBook Page, then blog URL references
17 Guidelines and Guidepoints
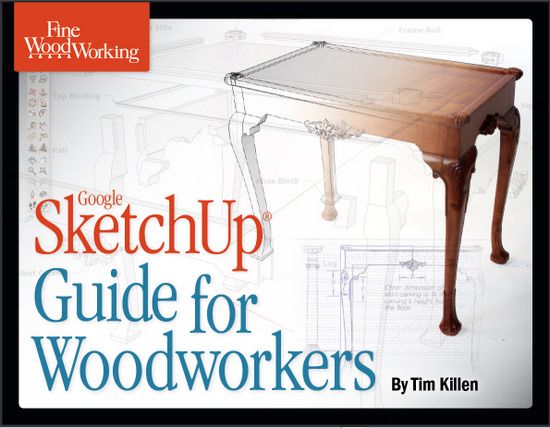
https://www.finewoodworking.com/item/32030/special-announcement-my-book-on-sketchup
31 Magazine Rack Tongue and Groove Joints
https://www.finewoodworking.com/item/32030/special-announcement-my-book-on-sketchup
https://www.finewoodworking.com/item/32372/tongue-groove-joints-in-magazine-rack
32 Magazine Rack
https://www.finewoodworking.com/item/32030/special-announcement-my-book-on-sketchup
https://www.finewoodworking.com/item/32956/cutting-the-ogee-shaped-cutout-in-the-magazine-rack
https://www.finewoodworking.com/item/33040/the-most-often-frustrating-error
33 Magazine Rack, Ogee Cutout
https://www.finewoodworking.com/item/32956/cutting-the-ogee-shaped-cutout-in-the-magazine-rack
https://www.finewoodworking.com/item/33040/the-most-often-frustrating-error
34 Creating Dadoes in Magazine Rack
https://www.finewoodworking.com/item/32030/special-announcement-my-book-on-sketchup
35 Rabbets on Back of Magazine Rack
https://www.finewoodworking.com/item/32030/special-announcement-my-book-on-sketchup
44 Back Legs on Chamfered Post Table
https://www.finewoodworking.com/item/32956/cutting-the-ogee-shaped-cutout-in-the-magazine-rack
47 Creating Leg Chamfers
https://www.finewoodworking.com/item/32856/makingcopying-chamfers-in-table-leg
49 Tenon Length should be 11/16-in.
https://www.finewoodworking.com/item/32030/special-announcement-my-book-on-sketchup
50 Difficulty Seeing the Tenon on Chamfered Table
https://www.finewoodworking.com/item/32030/special-announcement-my-book-on-sketchup
https://www.finewoodworking.com/item/32495/chamfered-post-table-and-mortise-tenon-joints
https://www.finewoodworking.com/item/35315/trouble-seeing-the-tenon
55 Care in Making a Component
https://www.finewoodworking.com/item/34393/wheres-my-component
62 -63 Making the Beveled Drawer Bottom
https://www.finewoodworking.com/item/32030/special-announcement-my-book-on-sketchup
https://www.finewoodworking.com/item/11864/making-a-bevel-edged-drawer-bottom
78 – 79 Re-sizing Model or Imported Picture Using the Tape Measure Tool
https://www.finewoodworking.com/item/32164/free-download-how-to-use-sketchup-tools
I will periodically update this index for additional blog entries related to the book.
Tim


Comments
Thanks for taking the time to do this Tim. This resource just gets better and better.
Tim, doing the exercises in your book, hope to rid myself of some problems I am having and needing to redo a lot of work. My questions are: 1. Chapter 5, the dimensioned drawing shows what looks like a hole in the stopped grove, but find no reference in the steps. 2. Same chapter, the dimensioned drawing shows two dimensions across the top of the right side lower face, any reason for this.
Excellent book, have convinced several of my woodworking friends to purchase. Keep the Design,Click,Build how to's coming. Someday, maybe I can be half as knowlegable as you and Dave.
To steverd: You are correct that there is no information on that hole that sits within the groove. In the bench, the hole carries a 3/8 threaded rod into the Top and is fastened there with a nut and washer. In the book, I felt that we could skip placement of that hole.
On your second question, I can't understand why there are two dimensions there. Very strange, and I've now just deleted them from the file.
Thank you,
Tim
I am working on the Components exercise in Tim Killen's book on page 26. I have a Mac and have been unable to make the skirt a component. When I double click the Select tool on the face of the skirt and hold down the Option key, I get a drop-down menu mentioned in his book. But when I use the Push-Pull tool to move the face back 7/8 inch and create that face, I cannot link them together into a component. I don't get the dotted-line box around the component so I can edit the component. How can I create the whole skirt component?
In general, I have been trying to parallel the windows-related text but it has been frustrating.
Dennis
Dennis, from your description, it sounds as if you are using the Move tool instead of Push/Pull. On the Mac, Option activates the copy function of the Move tool and this would result in a second face the same shape as the first but without the faces for the edges. You shouldn't need to hold Option at all when you run Push/Pull for this. (When you do need to use Option it toggles the function so you tap it once to activate and once again to deactivate. No holding.) When you are ready to make the skirt face 3D, try tapping 'P' on the keyboard to ensure you get Push/Pull.
As to the making of the component, after you select the skirt's geometry, (I like to do this by triple clicking on a face with the Select tool), hit 'G' or right click and choose Create Component. Look to see that the box for 'Replace selection with component' is ticked. If it is not, that is an indication that you've not selected all of the edges and faces that are connected. There are times when this is useful but it commonly happens when users have forgotten to make other, touching parts components first. You'll need to investigate if that's the case.
Assuming the box is ticked, and you can tick it if you need to, when you hit 'Create' or press Return on the keyboard, the component should be created and be displayed with a blue bounding box. The black dotted edged box you refer to will only be displayed when the component is open for editing. I believe Tim shows right clicking on the component to choose Edit Component. I like to double left click on it with Select to get it open.
-Dave
Thank you David. I now understand how to make components. Thanks also for the shortcuts.
Dennis
Your video for making the beveled drawer bottom has an older video about mortise and tenon joints instead. I am looking forward to seeing the video about the drawer bottom to see how to use the come along tool. I followed the instructions but could not get it to work.
Thanks
Dennis
Dennis, I believe the correct reference for the bevel edge drawer bottom is:
https://www.finewoodworking.com/item/11864/making-a-bevel-edged-drawer-bottom
This is not a video, and I don't think I have posted a video on this procedure.
Often there is trouble with the Follow Me Tool in forgetting to right click on the face of the profile and selecting Edit Component. So the steps are: 1) Select the path, 2) Pick the Follow Me Tool, 3) Right click on profile and select Edit Component, 4) Click mouse on the profile.
Let me know if you are still having trouble with this.
Tim
I have finished Tim Killen's wonderful book and am attempting a few designs. I have had a few problems. When I click "New" for a blank worksheet I get a worksheet with portions of earlier projects shown that I then have to delete. There are still old components listed that I cannot get rid of. How do I get a clean new worksheet.
Another problem is that I am building vanities for three bathrooms. Each project is different. The difficulty I am having is that when I have finished the first vanity project and start on the second, I try to save a component like "Bottom" I get a dialog box stating that "Bottom" already exists and do I want to replace it. How do I separate the projects in Sketchup so I don't have to invent different names for similar components in separate projects?
I am posting these questions here because I could not see how to post comments in the DCB blog.
Thank You
Denniswoodworker
Denniswoodworker: sounds like you have saved a file as a template and failed to do a Purge. Even though you deleted the graphics the component definitions are still held in the file unless purged.
I just did a blog entry last week on Managing your Template. Refer to that for more information. You want to have a clean template to start your files or you will get those messages that say you already have those component names.
To do a purge, go to Window/Model Info and click on Statistics in the left hand panel. Then click on the Purge Unused button.
Tim
Log in or create an account to post a comment.
Sign up Log in