Gallery
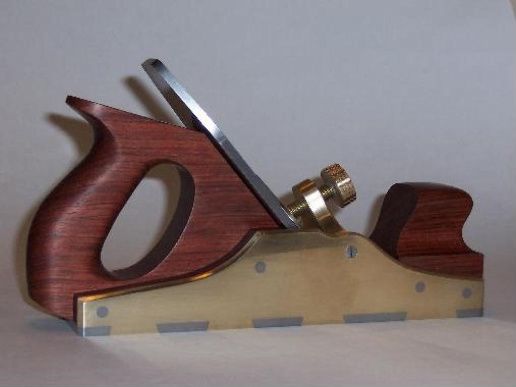
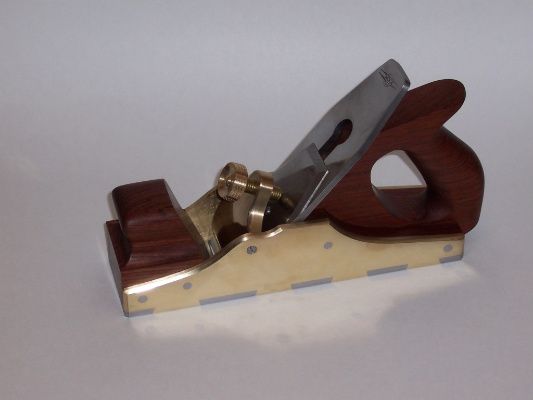
Infill Smoothing Plane
Feb 14, 2011

This plane took me almost 2 months to build. The sides are 3/16 brass and the sole is 1/4″ steel. They are connected by double dovetails which are peened together to produce a strong joint. The infill wood is bubinga with 3 coats of danish oil. The dovetails were cut by hand with a hacksaw and cleaned up with files. The only part of the plane i didn’t make was the 3/16″ thick Hock iron.
For anyone who has thought about building an infill plane, I strongly recommend taking the plunge. It’s very satisfying to know that you built a plane that should last a lifetime, and more.
This site is protected by reCAPTCHA and the Google
Privacy Policy and
Terms of Service apply.


Comments
Beautiful. I hope you have someone special to pass it down to. You're right ... but, it should last several life times.
beautiful job! Did you have a kit for all of the materials or did you do the screw for the iron etc.?
Thanks. No I didn't buy a kit. I bought the brass and steel from industrial metal supply. I cut all the parts with a hacksaw and cleaned it up with a disc sander and oscillating spindle sander. The dovetails were refined with files. I did spend countless hours online researching the process first.
I did make the screw myself. It's 3/8" threaded rod with a piece of brass epoxied to it. I used a piece of scrap left over from the lever cap, which i drilled, tapped, then epoxied to the threaded rod. When it was dry, i chucked it onto my wood lathe and used a file to turn it round. I used a triangular file to cut the knurling on the screw. I planned on buying one, but i couldn't find one that size anywhere.
Beautiful work
Mighty Fine!!! I'm just learning to use planes, and they are great. Wow, if I could actually make a great plane like that one....what a fine job you did. My hat's off to you!
Log in or create an account to post a comment.
Sign up Log in