Here’s another quirk in SketchUp….. sometimes you can select a group of graphics on the screen, execute making it a “component”, yet the group of graphics you started with does not become a component (and remains a bunch of non-integrated graphics).
Sounds weird, but it is likely that you have run into this phenomenon. I’ll use an example from my book in Chapter 9, Page 55 – making the Top for the Chamfered Post Table.
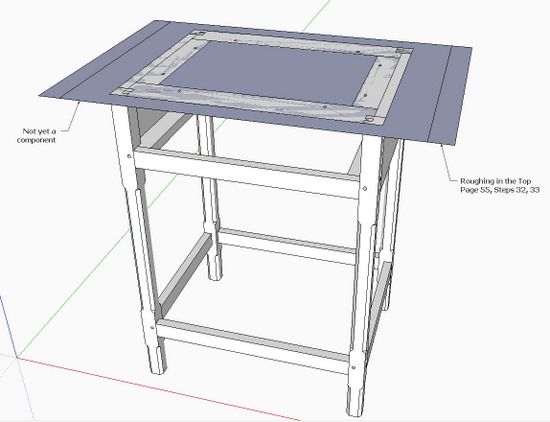
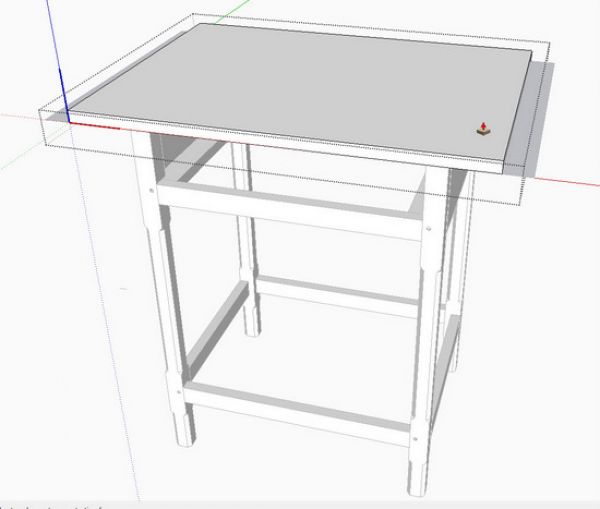
Here is Figure 36, Step 32, laying out the Top:
Using the Line Tool with the help of guidelines, the perimeter of the Top and the Breadboard Ends is drawn resulting in the blue plane shown above. The next step says to make this a component and give it the 3/4-in. thickness.
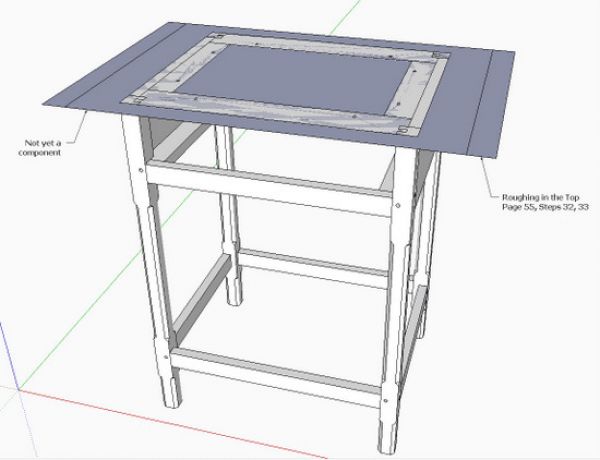
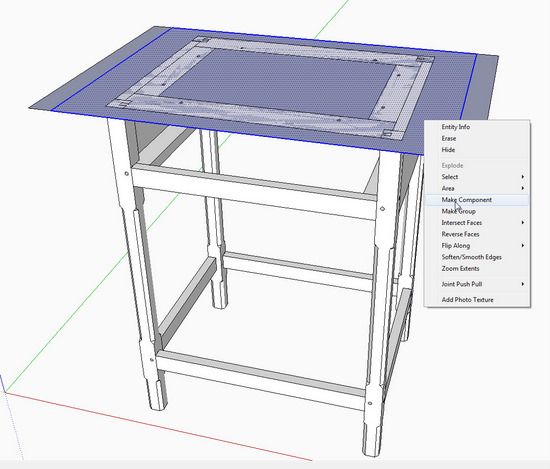
Double click the Select Tool on the middle rectangular face to select the top face for making a component. Right click on the selection and a pop-up box appears as shown below.
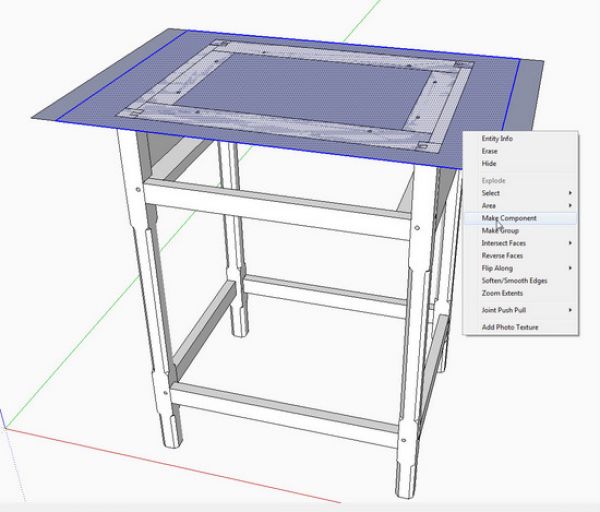
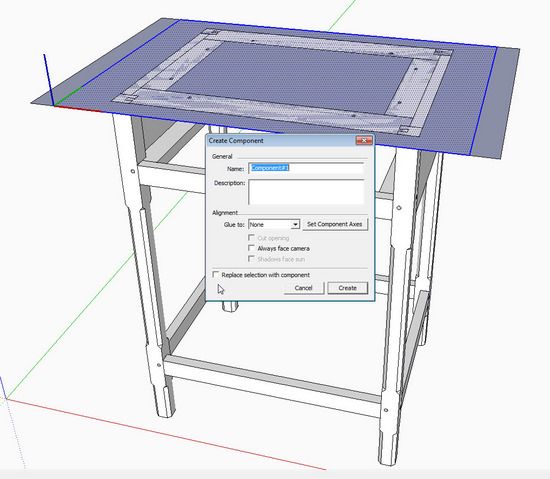
Pick Make Component from the pop-up list and a Component Dialog Box will appear as shown below.

Note the Selection Box at the bottom of the Dialog Box with the words “Replace selection with component”. If this box is not checked, and you click on the Create button, you will create a Component, but the selected blue rectangle on the table assembly will not be replaced with the component.
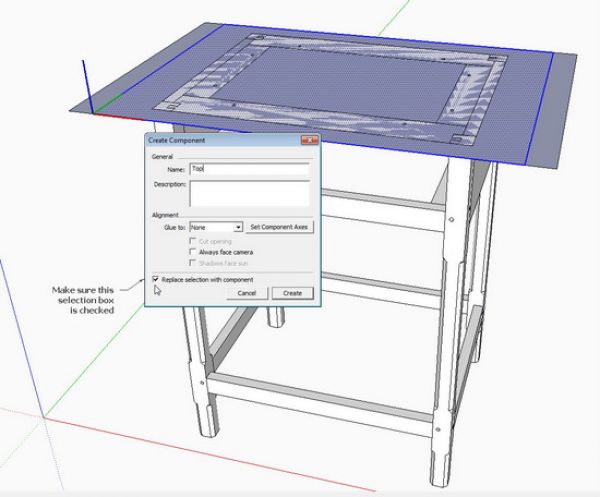
Before you hit the Create button, make sure you’ve checked that box, then your table assembly will have a Top which is a component.
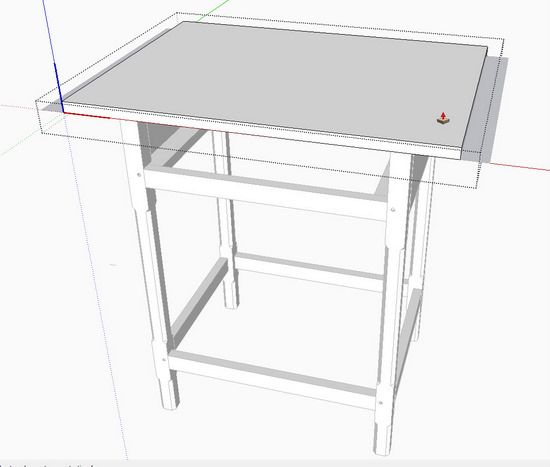
Now you can use the Push/Pull Tool to give the Top a thickness of 3/4-in.


Comments
The benefit of this feature appears rather obvious. A person describing flexibility in software design as being a quirk says more about the person than the software.
I wonder- is there a way to have the button that says "replace selection with component" be checked by default? It seems as if sometimes it's checked and sometimes it's not.
Another mis-feature of SU. It really ought to remember the state of the checkbox, and not set it randomly.
The state of the check box isn't random. It is entirely predictable. If there is unselected geometry connected to the selection, SketchUp doesn't presume to replace the selection with the new component. It does replace the selection with the component if there is no unselected connected geometry and gives you an option not to do so. I find in my work flow very little need to even worry about that because I don't move on to another part until I've made a component of the part I'm currently work on. I do use it sometimes when I am repairing models I've gotten from others, though.
-Dave
Thanks for that explanation, Dave.
Sorry Dave but that's not it.
In a new file I just drew a rectangle selected it and went to create a component - checkbox ticked.
Then I added a new line coming from one of the corners of the rectangle and left it unselected. Go to create a component and the checkbox is still ticked.
I then cleared the selection and re-made it. The checkbox is still ticked.
All this in SU Pro 8 using the brand new release, but it is also the same on last week's version on my other PC. Not thaat it's your problem of course.
Nick, I should have written that differently. If there are unselected faces connected to the selection the check box will not be checked.
I wish we could edit comments.
I still think "best practice" would be as I indicated before and make one component before moving on to the next. There's less chance of missing some geometry or including too much.
Try this: Draw a table leg and an adjoining apron as one lump of geometry. Then select the leg geometry and make a component being sure to tick the Replace Selection box. then make a component of the apron. Separate them. You'll find the leg has unwanted edges from the apron and there's no face on the end of the apron. I made an example here: http://www.flickr.com/photos/8294157@N08/5352085248/ It would be less work to draw the leg and make it a component before making the apron.
On the other hand, at least there is an option for cases where components don't get made when they should.
Hello,
Your e-book is fantastic but I've struck a problem when I attempt to use the follow me tool to create the bevel on the drawer bottom.I followed your instructions,made the bevel shape,made it a component etc,but when I hover the follow me tool over the shape,it won't work.However,if I don't make the shape a component ,it works fine.Problem is,It is more difficult to select the extruded shape to make it a component afterward,without moving the sides of the drawer bottom away.What am I doing wrong?
Killenwood writes: To KiwiPaul: In another blog comment, i see that you've solved the problem, that is to right click on the profile to Edit Component. For some reason, you could not do this in version 7. You had to have the path and the profile within the same context, that is both within the same component or both non- components. Version 8 corrected this error and now allows the path to be outside the definition of the profile component. But you have to remember to open the profile to edit mode after choosing the Follow Me Tool.
Tim
Log in or create an account to post a comment.
Sign up Log in