

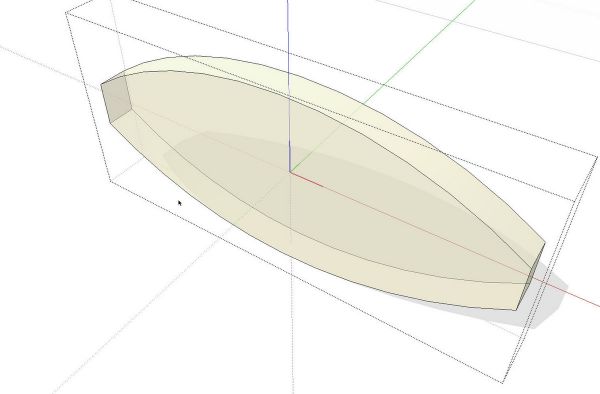
The other day a reader asked e-mailed me to ask about how to cut draw biscuit slots in SketchUp. Although when I’m drawing models for my own use I don’t draw these sorts of details, the process is straightforward with a little bit of attention to the setup. This process could also be used for drawing other sorts of joinery such as loose tenons, dowels, splines and screws. In some cases, going to this sort of effort could have some value in that it might save you from ruining the project. By drawing it out accurately you can ensure you won’t end up with the biscuit exposed when you’ve finished shaping the corner.
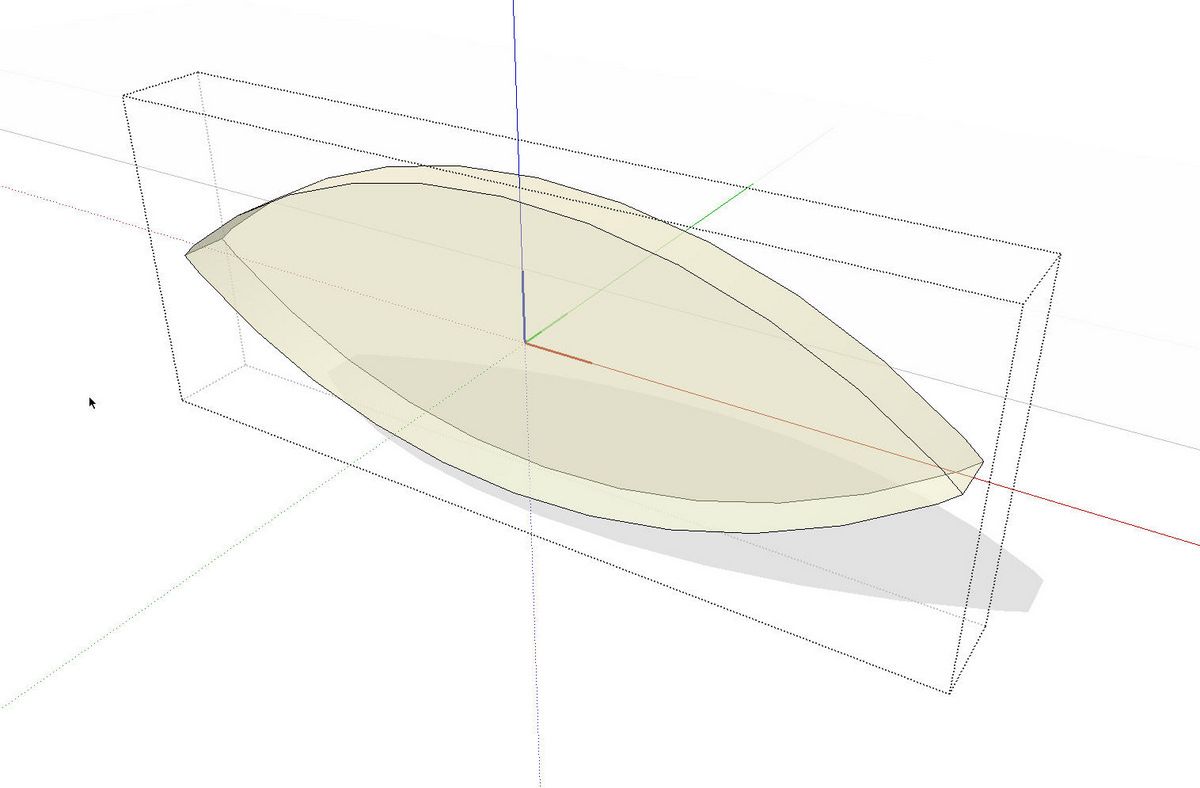
I made a simple drawing of a #20 biscuit for this demonstration. After making a component of it, I changed the axes so the component axis origin is in the center of the biscuit. Since the origin is the insertion point for the component, locating it in the center of the biscuit will make it much easier to actually place the biscuits when the time comes.

To make the slots more accurate, I drew a biscuit “slot” component. We could just use the biscuit but this shape will make it easier to see if there’s any chance the cutter will blow out through an edge. I put this components axis in the center as well. You can’t tell it in this view but I’ve reversed all of the faces on this component. I did that because when I’m finished with it, it’ll be the interior of the slot that I’m interested in.

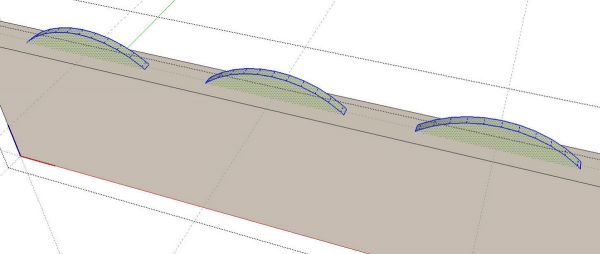
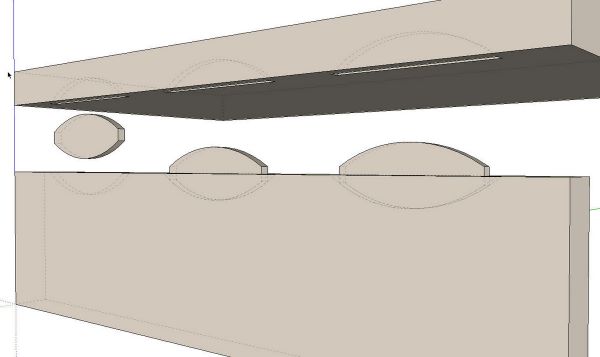
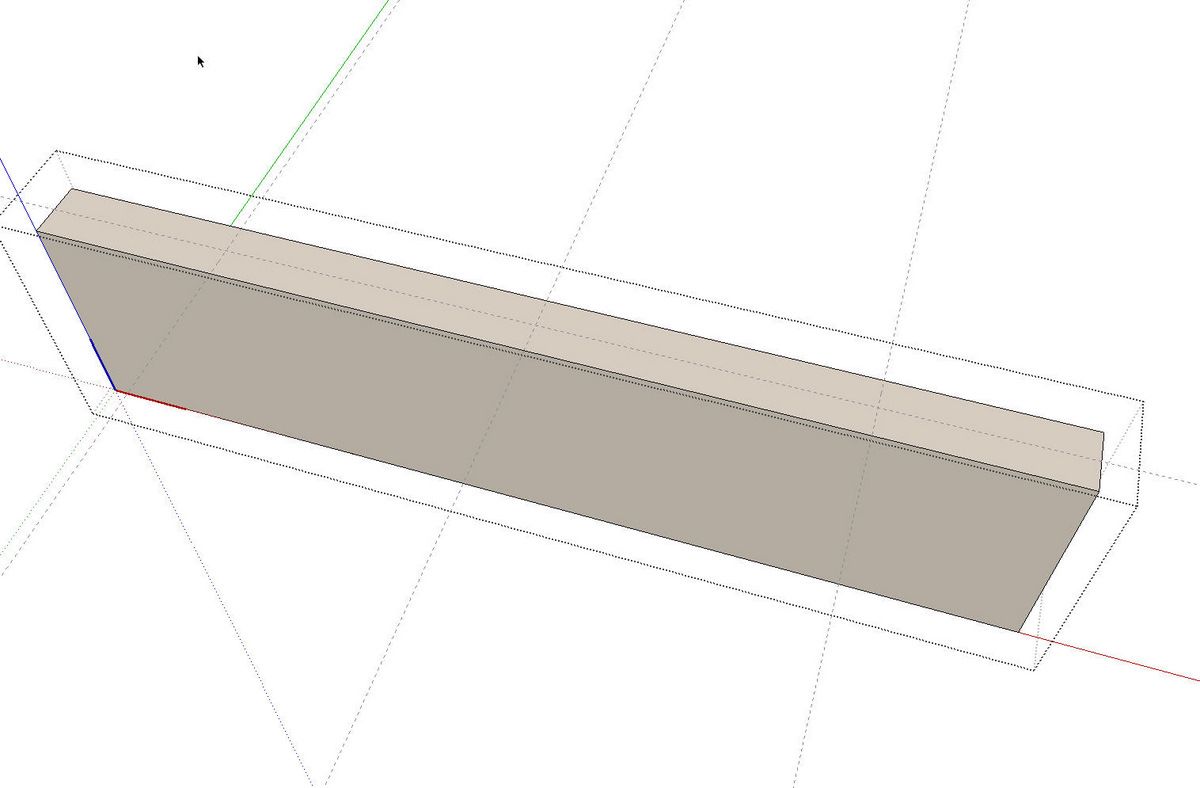
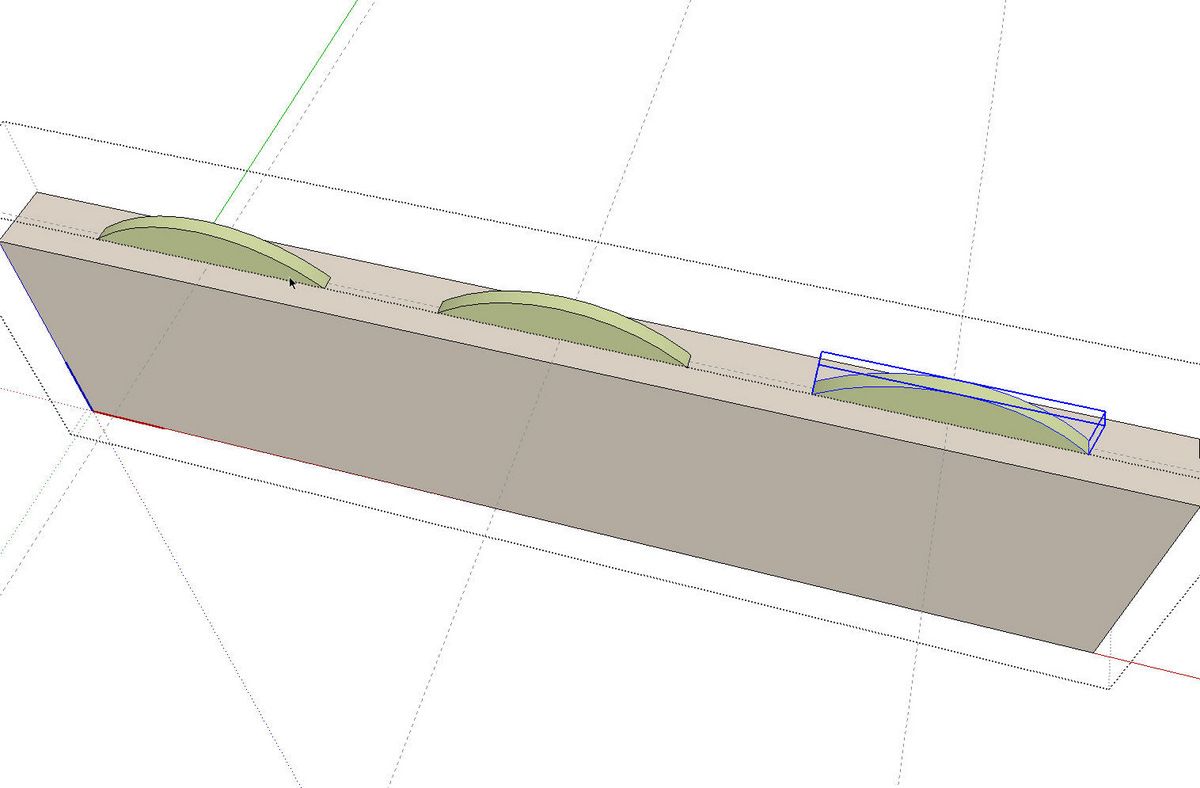
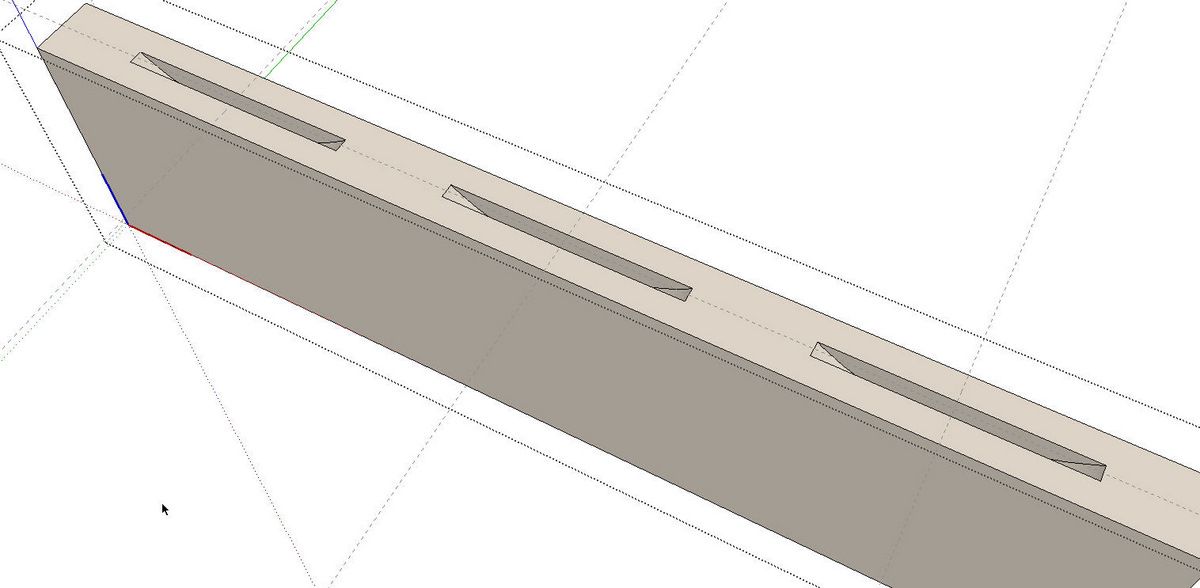
Now here’s a “board” component on which I’ve laid out the locations of the biscuits. I set a guideline down the length of the face and crossing ones where the centers of the biscuits will be. You could think of those crossing lines as the pencil lines you might draw on the real board to locate the cutter. I also have the mating board drawn and in place but I’ve hidden it to make it easier to see what is going on.

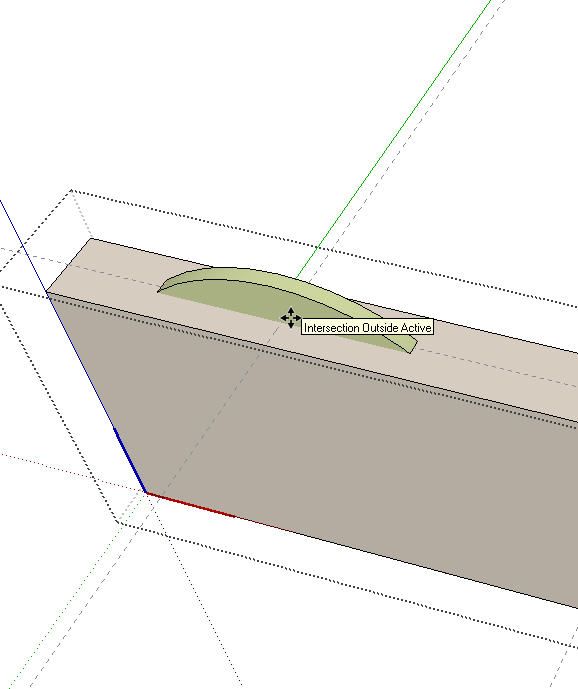
With the board component open for editing, I selected the biscuit slot component from the Components browser. As it comes into the model, I have hold of it at its center because of the location of the component’s axes. It’s a simple matter to move the cursor to the intersection of the guidelines and drop it into place. Notice the message, “Intersection Outside Active.” This tells us we’re in the right spot. “Outside Active” is displayed because the guidelines were placed outside the board component. If the alignment of the biscuit isn’t right, use the Move tool to rotate it as needed. The component will rotate about the intersection of the crossing guidelines so you won’t need to move it around after rotating.

To place the other slots, you can either grab the component from the browser and drop it in place or you can use Move/Copy to copy the first one.
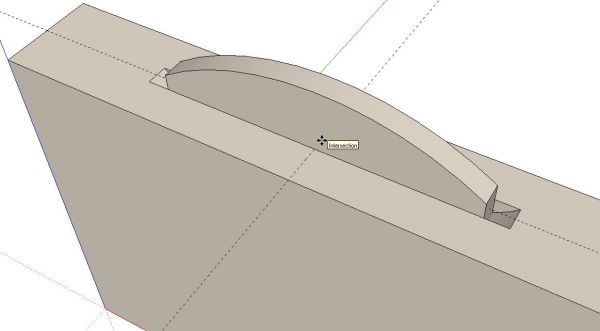
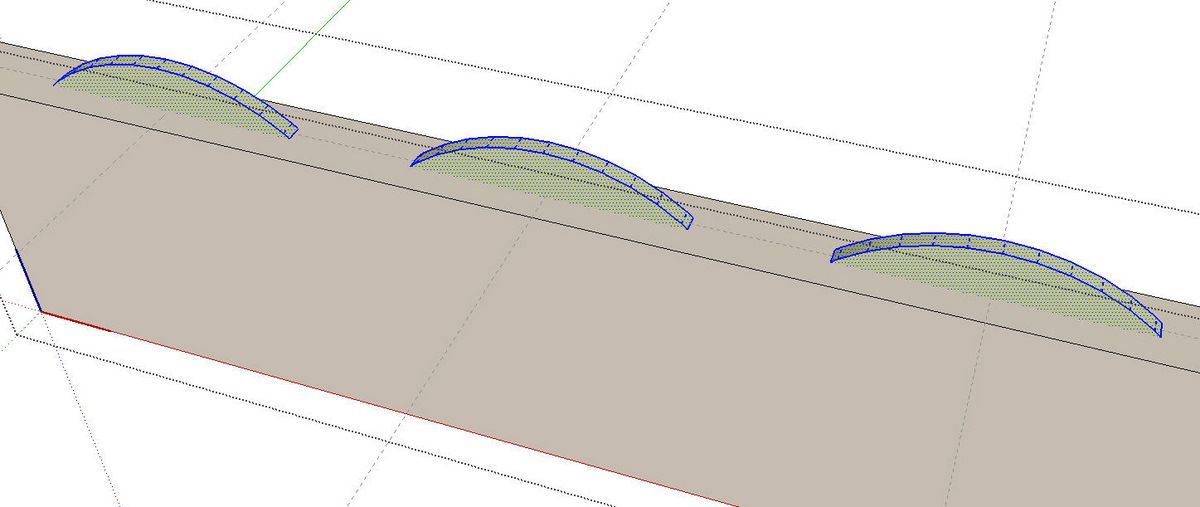
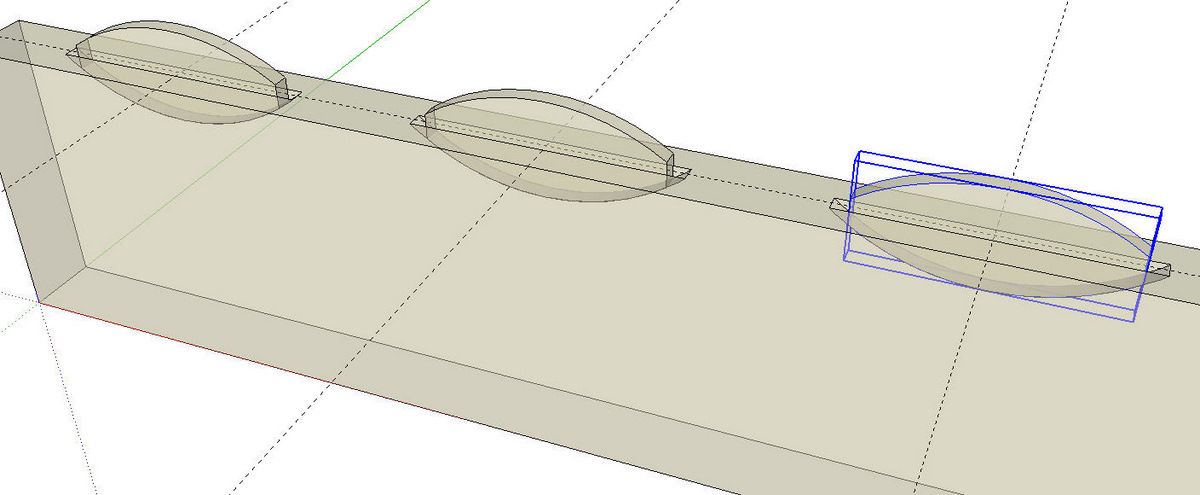
Select the biscuit slot components and then right click on one of them. choose Explode. Notice that there’s no black edge between the faces of the biscuit slots and the board.

Select all of the geometry and right click to open the Context menu. Choose Intersect Faces>With Selected. When the intersections have completed you’ll see the black edges around the slots geometry.

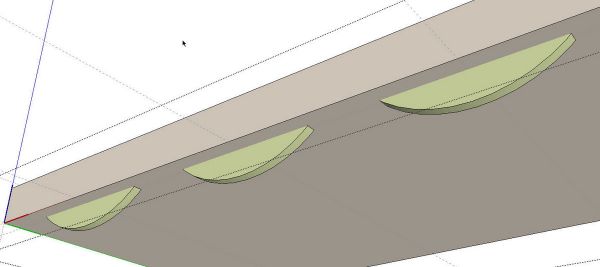
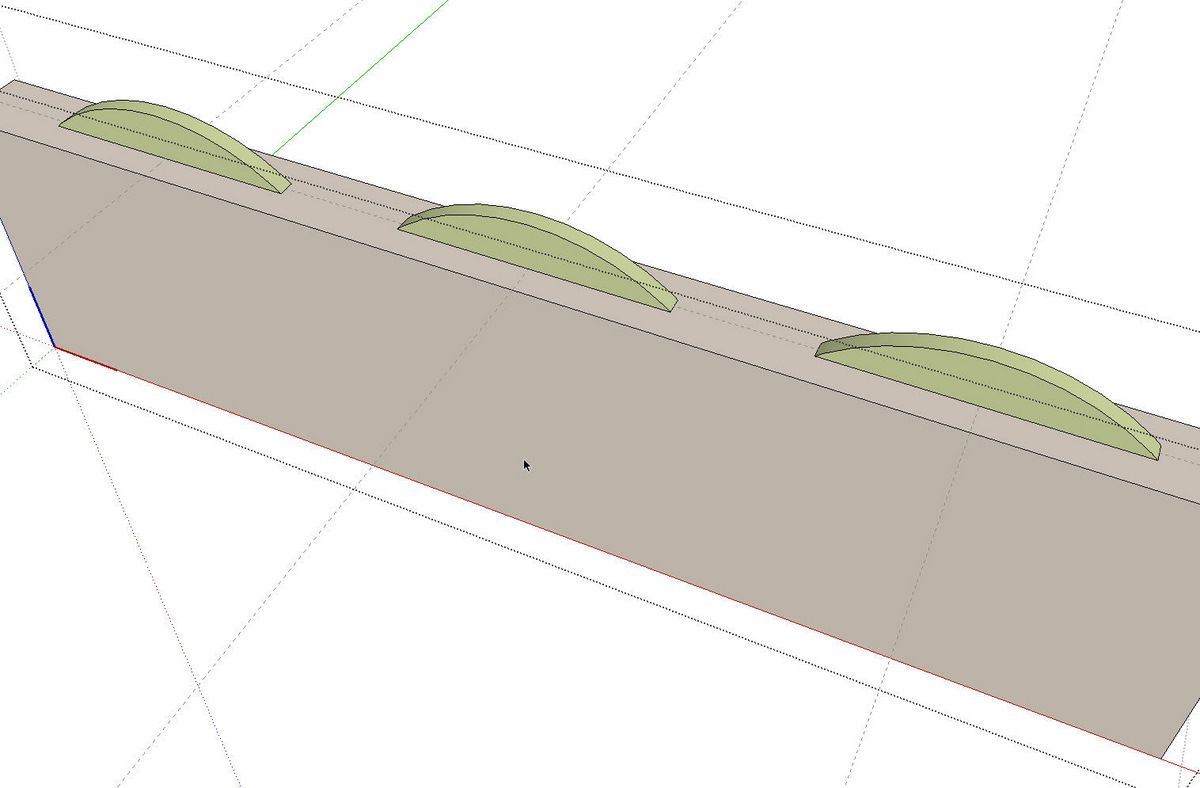
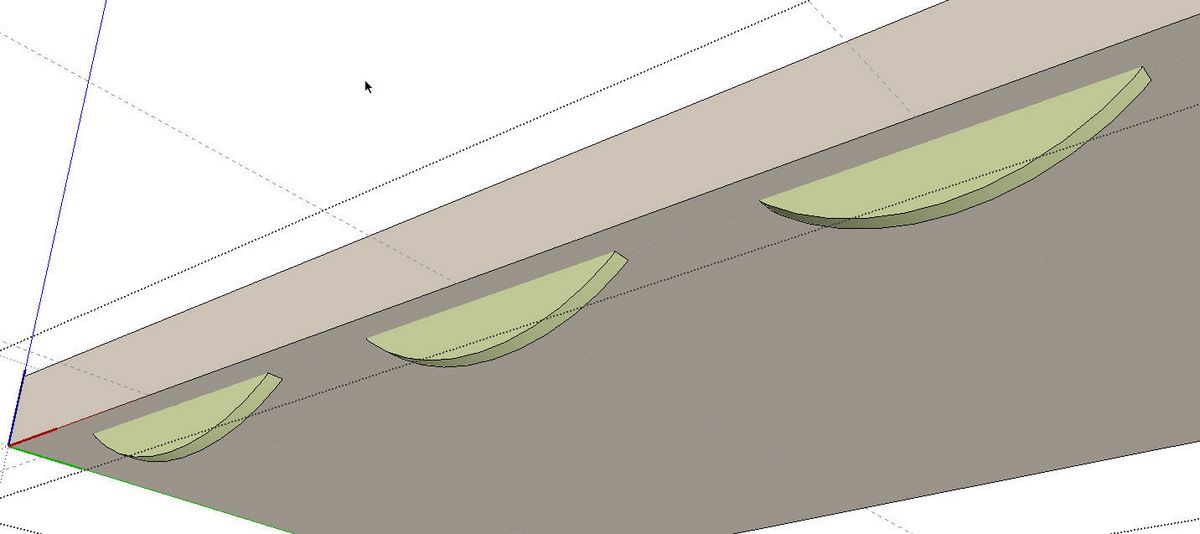
Delete the portion of the biscuit slots that extends above the surface on the board. You can do this with the Eraser tool, Just hold the left mouse button down while you sweep over the edges. You could also drag a right to left selection box around the geometry to select it and then hit Delete. You’ll find there’s and outline of the biscuit slot but there’s still a skin over the hole.

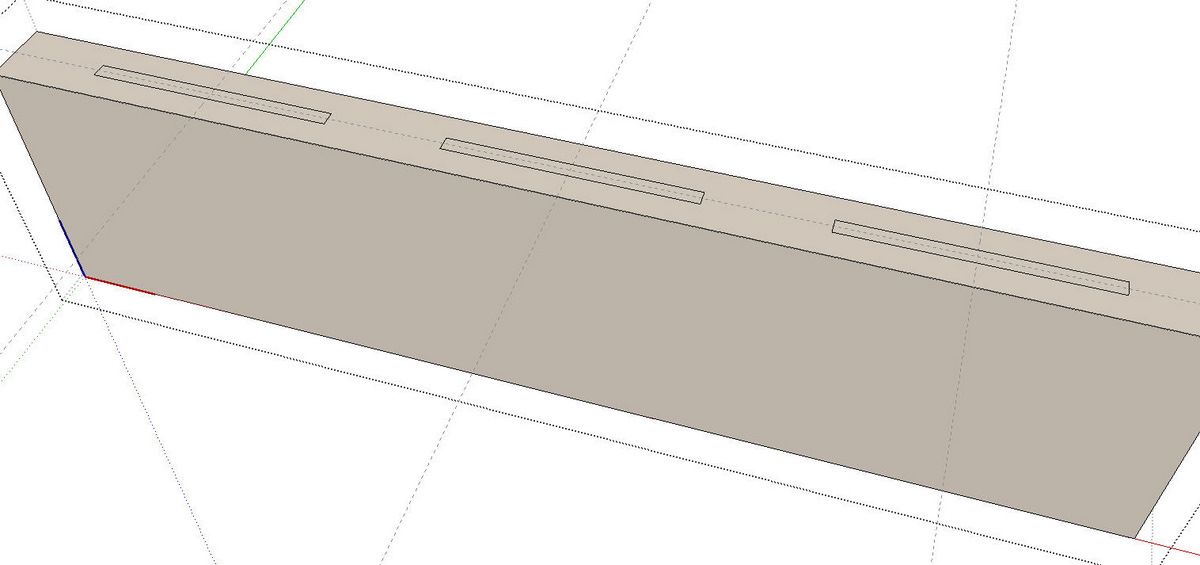
Select the faces inside the outlines and then hit Delete to get rid of them. The slots in this board are completed. Close the board component by clicking in empty space with the Select tool.
Place the biscuit components just as you did the biscuit slot components using the same guidelines as before.
I unhid the other board and hid the board and biscuits I already worked on. I repeated the process of using the same guidelines as before.
That’s all there is to it. It’s actually faster to do than write about.
And now for the gravy. If you have the pro version of SketchUp 8, make the slot component with its front faces out. Place the slot components as above. Then get the Trim tool. Click on a slot component and then the board. The slot will be cut immediately with the proper face orientation. After you’ve done this for each slot and for both boards, select all of the slot components. Go to the Component’s browser and right click on the biscuit component. Choose Replace Selected from the menu. If you’ve done the set up correctly, all of the selected components in the model will be replaced by the biscuit component.
No matter which way you go about this, make sure you save the slot and biscuit components for future use so you don’t have to draw them again.


Comments
good
too good
thanks a lot for the blog and how to
thanks
I agree Dave sounds like it would be a lot easierto do than write about. Well done
Do you know if the various sizes of biscuit and their 'sockets' are available as a component download somewhere?
I'd find them useful but don't have the 'measuring ability' to create them accurately in my 8ft by 3ft 'workshop in an apartment'...
Hi Duncan,
It never occurred to me to look until you asked. As matter of fact, you can download biscuits from the 3D Warehouse. Just open your Components browser in SketchUp and where you see the word Google, type biscuit and hit enter. You'll get several options along with dog treats and models of furniture indicating it was assembled with biscuits.
Since biscuits are pretty easy things to draw, you could also look up the dimensions on the Internet and draw them from scratch in a few minutes.
As I indicated in the post, I wouldn't add then to a model unless they are actually a benefit. Will they be useful or will they be invisible detail?
-Dave
Hi Dave
Thanks for the reply.
In the case I have in mind, they'll be useful - I need to ensure that things don't 'intrude'. Given that the biscuit matches the curve of the cutter (as far as I understand it) and the cutter cuts a bit 'over' I'll do a plunge, measure the length and use that for the sockets - does that sound good.
It's also useful to have the sockets as a memory-jogger on the relevant parts (along with their locations) and the biscuits themselves in the BOM.
Thanks again
Duncan
P.S.
I never knew that method of searching for components directly from SketchUp before your reply either - so a double thank you...
Duncan
Hi Duncan,
You're very welcome. Glad I could help.
Your idea of using the biscuit slots to make sure they don't "intrude" or perhaps protrude is a great idea. You could probably get away with inserting only the biscuits and skip the slots.
Dave
Log in or create an account to post a comment.
Sign up Log in