
In Chapter 9 of my eBook, on page 47, I describe a method of making and copying the chamfers on the Chamfer Post Table. After receiving questions on this procedure, I’ve created a video showing the method I described in the book.
The making of a chamfer involves careful placement of several guidelines that identify the shape and size of the chamfer. Then the Line Tool is used to create the boundary of the chamfer. There is one required line at each end of the chamfer that is hidden. It helps to use X-ray to see that this line is properly placed.
You could similarly create chamfers in each corner of the leg. But it is much faster and easier to use a copying method to place chamfers in the remaining corners. The Rotate Tool is used for this copying process. After you select the Rotate Tool, remember to tap the Ctrl Key (this adds a plus sign to the tool icon) to effect the copy process.
Before using the Rotate Tool, select the standard Top View icon from the Views Toolbar. Also you should select Parallel Projection from the Camera tab.
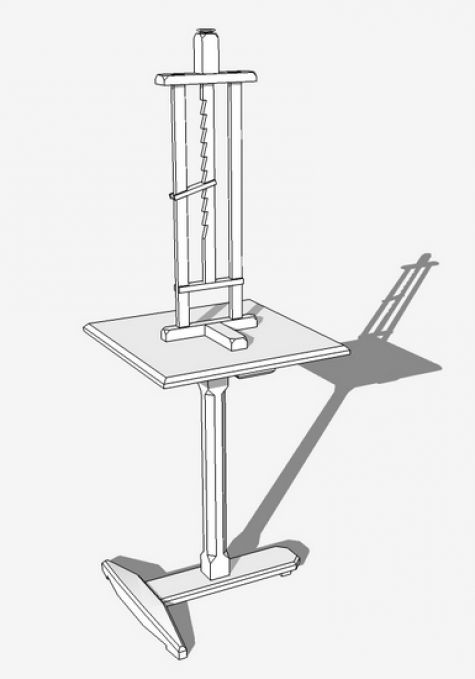
For the video, I’ve chosen to create the chamfers on a candle stand post. This post is bigger than that used for the Chamfer Post Table leg, but the process of creating and copying chamfers is the same.
Here is the model of the Candle Stand….
;
Tim


Comments
When rotating the first copy (3:30 in the video clip) you could type x3 after placing the first copy at 90°. This would save having to perform the action three two more times.
Your data is so important otherwise I would say nothing, the video is great but could you improve the audio by moving the mike further away from your mouth. Sorry if this offends
Thank you
M1FDS: thank you for the feedback. I will try to improve the audio on my next videos.
Tim
Tim,
This was extremely helpful. After struggling with the instructions in your marvelous book I just couldn't get it. This video made the difference. It's crystal clear now. THANKS!
I'm always confused about when to put guidelines in the component versus outside. (i.e. after opening the component for editing or before). Any comments on that?
Thanks again.
Hal
If I may comment, Hal, on whether to place guidelines inside or outside a component. Most of the time it doesn't make much difference but there are times when it could cause some confusion. If you have multiple instances of a component and you open one for editing before inserting guides, you might end up with a rat's nest of guidelines which could make it difficult to identify exactly which ones you are using. If you place the guides without opening components, you one end up with unneeded copies of them. On the other hand, if you have set up your components so that when one component instance is open for editing, the rest of the model is hidden, you won't see the guidelines unless they are placed when the component is open. I don't care for hiding the rest of the model because I frequently edit components relative to the surrounding components but some folks like to clear the decks when editing.
-Dave
Dave - thanks for the fast response. Good explanation - including the pros and cons of different approaches. Thanks.
Hal
Log in or create an account to post a comment.
Sign up Log in