Gazebo Roof Cedar Shake Installation Jigs

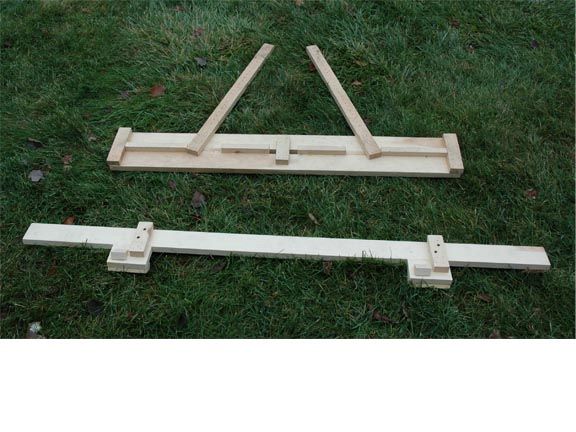
Bottom: jig for first course (roughly 4 feet wide). Top: jig for successive courses (roughly 3 feet wide; course exposure is 7 inches).
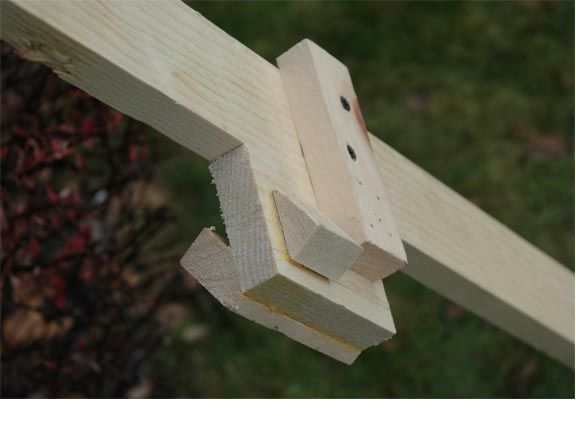
A few years back, I led a group of condo neighbors on a project to rebuild a gazebo on our property. I had plenty of willing but marginally skilled workers, so I needed jigs to simplify the work — and make sure we weren’t doing things “by eye” (after all non-involved neighbors can be highly critical if things don’t look right). For installation of the cedar shake roofing, I devised two jigs: one to align the first course (bottom of the first photo) and one to align each successive course (top of the first photo). The jig for aligning the first course is clamped evenly to the fascia board; the third photo shows the detail of wedges to get it to an appropriate angle for the overhang. The jig for the additional courses clamps to the batten boards (laths) and is exactly the width of the course exposure (so requires only aligning with the bottom of the preceding course for spacing). Material was remnant or scrap pine from my workshop. This type of project was a first for me and I learned a lot from it — the project came out well and drew many positive comments from our fellow owners. These may not be jigs for use in a workshop, but they were certainly shop made.
-
Bottom: jig for first course (roughly 4 feet wide). Top: jig for successive courses (roughly 3 feet wide; course exposure is 7 inches).
-
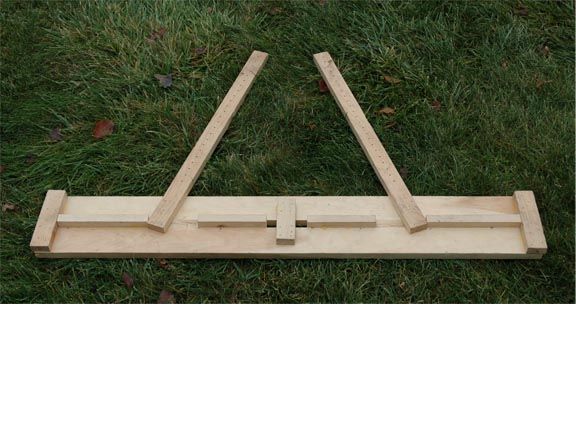
Spacing for each course.
-
Detail of clamping pads on jig for first course.


Log in or create an account to post a comment.
Sign up Log in