
It was early in 2010 that I first reported on the Campeche Chair shown in the Williamsburg conference “Working Wood in the 18th Century”. I modeled-up the chair but never completed the design, particularly the method of fastening the leather sling. Also, I did not build the chair.
Based on recent contact with the reader, I became more interested in the chair, and have started building one in ash. I am updating the SketchUp model to finish up the details and create the design package along with full-size templates. I’ve changed some material thicknesses, and have increased the width of the chair by about three inches.
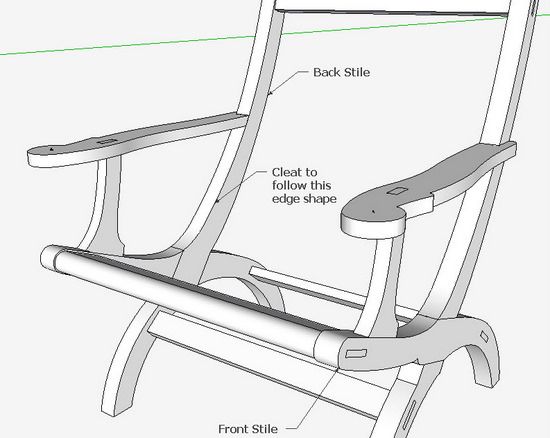
I am still uncertain about the leather sling, and will be talking to leather suppliers this week. In the meantime, I designed an upholstery cleat that I expect will be required. The sizing and the placement will no doubt change as I work out the leather details. I’ll show you how I “built” the cleat in SketchUp.
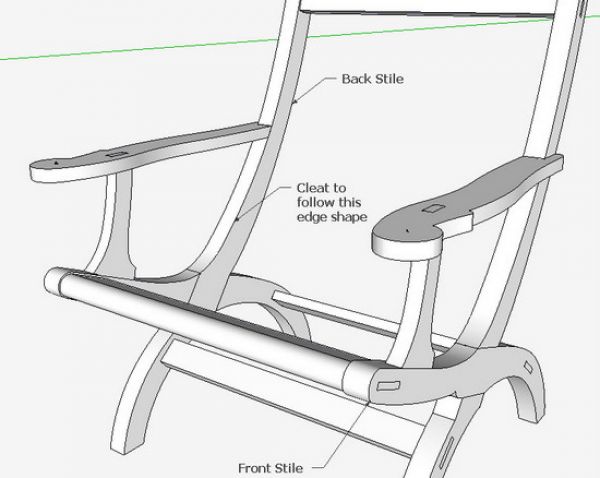
First, here is a picture of the revised model showing the completed cleats in magenta color.

Step 1: Set up a view of the model where the inner curved edges of the Stiles are accessible. The cleat needs to follow the shape of these inner edges.
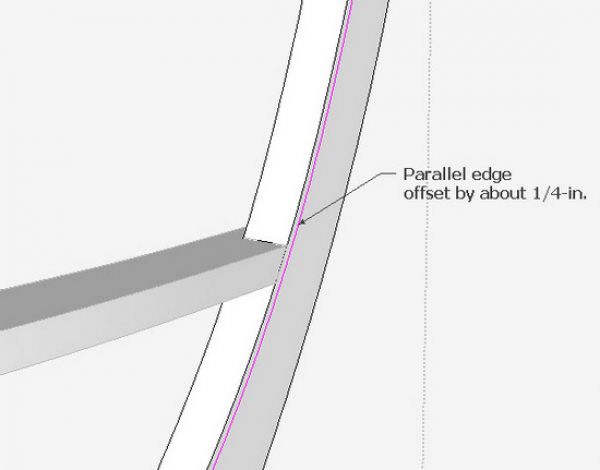
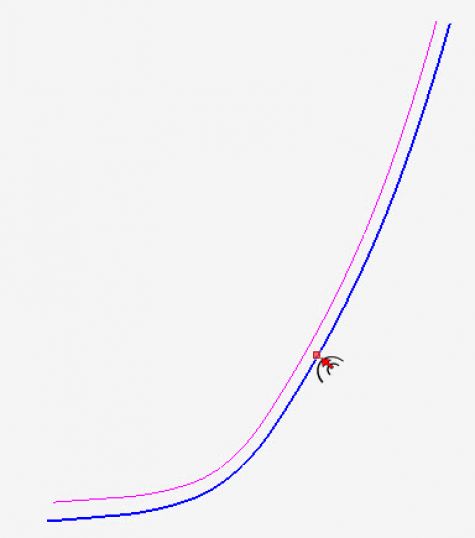
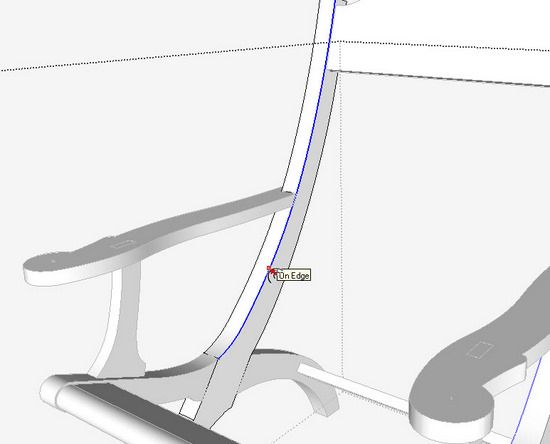
Step 2: Use the Offset Tool to copy the inner edge shape. When I made the Stile components, I created the edge shapes with the Arc Tool. This resulted in several arc segments ganged together. I used the Weld plug-in to combine the arc segments into one arc. In the illustration below, you can see where the total length of the edge is highlighted in blue when hovering the Offset Tool. Click the mouse and move the copied edge shape downward. Type the value of the offset – in this case I used 1/4-in. – then hit the Enter key.

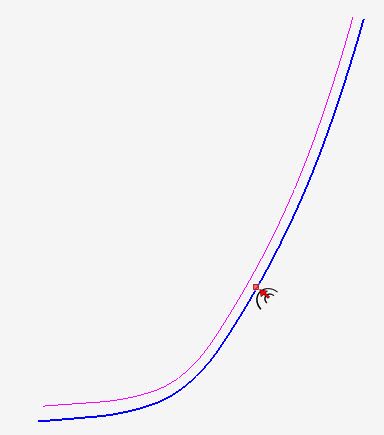
Step 3: You can see the resulting offset edge shape. I’ve highlighted in magenta color.
Step 4: Repeat the offset process for the Front Stile.
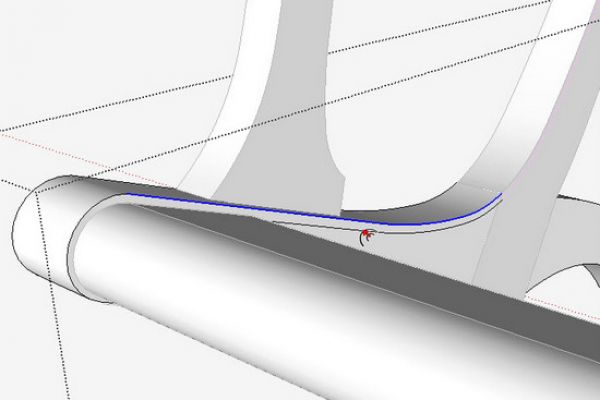
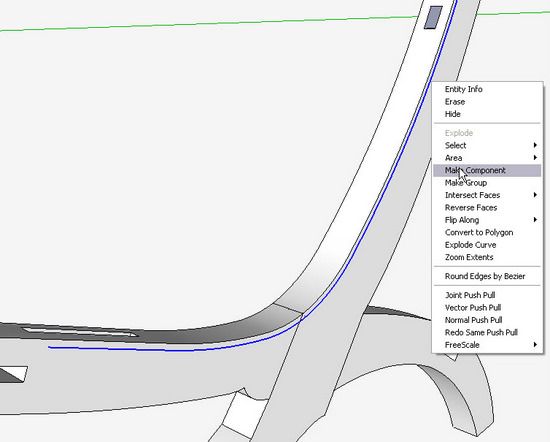
Step 5: The offset parallel edges were created within the definition of the stile components. I need to have these magenta edges outside the component definition so I can use them to make the cleat. So copy out the Stile components as shown below – right click on these copies and select Explode. This allows an access to the offset edges apart from the Stile components.
With the Select Tool, select the two offset edges, shown in blue below. Right click the mouse and choose Make Component. Name the component Cleat.

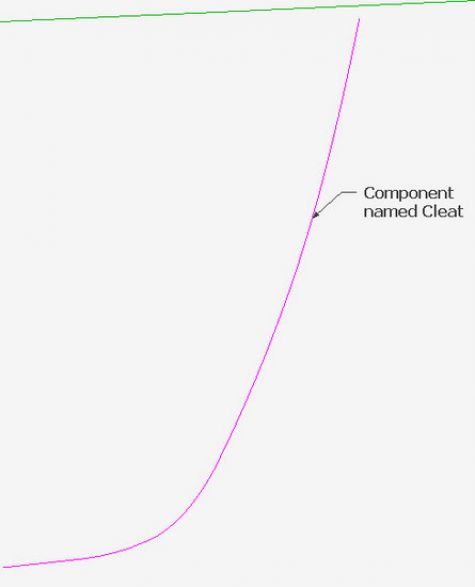
Step 6: Here is the new component Cleat. All it is at this point is an edge shape as shown below.
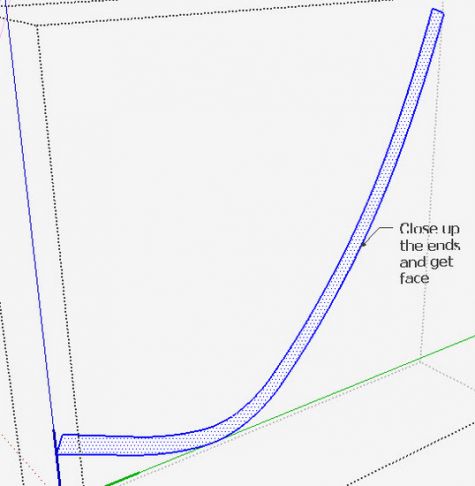
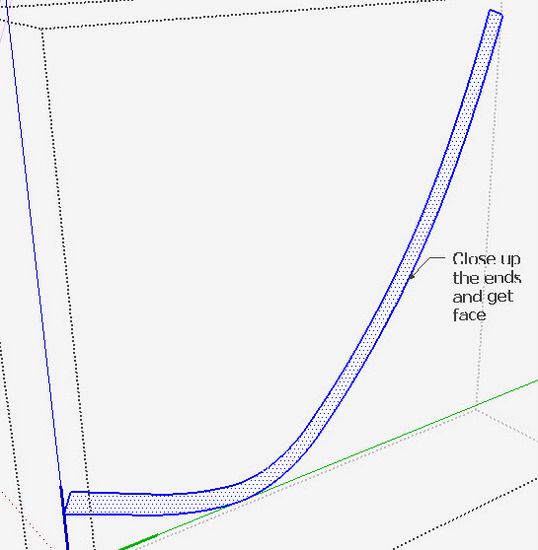
Step 7: Use the Offset Tool again to create another parallel edge shape at a separation of 7/8-in. Then with the Line Tool, close in the ends to create a plane as shown below.
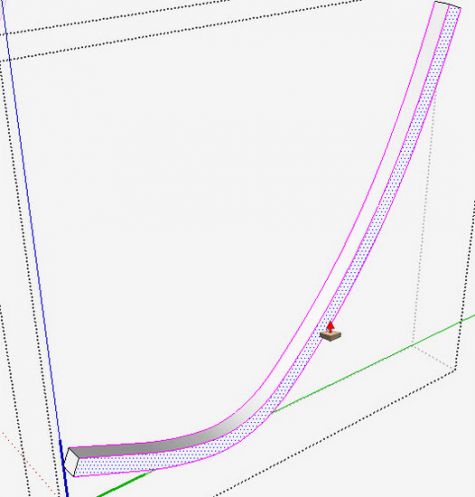
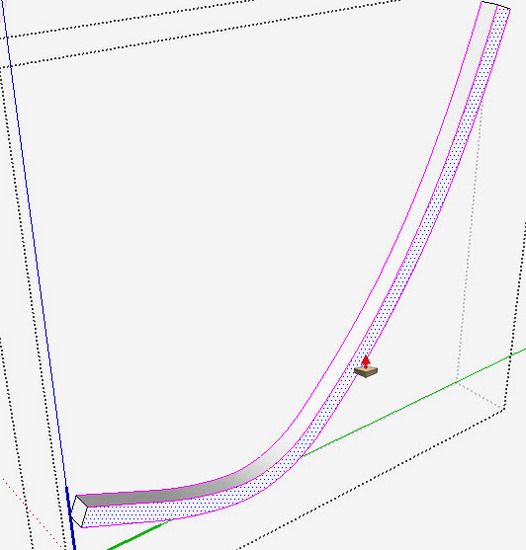
Step 8: Use the Push/Pull Tool to draw out the face to a distance of 7/8-in. This makes a cleat 7/8 x 7/8. This may require adjustment based on my investigation of leather upholstery options.
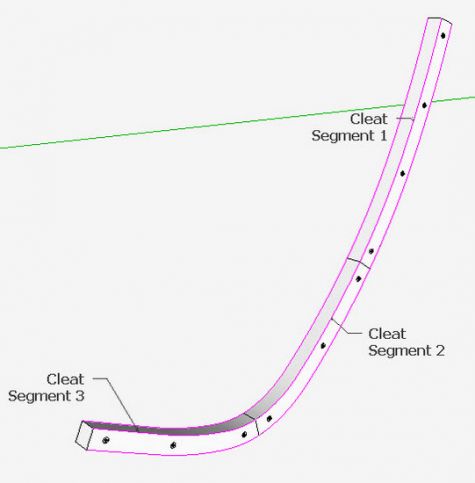
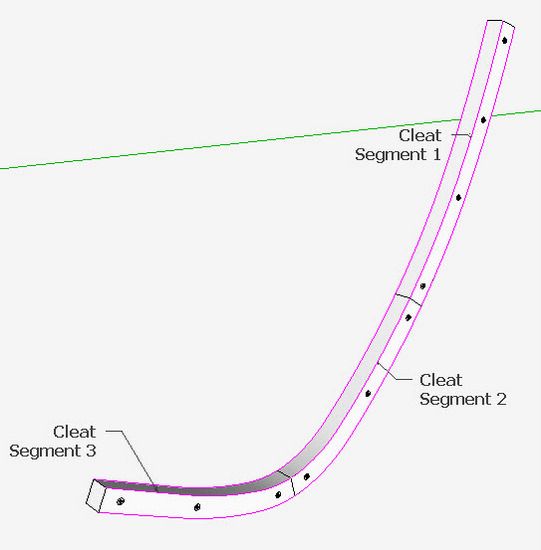
Step 9: Divide the cleat into three separate segments and locate the shank holes for the FHWS fasteners.
Creating segments will facilitate the making of the cleat. Otherwise, there would be considerable waste of lumber.
Last Step: Fasten the cleats to the inner edge of the Stiles in the assembled model, as shown in the first illustration above.
It could be that I will need some webbing and foam cushioning behind the leather covering. Hopefully, this cleat may be adjusted in size and configuration to accommodate the resulting upholstery strategy.
Tim


Comments
Tim,
Antiques The Magizine did a feature article on campeche chairs a few monts back. In the article thay had a few photos of chairs with the upolstery off. You may gain a little more insight into exactly how thay attached the leather seat. I believe it also shows some with the leather upolstery nailed directly to the frame, sans any cleat.
To Traveller2:
Thank you for the reference to the magazine feature article on Campeche Chairs. I read through it and studied the pictures. Clearly there are multiple ways of fastening the leather sling, including directly on the top face of the stiles.
I recall Williamsburg cabinetmakers mentioning various means of handling the seat, including a cleat option. My leather is 3/16" thick and I feel it needs to be inset from the face so as to be flush with the wood surface. This requires some rabbet or cleat to provide the offset.
Tim
Log in or create an account to post a comment.
Sign up Log in