-
Fixing Woodworking Mistakes -
How to Apply an Aerosol Finish -
Best Tabletop Finish -
Five Minute Guide: Glue-Ups -
Dedicated Sled Delivers Perfect Finger Joints -
3 Steps to Great Glue-Ups: Sliding Dovetail Joints -
Tablesaw Tapering Jig is Safer and Faster -
Buying and Using Trim Routers -
Upgrade Your Jointer with a Segmented Cutterhead -
How to Make a Simple Jig for Offset Knife Hinges -
Box Making Tips and Tricks -
How to Sharpen a Card Scraper -
Five Minute Guide: How to Use a Tablesaw -
Router Jig for Perfectly Aligned Dadoes -
How to Drill Windsor Chair Mortises -
How to Cut Sliding Dovetail Joints -
T-Track is a Smart Workbench Accessory
Installation Instructions in SketchUp/Layout
comments (0) August 8th, 2010 in blogs
My last entry covered a group project to create bunk beds for a local city camp in the Sierra near Lake Tahoe. We accomplished the goal within our original schedule of four days, delivering two bunks including the finish (a coat of linseed oil). My design in SketchUp was effective to avoid stoppages or rework. As explained in my last post, without SketchUp I would be reluctant to take on these large scale woodworking projects.
Here is the assembled bunk shown within the Layout application.

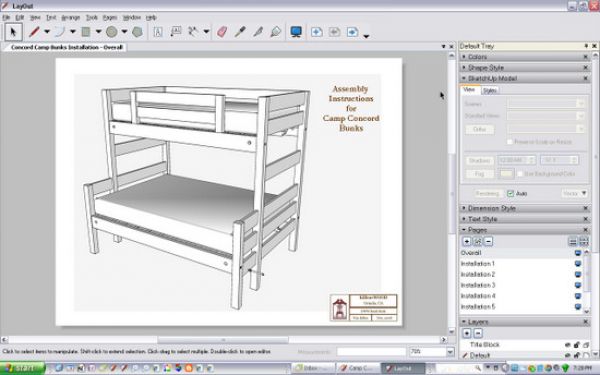
Since the bunks breakdown to enable handling, shipping and installation, we needed a way to instruct the camp administrators on the proper installation sequence and steps. Again SketchUp came to the rescue, but this time relying on the companion program, Layout. With Layout, there is an advantage to applying notes and tags, and also delivering as a convenient PDF.
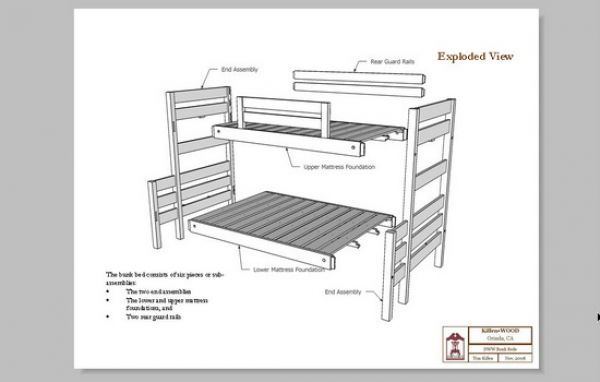
During construction in the shop, we created several sub-assemblies made up of different components. Some sub-assemblies were permanently glued. In other cases, parts were fastened together with wood screws.
Here are the resulting sub-assemblies (six of them) that the customer must assemble. In SketchUp, I created new components for the sub-assemblies. This helped me copy and move these units while creating the various scenes for installation.

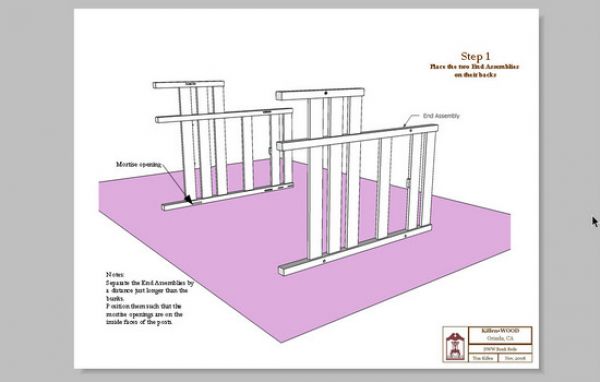
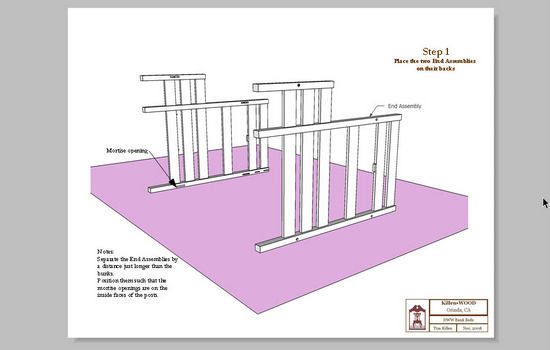
Within SketchUp I created several Scenes of the installation sequence. I used the Hide function to remove subassemblies in certain scenes, only to "unhide" them in later scenes. When using this procedure, remember to save the scene after you hide or unhide particular components.
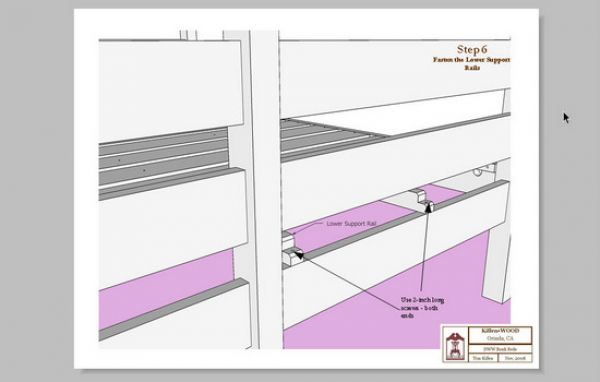
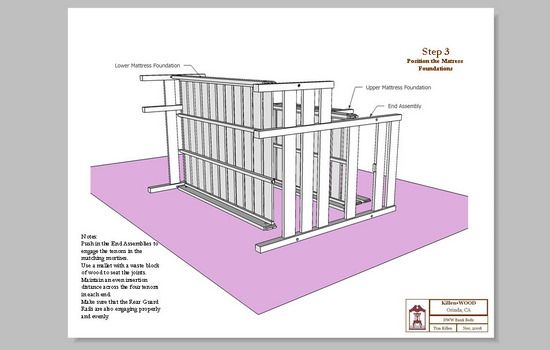
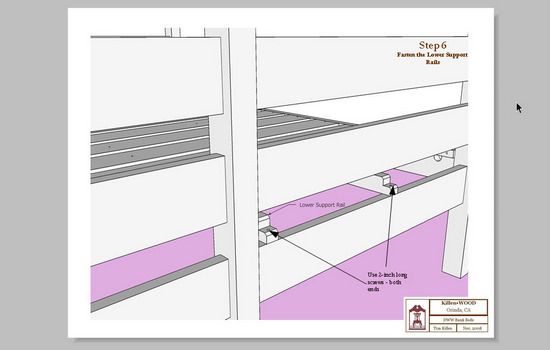
Here are some of the resulting pages of the installation document starting with Step 1.
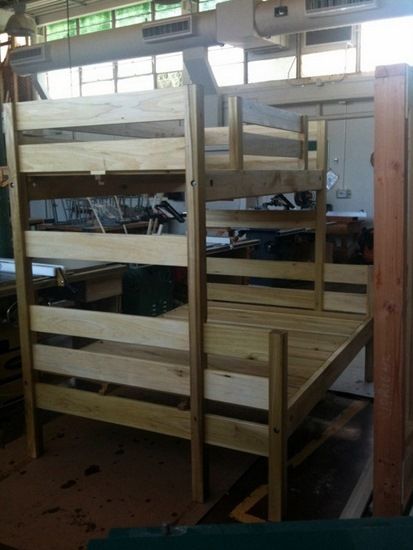


Here's a photo of one of the finished bunks in the shop.
posted in: blogs
Become a Better Woodworker
About Design. Click. Build.
Learn the art and science of designing furniture in SketchUp with Fine Woodworking's official blog. Moderated by a devoted community of woodworkers, we feature step-by-step SketchUp tutorials on designing components, downloads of pre-built 3D models of furniture parts, and news and information about the evolving world of digital furniture design.
Buy the Video
Don't miss Dave Richard's brand-new DVD/video download, The Basics.
Buy the Book
Get Tim Killen's popular eBook, the Google SketchUp Guide for Woodworkers.
Basic SketchUp Tutorials
Learn the basics of building furniture in SketchUp with these classic posts from the Design. Click. Build. blog.
Creating a Project Plan in SketchUp
How I Draw in SketchUp
Axes in SketchUp
The SketchUp Move Tool
The SketchUp Rotate Tool
The SketchUp Scale Tool
Materials, Colors, and Textures
Applying Wood Grain Skins in SketchUp
Easy Dovetail Joints in SketchUp
Digital Project Plans
Download and modify SketchUp files for select projects from Fine Woodworking. View all. Top Sellers: Matt's Monster Workbench New England Pine Cupboard Garden BenchMeet the Authors
|
|
DaveRichardsI am a Biomedical Equipment Technician. I maintain anesthesia and respiratory equipment for the largest medical facility in southeast Minnesota. I...view profile |
|
|
Tim KillenI am retired from Bechtel Corporation after 36 years in Engineering and IT management. I grew up among woodworking machinery in...view profile |
|
|
FineWoodworkingEditors...view profile |


Comments (0)
You must be logged in to post comments. Log in.