
As indicated in the previous blog entries on this subject, I am usually able to paste the textures without fiddling with (or editing) the component. I find it simpler to set up the wood grain texture so it is big enough to avoid tiling, then easily click the paint bucket on each of the components in the model.
However, there may be situations where you want the texture within the definition of the component. In the following steps, I’ll show how to do this. I’ll use the drawer front of the Shaker blanket chest (see Materials, Colors, and Textures 3) as the example case.

Step 1
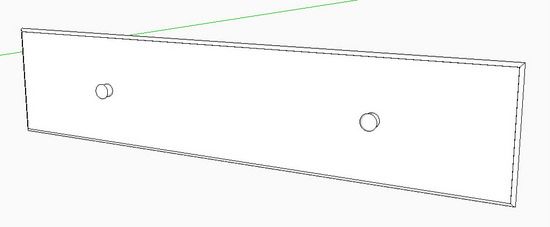
This time, before texturing, right click on the drawer front component and pick Edit Component. Pick the Paint Bucket and click on the front face of the drawer front. Note that the thumbnail molding is not selected, so is not textured. Click the mouse (paint bucket) on each of the thumbnail molded edges to texture them as well.

Step 2
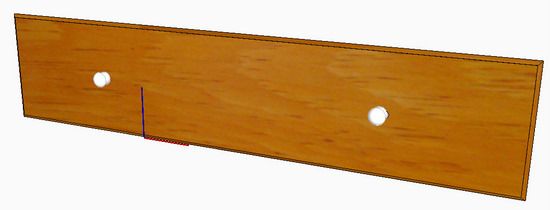
Note on the left end of the drawer, the ugly tiling line. This can be fixed by re-positioning the texture to eliminate tiling.
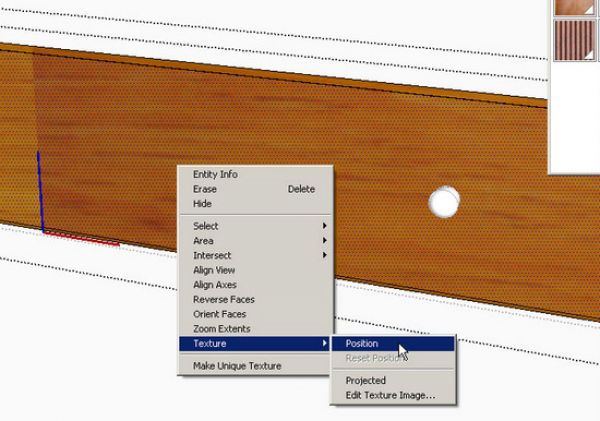
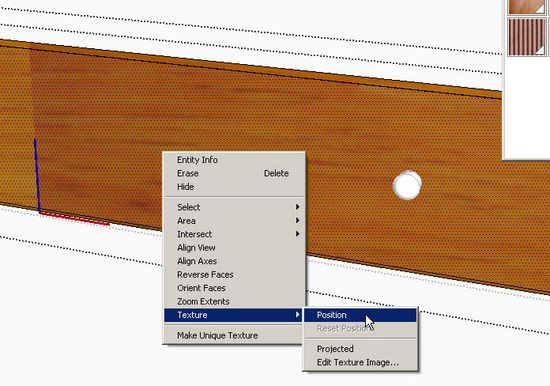
Note: I intentionally caused the tiling by moving the drawer front component axis toward the center of the drawer. The tiling occurs at the location of the axis. Right click on the face of the drawer. Pick Texture from the pop up menu, then choose Position as shown below.
Step 3
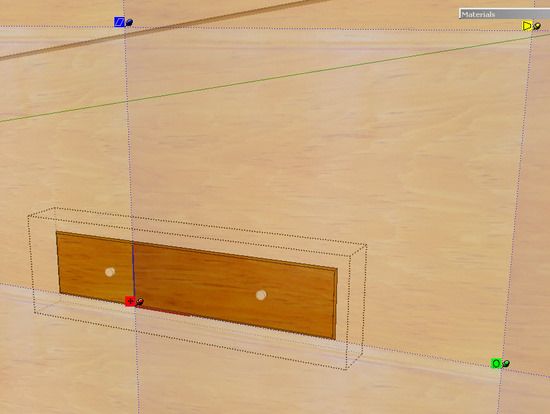
I’ve zoomed out to show the four texture pins on each corner of a tile. Now you can also see the size and position of the tiles. Each of the corner texture pins are used to edit the position, size, or orientation of the texture. The Move (red) pin moves the texture as you drag it with the mouse. The Distort (yellow) pin creates a perspective look to the texture. The Scale/Rotate (green) pin scales and rotates the texture. And the Scale/Shear (blue) pin scales and shears the texture.

Step 4
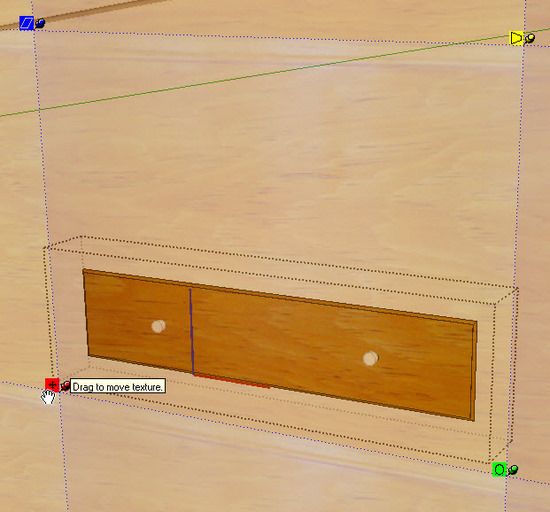
Click the mouse on the red pin and move the mouse to the right until the tile seam is off the face of the drawer front.

Step 5
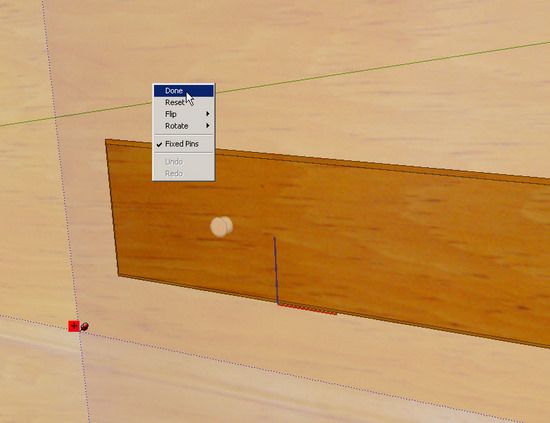
Right click on the texture and pick Done from the popup menu. This completes the texture within the definition of the component.

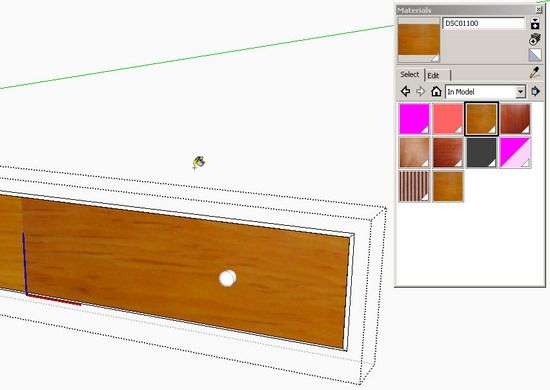
The completed texture is shown below however, I should have also painted the drawer pulls.

Tim


Comments
Tim,
I recall a posting sometime back about importing textures and colors. I can't seem to find that posting. I want to create a library of wood types: cherry, maple, oak, etc. Is there a file somewhere that can be imported to the materials library? If not, how can I create those textures from, say a photo?
Thanks
Tim, I just answered my own question (or at least I think I did). I'm using SketchUp 8 for Mac. I can import a picture of a texture directly into the materials dialog box. At the bottom right of the dialog box I click on" color", then on "new texture". This open my "documents" folder where I can locate and click on ay photo I have. It then appears as a new texture in the Materials Dialog box. I can paint the model parts normally. I haven't tried to rotate the pattern yet though. I guess I could first rotate the photo before I import it.
To NashvilleLee: I am glad you were able to sort it out. You may want to review a previous blog entry by Dave Richards last October at this link:
https://www.finewoodworking.com/item/32016/a-tiled-floor-creating-a-material-in-sketchup
Although the subject was a tiled floor, it contains a lot of information on handling pictures on the Mac to prepare and store textures.
Tim
Log in or create an account to post a comment.
Sign up Log in