-
Tablesaw Tapering Jig is Safer and Faster -
How to Drill Windsor Chair Mortises -
Buying and Using Trim Routers -
Best Tabletop Finish -
T-Track is a Smart Workbench Accessory -
Box Making Tips and Tricks -
Router Jig for Perfectly Aligned Dadoes -
Upgrade Your Jointer with a Segmented Cutterhead -
3 Steps to Great Glue-Ups: Sliding Dovetail Joints -
How to Make a Simple Jig for Offset Knife Hinges -
Fixing Woodworking Mistakes -
Five Minute Guide: How to Use a Tablesaw -
How to Apply an Aerosol Finish -
Five Minute Guide: Glue-Ups -
How to Sharpen a Card Scraper -
Dedicated Sled Delivers Perfect Finger Joints -
How to Cut Sliding Dovetail Joints
Sugar Scoop - A Follow Me and Push/Pull Excercise
comments (1) May 21st, 2010 in blogs
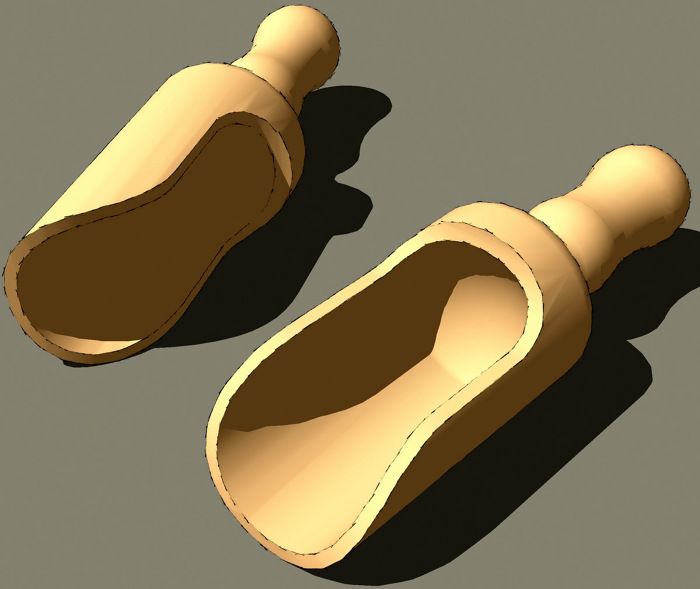
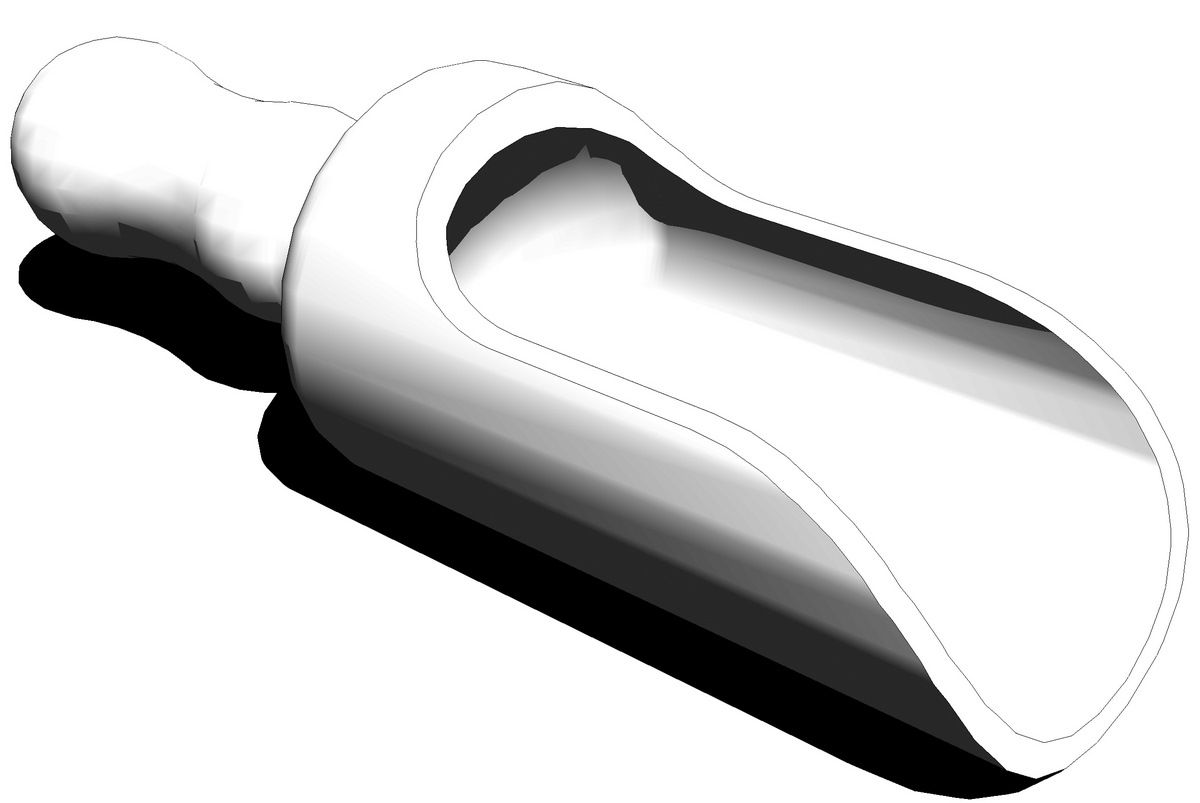
The other day I had an e-mail from a reader who was asking about how to draw a wooden scoop similar to the one shown here.

Like the Ruhlman-inspired leg in my previous blog entry, it is easier than it might seem. Here's the way I did it.

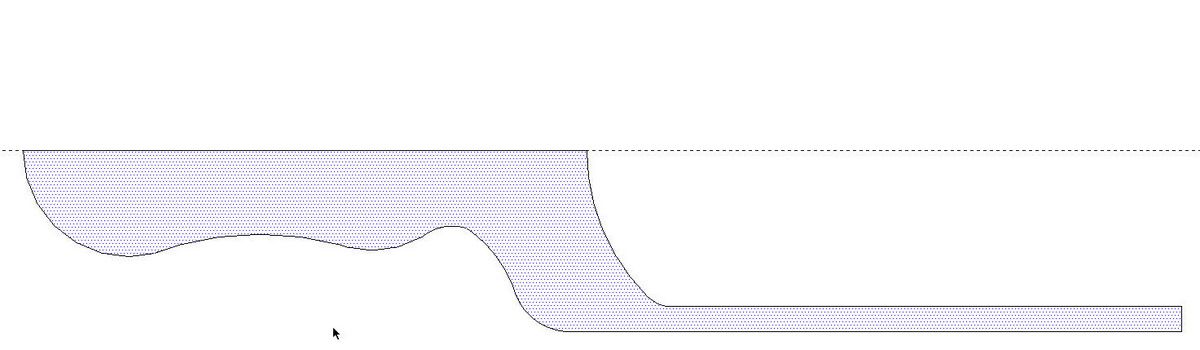
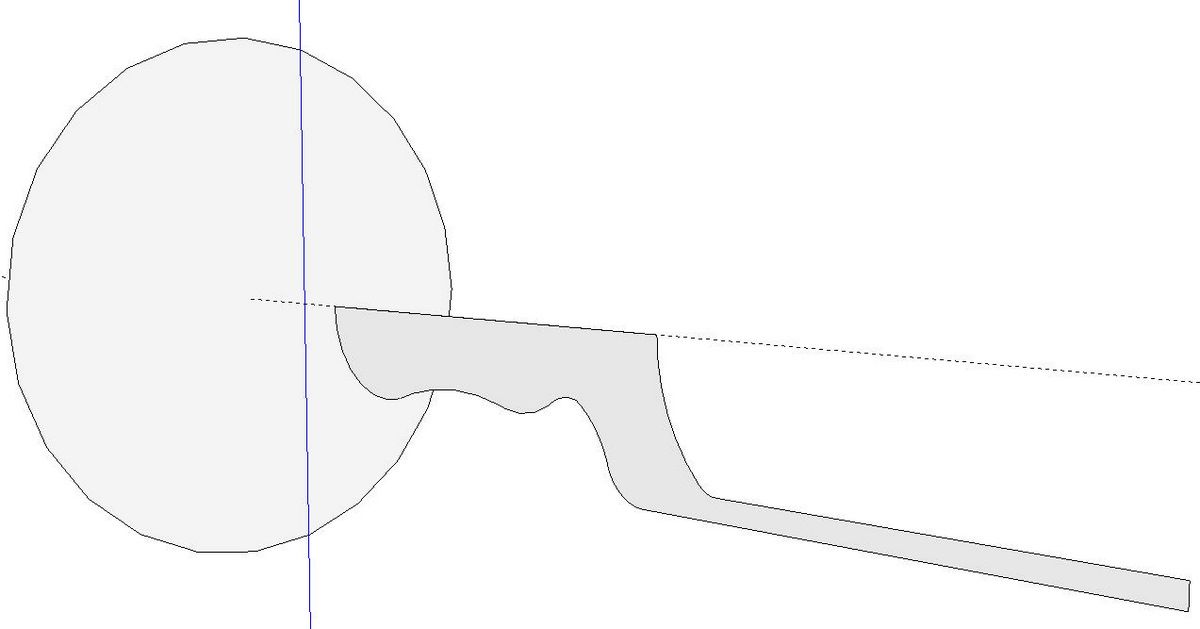
The first step is to draw the profile. Only half of the scoop's shape is needed. There's a guideline used as a centerline.

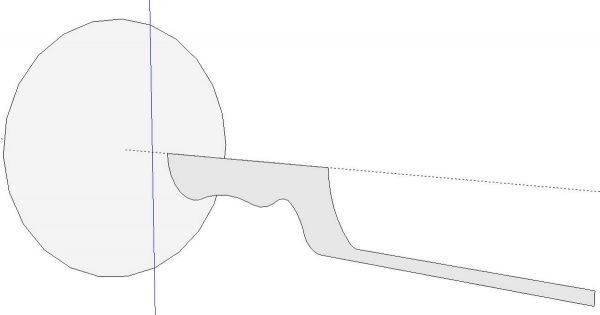
On that same centerline I drew a circle. The size of the circle isn't important. This is the path for the coming Follow Me operation. Before creating the turned shape, scale the model up by a factor of 100 or so. If you don't do that, you'll likely end up with holes in the surfaces because SketchUp won't fill very small faces. Select the edge of the circle, get the Follow Me tool and click on the profile.
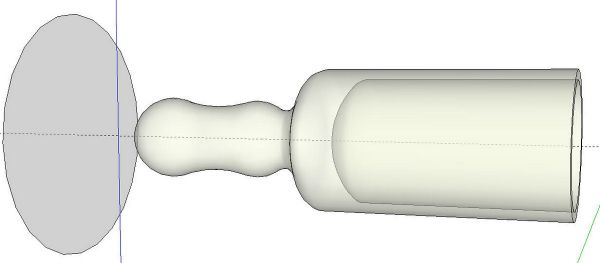
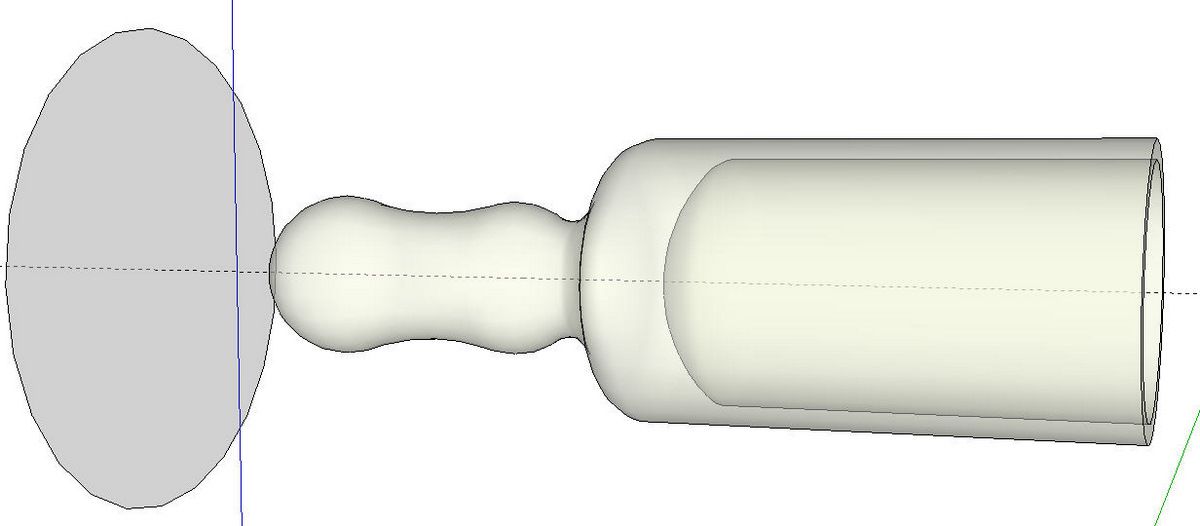
Here's the "turned shape after Follow Me. I've shown this in X-ray view so you can see the hollow inside. Make sure to correct reversed faces if there are any. I also softened edges between arcs which will show as concentric rings around the turning. You could also use the Weld plugin to weld the edges before running Follow Me.

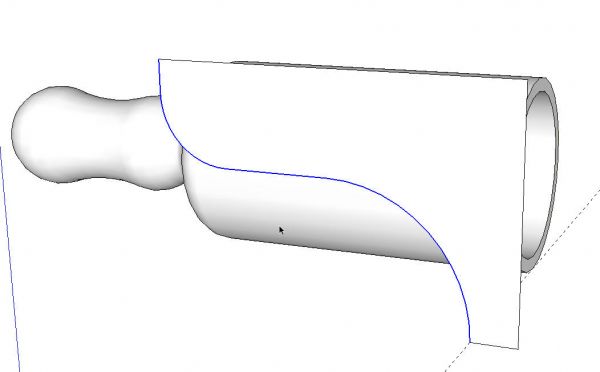
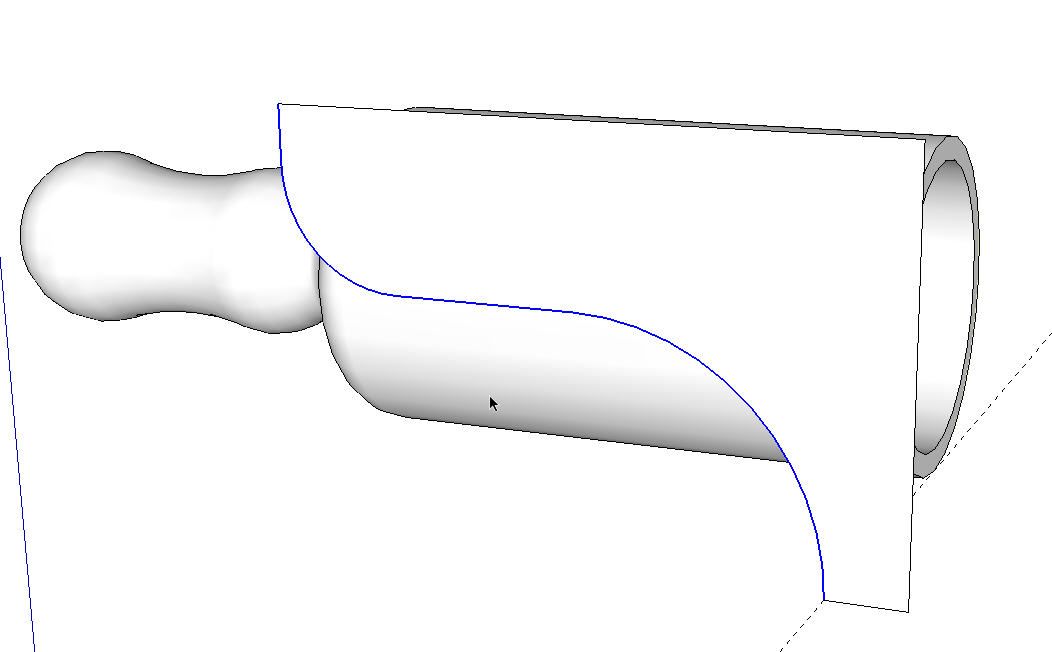
Next, I drew the curve for the cut on the scoop. This is the path a bandsaw blade would take as you cut the waste away. I made a face so that Push/Pull can be used.

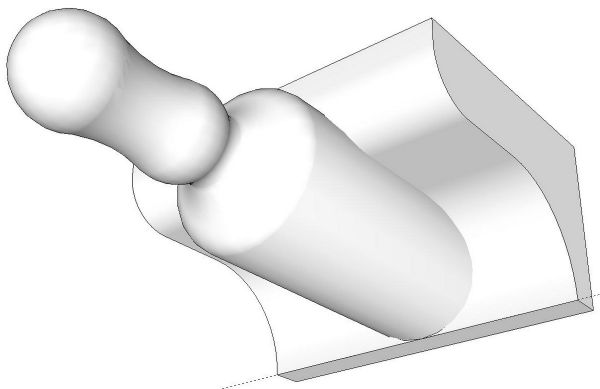
After Pushing the profile through the scoop we have the above. Notice there is no edge at the junction between the cylindrical face of the scoop and the extrusion. That indicates there's no intersection, yet. Select everything, right click and choose Intersect>Intersect Selected.
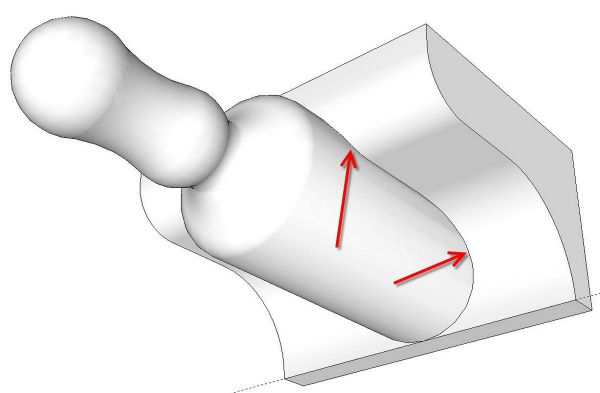
After the Intersect has completed the "cut line" will be present. Delete all of the unneeded faces and edges, correct the face orientation and the scoop is complete.
If you are somewhat new to SketchUp, perhaps you'll find this a good exercise to gain some familiarity with some important tools.
posted in: blogs
Become a Better Woodworker
About Design. Click. Build.
Learn the art and science of designing furniture in SketchUp with Fine Woodworking's official blog. Moderated by a devoted community of woodworkers, we feature step-by-step SketchUp tutorials on designing components, downloads of pre-built 3D models of furniture parts, and news and information about the evolving world of digital furniture design.
Buy the Video
Don't miss Dave Richard's brand-new DVD/video download, The Basics.
Buy the Book
Get Tim Killen's popular eBook, the Google SketchUp Guide for Woodworkers.
Basic SketchUp Tutorials
Learn the basics of building furniture in SketchUp with these classic posts from the Design. Click. Build. blog.
Creating a Project Plan in SketchUp
How I Draw in SketchUp
Axes in SketchUp
The SketchUp Move Tool
The SketchUp Rotate Tool
The SketchUp Scale Tool
Materials, Colors, and Textures
Applying Wood Grain Skins in SketchUp
Easy Dovetail Joints in SketchUp
Digital Project Plans
Download and modify SketchUp files for select projects from Fine Woodworking. View all. Top Sellers: Matt's Monster Workbench New England Pine Cupboard Garden BenchMeet the Authors
|
|
DaveRichardsI am a Biomedical Equipment Technician. I maintain anesthesia and respiratory equipment for the largest medical facility in southeast Minnesota. I...view profile |
|
|
Tim KillenI am retired from Bechtel Corporation after 36 years in Engineering and IT management. I grew up among woodworking machinery in...view profile |
|
|
FineWoodworkingEditors...view profile |


Comments (1)
Posted: 3:00 pm on October 4th
You must be logged in to post comments. Log in.