
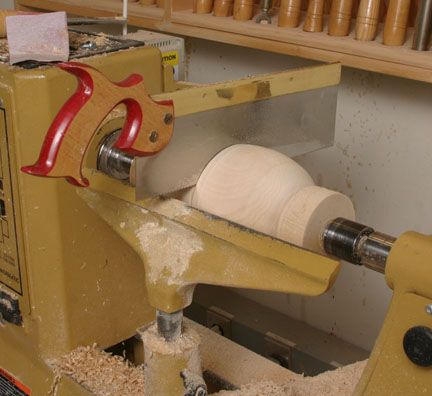
I've completed the turning of the outside of the pear-shaped tea caddy, and I'm half-way through separating the top and bottom with a backsaw.
I made plenty of progress on the tea caddy this week. I turned the piece, sanded it as smooth as I could, and began cutting the mortise for the lockset.
The turning was, for me, the most straightforward part of the project. In effect, I turned two bowls, which happen to meet rim-to-rim. After I turned the rough blank of basswood round, I reduced the stock at each end to about 3- in. in diameter, making tenons that would later be held in the jaws of a scroll chuck.
Next, following the pattern I made, I turned the pear shape. It’s just a couple of big coves and beads. No special turning technique required. I frequently checked the turning against my pattern to be sure I had something pear-shaped, not a bowling pin.
Once I was satisfied with the shape and gave it an initial sanding with P150 grit paper, I marked where the two halves would separate. I scored that pencil line with the tip of a skew chisel, then carefully–very, very carefully–worked a backsaw into the groove as the piece spun.
I hollowed the bottom half first, reasoning that I needed some latitude with the thickness of the walls, to be sure the lockset would fit. If I turned the top first and made the walls too thin, I wouldn’t be able to use the bottom half and would have to start over. Fortunately, the 3/8-in. walls worked fine. There’s plenty of room for the lockset.
As it was, I did skip one step. I should have checked the outside diameters of the two pieces where they will join, and shaved a little from the bottom half. Now, they’re slightly different diameters because of the material lost when I sawed them apart. I’ll pare the bottom piece by hand.
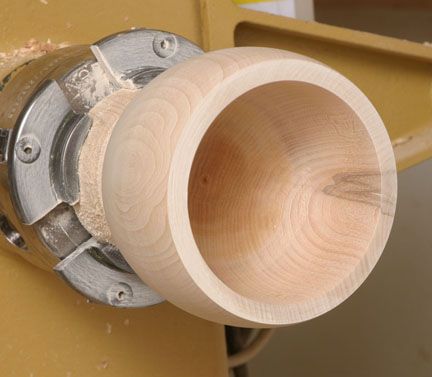
Again, no special turning technique needed. Hollowing the pear is the same as hollowing any other bowl or vessel. Sanding is another story, though. Because I plan to gild the inside of the bowl, I have to get the wood as smooth as possible. So I worked down to P600 grit. To keep the dust down and keep the wood cool, I rubbed the surface with a rag soaked in mineral spirits, then began sanding. It’s a technique I learned in the first turning class I took.
Once I was satisfied that the piece was as smooth as I could make it, I parted it off. That left a small nubbin of wood at the center, which I pared away with a chisel.
Cutting the mortise for the lockset was neither pleasant nor fun. Working on the inside of a curve was challenging. A FWW article by Phil Lowe helped immeasurably. Still, it was hard to reach inside the bowl to scribe the lines for the body of the lock and for the flange. I wound up using a single-edge razorblade, because it was the only tool I had that would fit inside the workpiece.
One unintended consequence (OK, two: I nicked my finger on the razorblade): I had to add a small piece to the top in order to give the latch for the lockset something to fit into. (This small lockset, doesn’t have a deadbolt; instead, turning the key engages or disengages a tiny latch that’s driven into the lid like a brad.)
Coming in chapter 3, gilding and finishing
-
I've completed the turning of the outside of the pear-shaped tea caddy, and I'm half-way through separating the top and bottom with a backsaw.
-
The bottom half of the pear, hollowed and sanded up to P600 grit so that the gilding will look smooth and even.
-
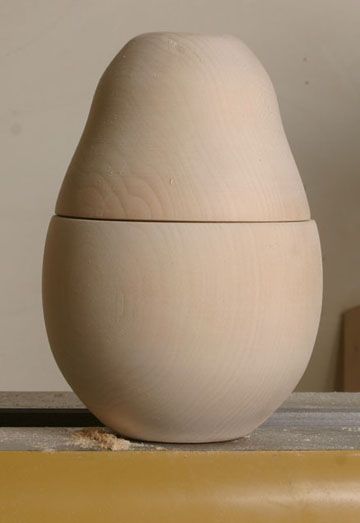
The finished turnings, ready for the next stages


Log in or create an account to post a comment.
Sign up Log in