In teaching SketchUp, I often find students trying to edit and work on a model that is zoomed-out to a fly speck.
As you probably know, this can make SketchUp a very frustrating exercise. Making and connecting components requires precise placements and movements, and these things cannot be done from faraway. This is why experienced SketchUp users are continually scrolling – that is, rotating the scroll wheel on the mouse. As discussed in a previous blog entry, the scroll wheel is very good at zooming in and out. It seems like a simple thing to do, but for a new user of SketchUp, even zooming in and out can be a challenge at first.
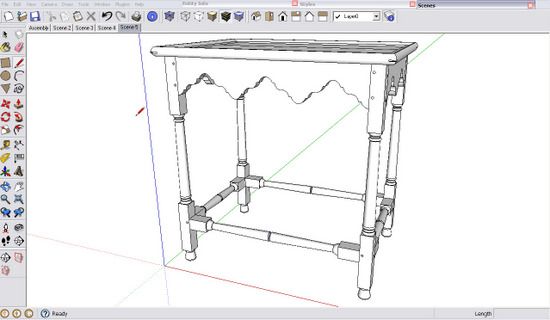
Importance of Mouse Cursor Position: Here’s the issue with zoom – you need to pay attention where you place your mouse cursor. SketchUp will zoom toward the point where you place the mouse cursor. If you have the cursor on the model or a part of the model, the zooming will go right to the model, and indeed, if you continue to zoom in, you will go right through the model. So to bring that table into a close-in view, set the mouse cursor on the table and begin to rotate the scroll wheel. As the table gets closer, focus your mouse cursor on the exact part of the model of interest and continue zooming.
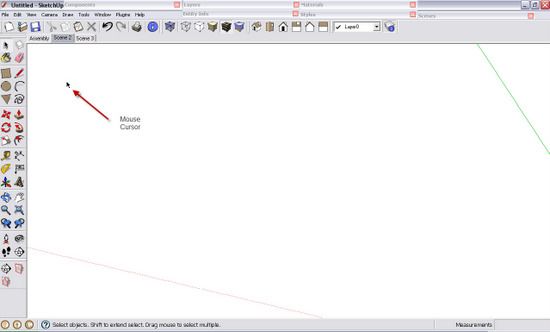
However, if you place the cursor out in space away from the fly speck model, and then begin scrolling (zooming), you can find yourself with no model in view and wondering where it went. If you place the cursor above the model, the model will move out of view away and toward the bottom of the screen. Placing the cursor in the left side of the screen will cause the model to move away and toward the right edge of the screen. And so on….. To center your model in the screen, move your mouse where the scrolling nudges your model in the desired direction. In this way, you achieve a panning action while also scrolling.
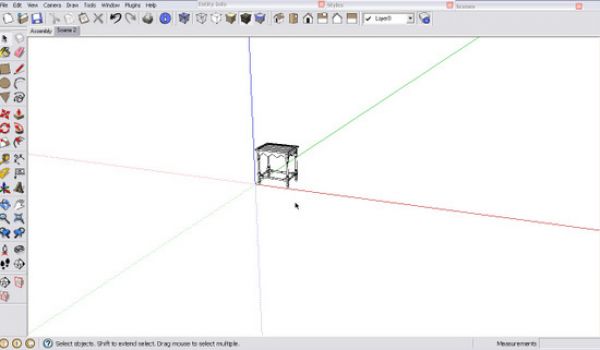
Here’s what happens when you place your mouse cursor in the upper left hand corner. The model disappears in the lower right hand corner.

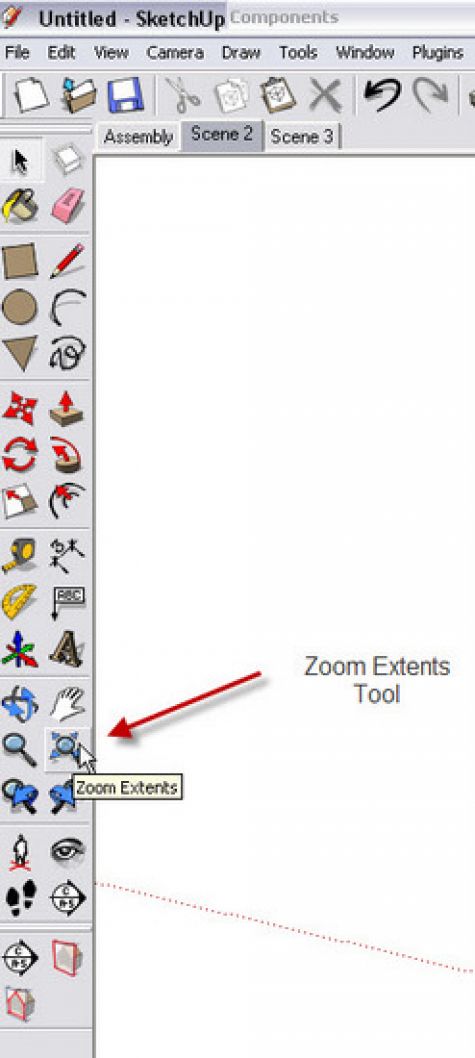
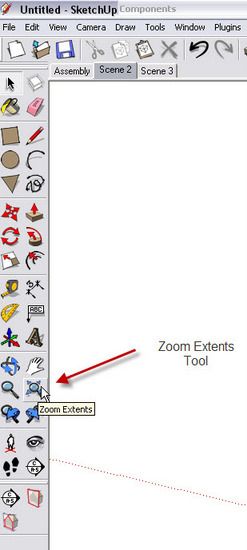
Whenever you’ve “lost” your model, there is help with one click of the mouse. SketchUp includes a Zoom Extents Tool and its position in the Toolbar is shown in the following image. When you click this tool, SketchUp gathers up all the modeling you’ve got and fits it within the screen.
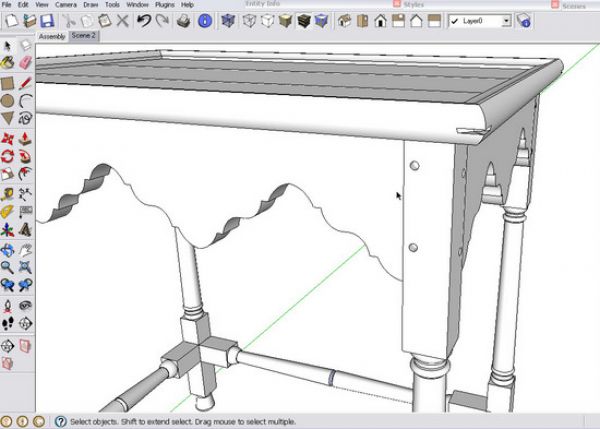
Here is the result of clicking the Zoom Extents Tool. So if you get lost, hit Zoom Extents.

One more thing about scrolling. If you have the mouse cursor away from the model, the zooming action may not be as efficient as when the mouse cursor is stationed over a model. That is, you spin the scroll wheel and nothing seems to happen. Just shift your mouse to be over some graphics and the speed of zooming will change dramatically.


Comments
Something to add is that the zoom amount (per scroll wheel rotation) varies based on the distance you are from the object to which you are zooming. I'm not sure what the exact algorithm is, but it appears that a rotation cuts the distance to the object in half with each rotation. So with each turn of the wheel, the amount of zoom decreases allowing you to have finer and finer control over the zoom amount as you get closer and closer to the object of interest.
This can be frustrating when you zoom inside a solid object, as the next object of interest is the opposite wall of that object. So you might need to rotate the wheel many times to traverse the 3/4" to the opposite side of a piece of wood (if you find yourself in a termite's perspective). This is when zoom-extents is most handy - to get you back outside of something you have drilled into accidentally.
Tim, I seem to find that the zoom feature works differently based upon where the cursor is located when I try to zoom.
If I try to zoom and my cursor is outside the model or object, it's like trying to zoom through jello. When you are inside the bounds of the model, it's like woodvice notes, one turn of the wheel and you can zoom right out the back of the item.
Now that's frustrating!
Ken T
Does it matter how far you are away from the 00 axis? I created a sketchup file where I drew 10 tables of different designs along the X axis. I am going through how I want to design the table. When I am working on table ten it is much harder for me to keep the table in view.
I created scenes to quickly get back to the table but is there a better way to do this?
Can you move the main axis?
Is it better to create separate files?
Tom8021: I think you are doing just the right things using one file and scenes. To my knowledge there is no difference to Zoom when close to the Origin. When you say that you have trouble keeping the model in the screen, can you further explain this and what you are doing at the time of the problem. Also you can send your model to me on email at [email protected].
Tim
Log in or create an account to post a comment.
Sign up Log in