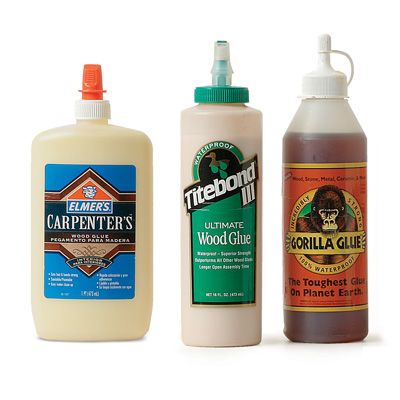
Complicated glue ups really are a sticky business. Multiple pieces need to have their fits checked and re-checked before the big moment, and when glue hits wood, it’s easy to turn beautiful joinery into one big mess. It’s not just about applying too much or too little either. When it comes to glue ups, knowing where and how to apply adhesive is just as important. Different joinery techniques require different approaches.
Glue ups should never be considered an afterthought–the easy part that comes after the skillful execution of complex joinery. Assembly requires a concrete game plan, an understanding of wood movement, and the experience to understand where glue should be applied and how much is really necessary.
And what about the age-old question of whether to apply glue to both mating surfaces, or just one? Over at Fine Woodworking‘s online forum, Knots, folks have been busy dissecting that very topic, with some interesting, insightful, and very useful responses. So where do you stand? Take our poll and read on for a variety of glue up tips and techniques.
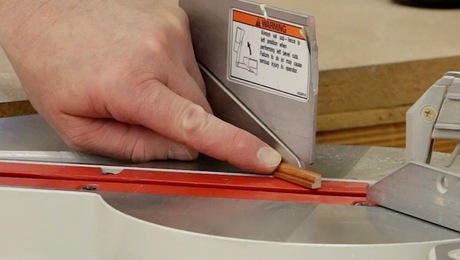
Glue Up Strategies: Mortise and Tenon
Every joinery technique presents its own unique problems when it comes to glue up. With the mortise and tenon, glue tends to be forced out of the mortise as the tenon is forced into it. Here are three solid techniques that will keep the mess out of your mortise and tenon joints.
|
|
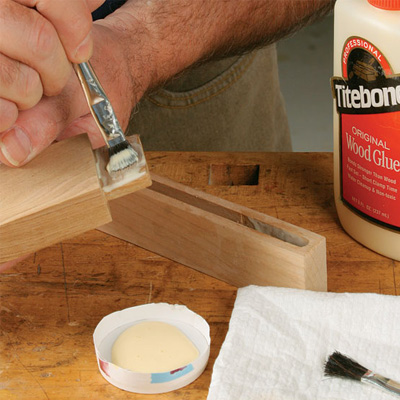
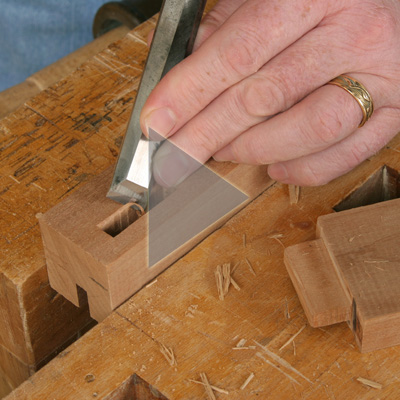
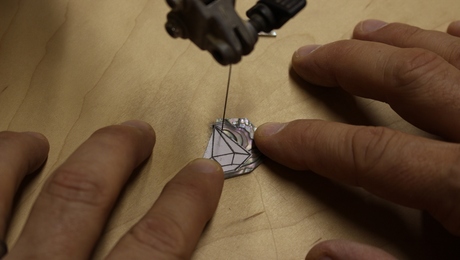
Barry Wishengrad of Jamesville, NY wrote in to us expressing frustration over his squeeze-out nightmares, which seem to occur most often with mortise and tenon joinery. Contributing author Bob Van Dyke suggests he clean the joint of excess glue, little-by-little, during the glue up process. |
|
|
The director of the Connecticut Valley School of Woodworking demonstrates how less is often more, when it comes to the glue up of mortise and tenon joinery. Not overdoing it and knowing where to apply adhesive are the keys to this take on the subject. |
|
|
Give Your Glue its Own Private Swimming Pool In this Fast Fix video, FWW senior editor Tom McKenna demonstrates a way to give excess glue a spot in which to pool. It’s fast, simple, and foolproof. Be sure to check out other Fast Fix episodes including: |
[[[PAGE]]]
Glue Up Strategies: Miter Joints
FWW contributing author Gary Rogowski provides two methods for tackling miters in the most common of situations: casework and picture frames. Rogowski focuses on clamping technique and what essentially amounts to priming of the mating surfaces.
Picture Frames
|
|
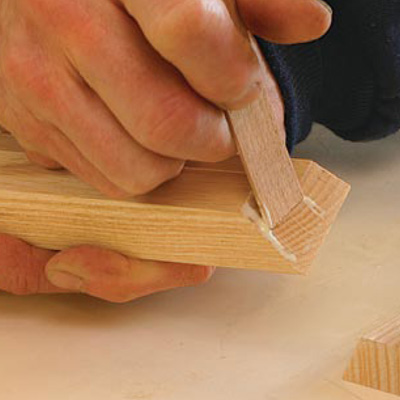
Before applying the glue that will eventually hold his mitered joints together, Rogowski first sizes the joint. Size is nothing more than a preliminary coat of glue which seals the end grain and prevents a glue-starved joint. After sizing the joint, he scrapes away the excess and waits a few minutes before applying the second, and final coat. |
|
|
When it comes to clamping, a mitered picture frame, simple really is better. Rogowski uses nothing more than a band clamp with a ratcheted adjustment. |

Casework
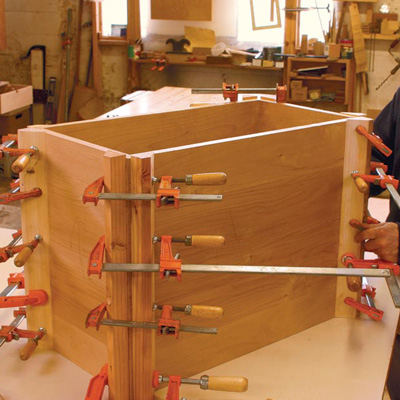 |
For Mitered Casework, Stick with Bar Clamps For mitered casework, forget about band clamps and reach for your tried-and-true bar clamps. Angled cauls direct the clamping pressure straight through the joints. To make the job even easier, consider using hot glue to temporarily attach the cauls and make tightening the clamps even easier. |
|
|
Angled Cauls and Hot Melt Glue Make for an Easier Glue Up Rogowski’s cauls come off the case at a 45-degree angle. Once you’ve tacked on the cauls using hot melt glue, it’s just a matter of tightening a series of sliding-arm bar clamps along the entire run of the joint. |

[[[PAGE]]]
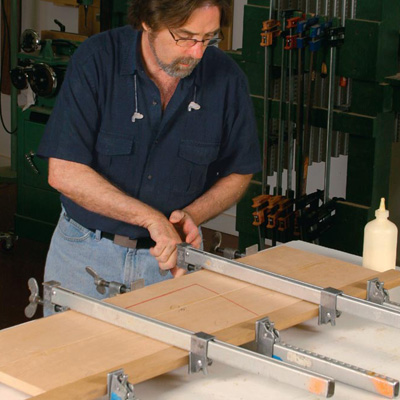
Glue Up Strategies: Tabletops
Here’s where differing opinions really come into play. Whether its among individual woodworkers or even Fine Woodworking staffers, everyone’s got their own take on how to glue up the perfect, long-lasting tabletop. Again, it all comes down to whether you follow the double-edge gluing tradition, or if you rely on applying glue to only a single side. Here’s one method that works well for FWW contributing author Bob Van Dyke.
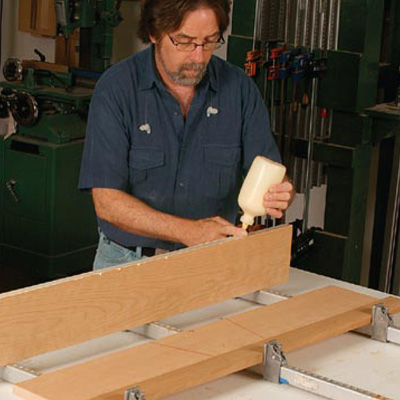 |
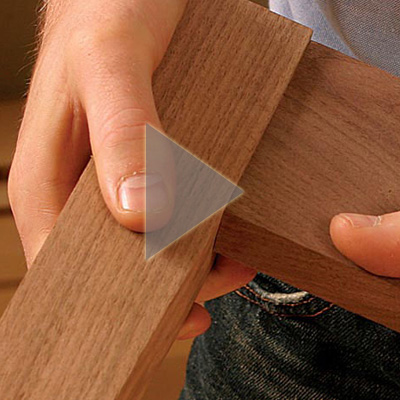
To begin with, Van Dyke doesn’t glue up the entire tabletop in one session. For wider tops, he generally glues up two sub-assemblies, followed by a final glue up that brings the entire top together. Here, Van Dyke applies a generous bead of glue to only one surface, spreading it out with his finger. |
 |
After pressing and rubbing the joint together, clamping pressure is applied. Whatever squeeze-out rises to the surface is quickly scraped off using a putty knife.
|
 |
Now Van Dyke turns his attention to the top clamps, applying firm and even pressure throughout. For more on this technique, be sure to read Van Dyke’s entire article on Creating an Attractive Tabletop. |


Comments
This is a very disappointing blog entry and is typical of many FWW blogs lately. There is almost no useful information in this blog, yet it was featured on the home page. I checked it out because I hoped to find a useful tidbit. Instead I was referred to Knots, which I already check regularly. And then, there is another poll. These polls appear to be a new FWW technique for stimulating member interest. It doesn't work for me. Good practices are not a matter of public opinion. They are a result of experience and practice, which can be carefully explained using skilled writing. Let's have more of that.
Well said Tom77!!
Agree, I expect experts who give advice to start a blog, then I can comment or ask questions.
Hi Tom77,
The purpose of a poll is indeed to stimulate member interest, and that's why the polls allow users to leave comments. To simply say "yes" or "no" would be pointless. Hence, we like folks to leave input that many times, is quite valuable.
As always - thanks for commenting - and keep 'em coming!
Cheers,
-Ed
Tom - if you didn't see them, the subsequent pages (1 | 2 | 3 | 4 next>) contain tidbits.
Whether they are tasty enough is up to the individual reader, of course. ;-)
Ay ay ay,
Indeed Tom, there are a few more pages to the post:)
Cheers and happy gluing!
-Ed
Definitely both surfaces, unless one of them is veneer. Isn't this one of the fundamental truths of joinery? Along with clamping as tight as the assembly permits - the notion that we can squeeze all the glue out is as flawed as risking a joint with glue only on one surface.
Agreed. How about more skilled, and useful writing? That's why I come here.
I apply glue to all surfaces with a acid brush, including the mortise voids. The top of the mortises are relieved to accept excessive glue roll out.
Bill Kirk @
[email protected]
As several of the respondents indicated, I hoped to learn how to best deal with this sticky question from experts in the field.
With "regular" wood-glue, both sides, but relatively thinly to avoid making the glue-line too thick, and to reduce or eliminate squeeze-out. I also tend to clamp whenever possible, even if it's only a bungee cord wrapped around the joint.
With "foaming" glues like Gorilla, I usually apply only to one side, and wipe the other side lightly - VERY lightly - with a damp cloth, the idea being to get some water into the wood for the glue to react with.
Have to say, this seems like a pretty rudimentary topic.
When I was teaching high school woodshop, my students used urea-formaldehyde (plastic resin powder mixed with water) glue for edge to edge and face to face glue-ups. I taught them to coat both surfaces. Sometimes the project would fall apart and on investigation I would find that the glue was only applied to one surface. When we used poly-vinyl acetate (carpenter's glue) I had them apply to one surface, press and slide the second surface to the first, pull it apart and insure that both faces were coated. Lastly, now that urethane glue (gorilla glue) is available, I coat one surface and wet the other with water. In my shop I keep several types of glue for different applications.
There were some handy tips here. As a newly retired engineer, I have time now to pursue woodworking as a hobby. I appriciate these tips. They may seem simple to more experienced woodworkers, but they help me learn and avoid costly mistakes.
What should be the first rule of glue ups has not been posted: apply the glue to the surfaces carefully. Too much, too little, and in the wrong places causes the problems.
I find the information here, even in small bit and bytes, useful but hard to decipher, I really have to want it to get it. What bothers me most and to me makes the comments almost useless is the way they are posted newest on top. It is very, very difficult to follow a topic thread last to first. Why can't you have new comments added to the bottom? I know that can be done because I do it on my blog and many I read are like that.... Please and thank you! Ed Kirkpatrick
I have used tite bond 50 and slowset for quite a few years.The technicians at franklin International and Helmitin suggest applying glue liberally to one surface only for face or edge glueing if the wood on both edges is no more than 2% different in moisture content.On mortise and tenon they suggest glue on both tenon and mortise because of the assembly time, the more glue there is the longer the open time.Often in the winter there is more joint failure because the heat in the shops is driing thesurface of the wood more, when it is too dry it wicks the moisture out of the glue too quickly and dries before assembly is complete.When glueing up for exterior I use titebond 3 and wet both side of any joints even the shoulders of the tenons, I fel it helps to seal the endgrain
Glue??
I read Bob Van Dyke's tips on avoiding glue squeeze out and troubles with getting PVA glues completely removed to avoid finishing troubles later. Good advise. Another angle to consider: hide glue. Even if you get squeeze out it peels away very easily. If there is a spot you missed, it doesn't discolor the wood like plastic glue. So?? you don't want to mess with a glue pot that's OK. You might try Olde Brown Glue from Pat Edwards(San Diego California). This stuff is great and you have loooooooooooooooooots of open time. Just another possibility.
dan
I’m sure that this magazine caters to a range of woodworkers-from beginners that need instruction on simple, basic methods to experts, who may prefer a comment format to share more advanced methods. Any particular article will not suit all readers.
I’m somewhere in the middle skill-wise, but still preferring a single basic method that verifies and guides my shaky knowledge, rather than reading about a range of methods by experts. So I search for lessons, not opinions. Expert readers may want different topics entirely. Glue-up tactics seem more basic.
I know that various experts have various methods, but I trust the staff of FW to only offer generally accepted methods that will work, and I need to learn just one way that will work for now. I don’t have the experience to judge various methods now. Perhaps I’ll wander off that trusted path later.
Perhaps the magazine needs to classify the entries as either beginner, intermediate and advanced. Then we can access only what we’re interested in and not have to wade through it all, only to find that it’s above or below our grade level. A waste our time either way. I think we may all appreciate that.
Call me unadventurous, but I don't presume to know better than the manufacturer of any particular glue, who I assume has put more research time into it than I ever will. So I follow the instructions that they have gone to the trouble of providing for me.
It is a radically novel approach I realise, but one that I find has paid dividends in most areas of life.
Several respondents refer to the use of urethane glue (e.g., Gorilla Glue). Please take note of a test of glues reported in the July/August 2007 issue of Fine Woodworking. Gorilla Glue came in dead last.
To all the respondents who feel this topic is too rudimentery, don't read it. Alot of us no nothings appreciate any and all information.
Unless it's going outside I use good old fashion Elmer's White Glue.Period... White Glue is just as strong and has a better work time then all the other (more Advanced) glues. If i'm doing veneer work or something that really takes a long open time I use hide. If I want to use Gorilla glue I'd just as soon buy a can of spray insulation foam and use it. Gorilla foam has no place in my shop.
Sometimes you don't have to apply glue to either surface...directly that is! Gorilla Glue solved a problem I had with an oak stair tread. An edge joint failed (the tread was made up of two boards edge glued together) and removing it to replace or repair it would have been difficult. Applying a bead of Gorilla Glue down the center of the full length of a 4" wide metal plate, which was as long as the tread, and screwing it to the underside of the tread (with the bead of glue centered underneath the broken edge joint) took care of the problem. The glue, which expands while curing, was forced into the joint - the metal plate prevented it from expanding elsewhere. The next morning all I had to do was removed the thin line of excess 'squeeze-out' from the top of the tread. Two years later the tread is still solid. Gorilla Glue has a place in my shop!
have to agree with Tom77 here
I would like to build some canoe paddles and I'm looking for an adequate,convenient glue for this purpose. Any suggestions welcome.
To otherbrother re: canoe paddles
Forget the laminating.
The best paddles are made of Ash.
They are light, strong and have a nice spring to them you will never get from laminated paddles.
If i'm glueing a table top, I use glue on one edge only. And whenever possible, I 'slide the mating pieces together. That gets both sides.
Dowels I use Q-tips to spread glue in both holes. Sometimes there is little need to spread glue on the mating surfaces (if they ar small in are).
Log in or create an account to post a comment.
Sign up Log in