
In this post, Fidgen shows how to glue up his bench. Read parts one, two, three, four, five, and six, for more details on this project.
The Glue-up
In the last post I finished off the cut out for the granite plate insert and I’m ready to start the glue-up. One last detail I took care of before beginning to glue the frame was to plane some rabbets into the lower cross stretchers. I didn’t get any shots of the process but they’re shallow rabbets about 1/2″ wide and only 1/8″ deep. Their purpose is to create a small lip to register a shelf against later on. These could be eliminated and simple batons screwed to the shelf bottom would act as guides but they only took a few extra minutes to make and will benefit the design and make the shelf installation that much easier.
With the rabbets complete I can finally start to glue. First thing I do is assemble everything I’ll need for the process, glue, clamps, paper towels etc… it’s easier to do this now before getting started, instead of scrambling around looking for something I need while the glue is starting to set!
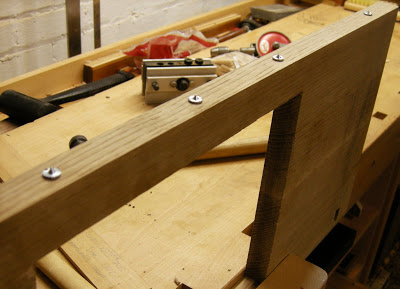
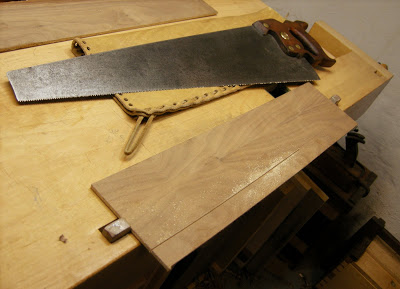
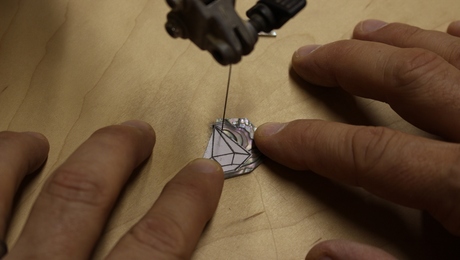
I begin with each side frame and will glue these up before adding the cross stretchers. I lay them out on the bench and start spreading the glue- lots of it! This is a workbench so I’m not too worried about any squeeze out. There are certain liberties you can take when building a piece destined for the workshop and not someones living room. When I have everything clamped I’ll check for square and measure my diagonals. As soon as the glue sets I’ll drill down through the joints to drive in some hardwood dowels. With a generous amount of glue I drive the dowels home. I leave the side frames to sit overnight and in the morning I’ll trim off the dowels.
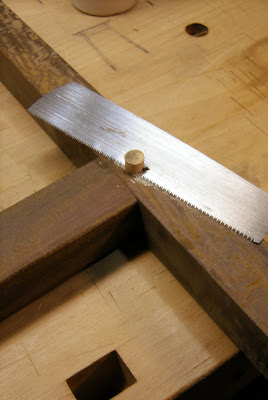
I use my Japanese flush cut saw and follow with a low angle block plane.
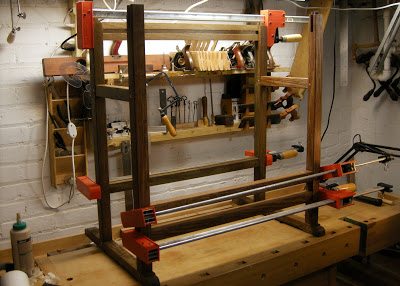
This completes the side frames and I repeat this process with the two frames standing on my bench top and the cross stretchers in place. I place a clamp across each stretcher and let things ‘cook’ awhile. Once the glue sets I’ll follow the same procedure by drilling and pegging all of the joinery.
With the frame glued I clean off my bench top and turn my attention to the surface pieces. The main work surface area has bread board ends set into the side aprons but to add some extra support I’ll use some blind dowels where it attaches to the front apron. I use a self-centering jig and drill a few holes down the front edge of the surface piece.
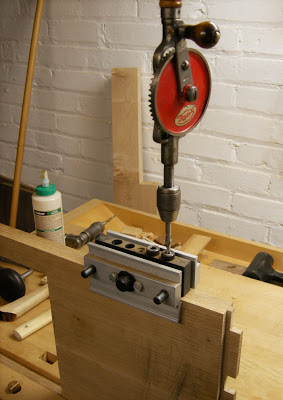
Once drilled I can insert some dowel centers and dry fit the pieces one last time. When the surface pieces mate these dowel centers will leave tiny dimples in the oak showing me exactly where I’ll need to drill.
No measuring and no guess work, the dowel centers and centering jig are great work shops aids that make things run a little smoother in the wood shop. Again, these are some jigs that you may not have considered using in a hand tool only workshop.
I take the dry assembly apart and drill out the dowel locations. Again it’s time to start spreading some glue so I’ll go through the ritual of organising everything I’ll need for a stress free assembly. I should also mention that the bread board ends have three tenons in each- the middle tenon gets glued but the two outside ones are left dry. Once assembled all three will be pegged with hardwood dowels as well.
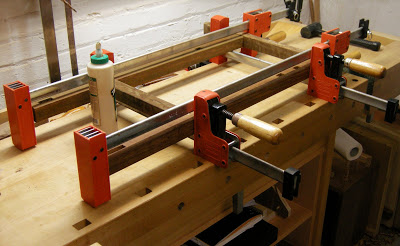
The two side aprons are first followed by the front and rear. Then the whole surface is clamped up tight to draw the dovetails together. Another night to set and in the morning I’ll see how I did. If you look closely at the following picture you’ll notice the placement of the clamps on each outside edge; they’re placed just inside the end of the dovetails so that when clamped tight, the extra meat on the dovetails won’t keep the assembly from coming together tightly.
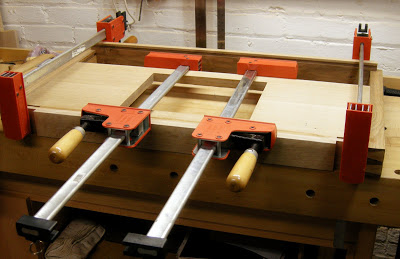
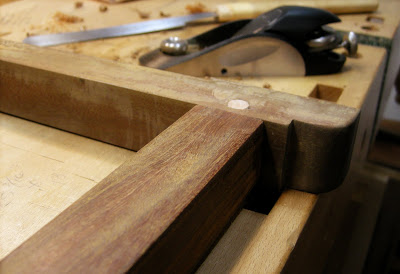
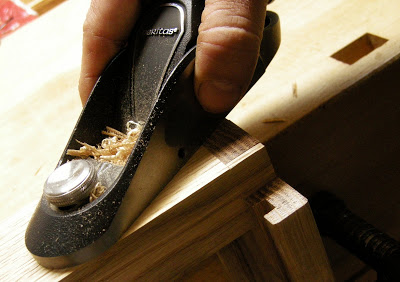
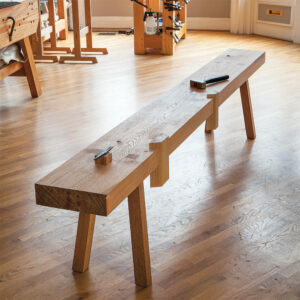
Sunday sunrise I come down to the shop to find the bench top is looking pretty good. The clamps are removed and I’m happy with the results. I scrape off the squeeze out and with a block plane I’ll trim the dovetails flush with the apron surfaces. I don’t have a whole lot of material to remove so it goes pretty quickly.
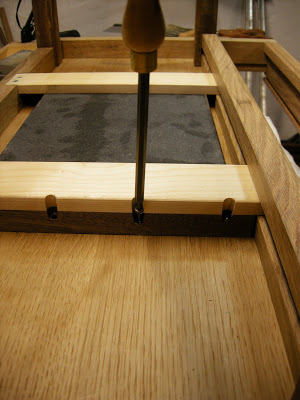
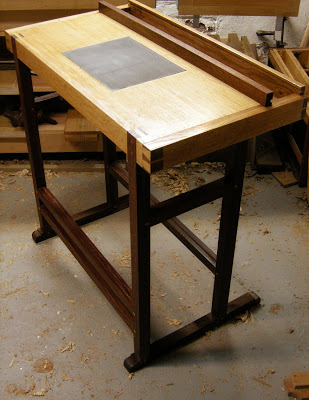
From here I’ll take the top assembly and place it good side down on my workbench. I’ll spread some glue for the frame and attach it now. The front slip joints will also get a couple of dowels for added strength- one through the leg and into the oak top and another an inch down through the middle of the joint. Now I can assemble the under carriage. The granite plate is inserted into the cut out and I’ll add the cross stretchers. These are the ones I put the pocket holes in to keep the granite living where it’s supposed to be and not falling out onto my workshop floor.
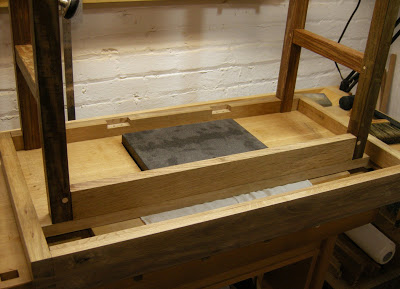
Two of the four drawer hangers are added as well (at this point I still haven’t decided on my final drawer configuration) and I’ll turn it back over onto the floor to check how the granite plate is sitting.
A reliable straight edge shows me that the granite is sitting just proud of the oak surface. This is good!

I’ll use up a little off cut of 1/4″ walnut plywood from the scrape pile and rip it to size for the tool tray bottom. This is cross cut into two pieces for times when I want the extra depth in the tool tray- I can easily remove one side or the other.
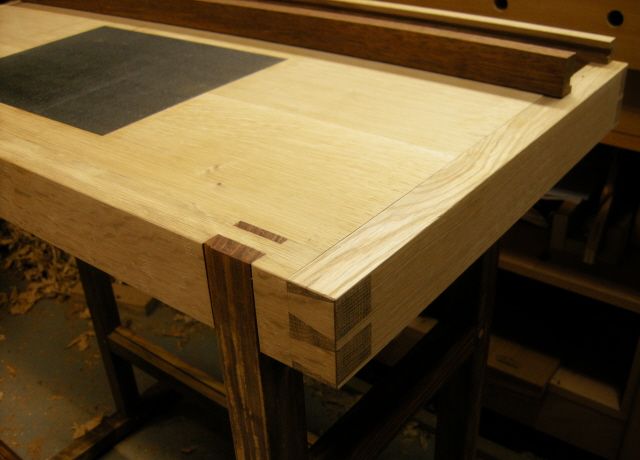
I give everything a coat of boiled linseed oil and paste wax and call it done for today. In this last shot you can see the shallow rabbet in the lower stretchers.
In the next post I’ll build the drawers and add the details….stay tuned.


Comments
This is a great blog. Thanks for the inspiration.
Love the constrasting wood colors.
Tom,
Wonderfully written piece with beautiful photos. The combination of hand tools and new technology is nice to see. The final product is stunningly simple and attractive.
Dan
Thanks for the comments everyone-
jeffb, I also think the wood is a nice contrast and was a coincidence really...the oak was taken from offcuts and the ipe was the cheapest hardwood I could find ! ;)
must be some 'good wood charma' I guess?
thanks again.
When you pegged the tennons of the breadboard did you make a slot in the outside tenons to allow for expansion and contraction?
discusthrower-
thanks for the question- I did indeed drill some holes into the tenons before assembly and with a small file I elongated them for movement. These tenons were also left dry- no glue. I forgot to mention that step in the write-up...
thanks again.
Hi Tom,
Beautiful work. Your book is on my reading list as well. Question: How are you managing wood movement around the granite block? Or are you concerned about it at all? I can't tell what size gap you have around the block. I know you simply cut a hole. It looks like a snug fit.
Pardon me if this question has already been asked. I was thinking of doing a kitchen counter top with maple framing granite inserts and I'm looking for wisdom on this subject.
Hopefully, you have plenty of wisdom in stock. : )
Chuck
Rhysling- thanks for the comments and the question. First thing is the material selection- I used quarter sawn white oak which is a pretty stable wood for cross grain movement. That said, wood will always move so I'm hoping the granite just strolls along with it!
If you notice the hangers underneath, there's room for the granite to move from front to back with the oak. If the oak opens up some, which is unlikely due to the time of year it was built, but if it does- then I'll have larger gaps around it. If it shrinks, then it'll be as tight as a drum and I may have to shave off some wood. I don't think that will happen either...I did leave a whisker around it- maybe and 1/8" total? If I was setting it into a countertop for a more permanent location, the you may have to consider leaving a hair more. Consider the species and the cut you're using and try to guess at the total movement you'll see. There are ways of figuring this out covered in some great articles on this web site- search for wood movement articles and go from there..
Hope that helps- good luck!
Wow, really nice work Tom. And very good naritive with the photos. I read the whole seven postings like a good book, couldn't stop until I read the ending. I have been reading something else related, Bruce Hoadley's "Understanding Wood" the new revised edition. I believe that Rhysling has a good point about potential wood movement. Not to take away from your outstanding skill and beautiful design, I would suggest readers consider the cross-grain movements that will take place in the top (around the oak) and what appears to be a restriction where the breadboard ends (that are "free to move") but are then held solid by the front apron dovetail joint. I have had my own trouble with this type of set up in setting in tiles on a table top and have found the best solution for my region is oak faced plywood instead of the solid 1-inch stock. The bread-board then covers the plywood edge grain and the front apron can be safely dovetailled (and glued) to the bread-board. Hope this helps, I highly recommend Bruce's book, also well written.
Robert.
Robert- (birchwoodguy)
thanks for the comments and the tip on some great reading!
I know what you're saying with the top movement and hope I won't have too much trouble with it. The surface being attached to the front apron doesn't seem like an issue to me- I think when the top expands it'll move where it can and that's towards the back where the surface is only 'floating'. The front of the tool tray is also floating and actually has a small rabbet to deal with any opening seams. The granite is sitting on runners and is also free to move with and when the top does. When the oak contracts then the opposite will take place. The surface will move away from the rear tool tray so I'll simply nudge the front of the tool tray forward closing any gaps.
A plywood or similar sheet product would illiminate any of these potential issues and may be worth considering when people build versions of the plan. I've seen a few excellent examples of plywood surface benches and if I didn't have the oak offcuts already here in my shop, might have considered using something like it. Examples of bread board ends used in traditional workbench construction is also pretty frequent and I'm hopeful I won't have too much of a problem with wood movement. Time will truly tell so I'll post something in the summer and then again next winter. The bench isn't going anywhere and I'll still be right here working wood!
Have a happy and healthy New Year-
Cheers!
This was a helpful plan. My students liked it very much. They ask for one that I think you need to include. Yhis a materials list. Is there any other materials this has been made from?
Thanks Tom, I had not realized the back tray was free-floating, hope this provides enough movement for the oak as it would be a shame to have any splits develope in such an outstanding piece. I am building a new shop and will want a dedicated sharpening area myself and am thinking of your design but with Walnut for the legs and Beech for the top. I figure it will give a nice contrast like you have in your work, but the Walnut will be easier to work (but may need to be a bit more beefy in dimensions) and the Beech for the top will give me a more closed grain surface to prevent water from getting through the finish and to ease clean-up. Let you know how it turns out! (I have to say I sure admire all your hand-work and your collection of Veritas tools! Wow!!)
Log in or create an account to post a comment.
Sign up Log in