As mentioned before, I will do a series on the Thomas Elfe Breakfast Table including the legs, pierced skirts, stretching rails, and wooden hinged leaf supports. I’ll be doing this series in a sequence that I would use to “build” the table. It’s no coincidence that this sequence is much aligned with the actual construction in the shop. I find that SketchUp works best when I follow a process that would be used in the shop.
Along those lines, I will start with the leg construction. The legs are 1 1/2 by 1 1/2-in. square in cross section. But they have some decoration which makes them an interesting project for SketchUp.
By the way, I was able to acquire a book by Samuel A. Humphrey titled “Thomas Elfe Cabinetmaker”. This book has wonderful orthographic dimensioned views which I’ve imported into SketchUp. I was able to copy the beautiful shapes in this piece by tracing over these imported views with the Arc and Line Tools.
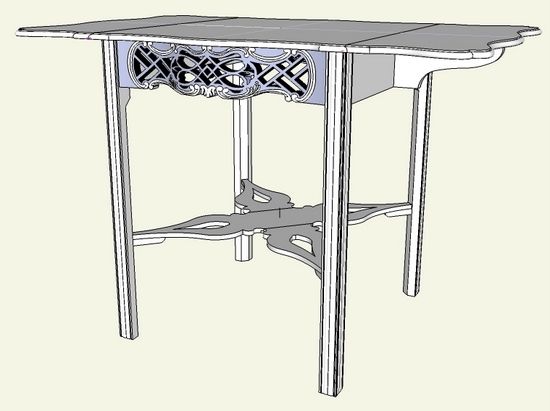
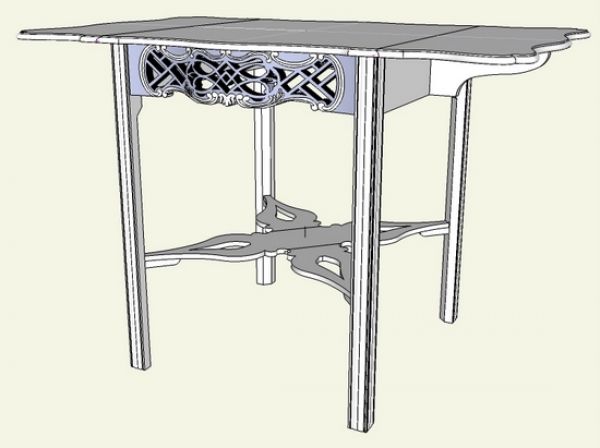
First, here is the completed model of the Charleston 18th Century table.
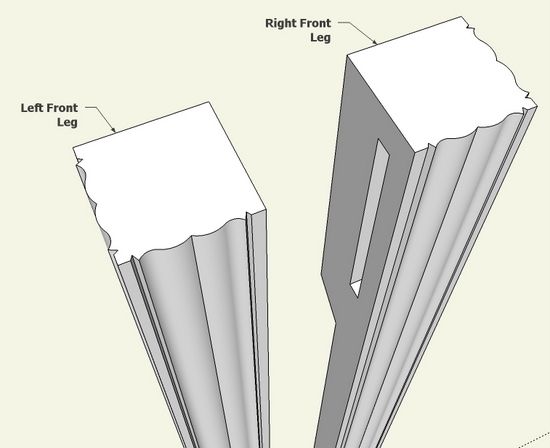
Here is a close-up top view of the front legs showing the decorative surface on two adjacent faces of the leg.

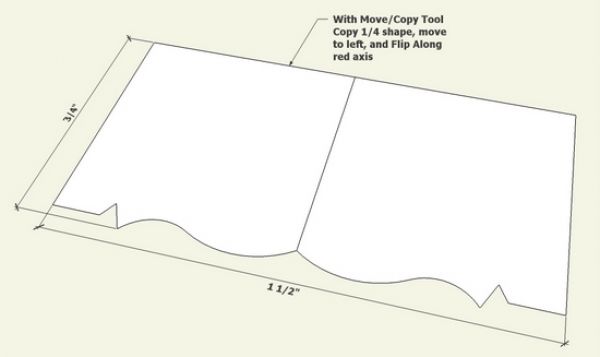
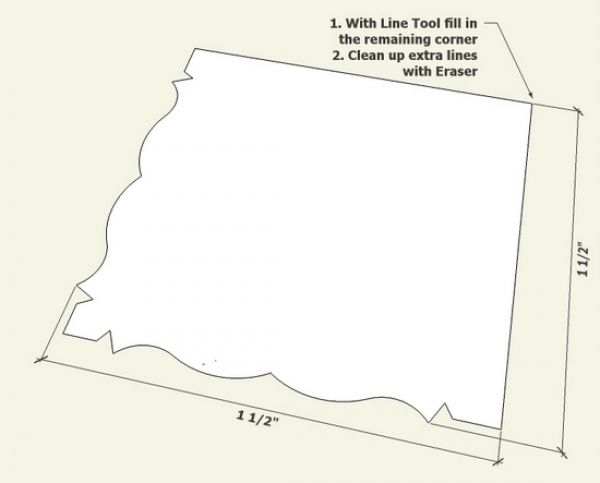
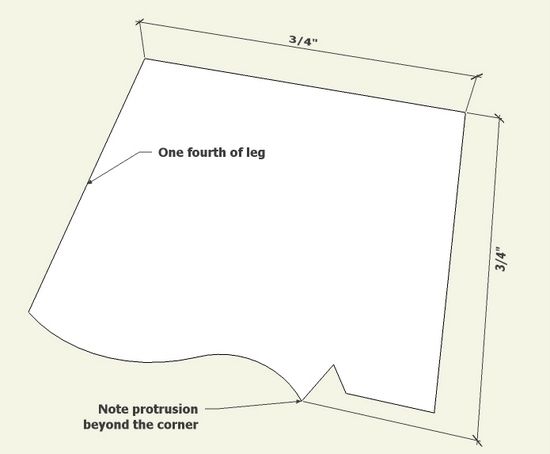
Step 1: The above referenced book has a detailed top view of the leg and I was able to copy this shape in SketchUp. I created the shape only for one-fourth of the leg since there is symmetry.

Step 2: Use the Move/Copy Tool to make a full 1/2 of the the leg cross section. Use the Flip Along function to properly position the copied quarter.
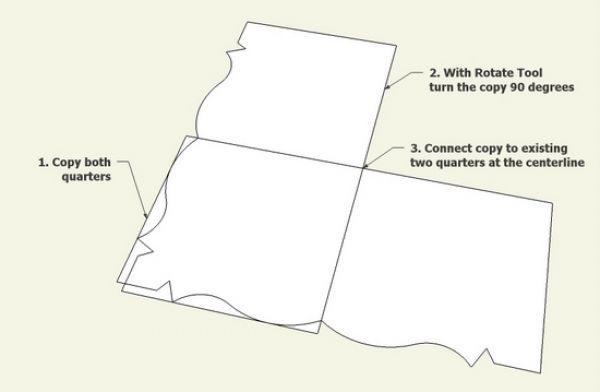
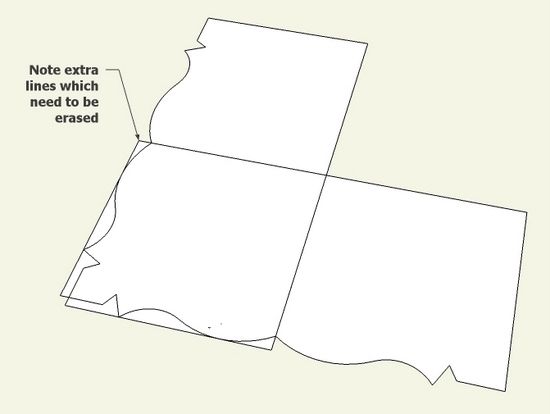
Step 3: Copy the one-half, rotate and connect to the first half at the centerline.
Step 4: There will be clean-up required with the Eraser Tool.

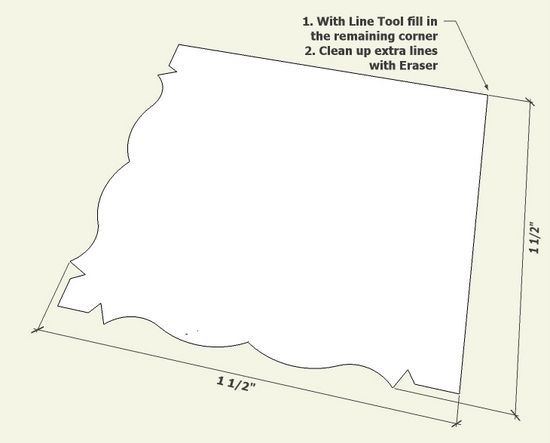
Step 5: Now fill in the final quarter of the full cross section. We should have a 1 1/2 x 1 1/2-in. face as demonstrated by placing dimensions. With the Push/Pull Tool give the leg its full length.
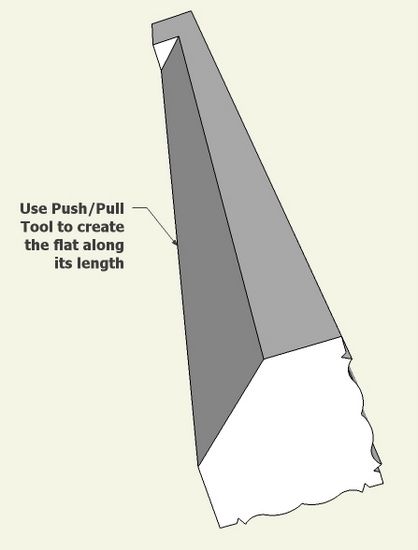
Step 6: Typically in Chippendale-style, the legs have a flat cut-out in the back corner. This flat is about 15/16-in. wide, so I placed guidelines to help find the endpoints of this flat area. Place a line between these endpoints and we are ready for a push/pull.
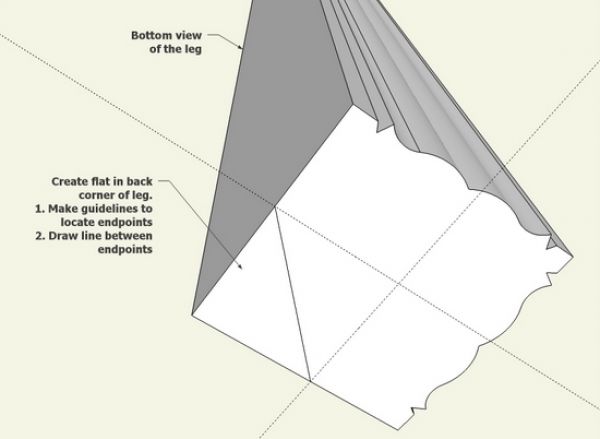
Step 7: Use the Push/Pull Tool to create the flat along its length.

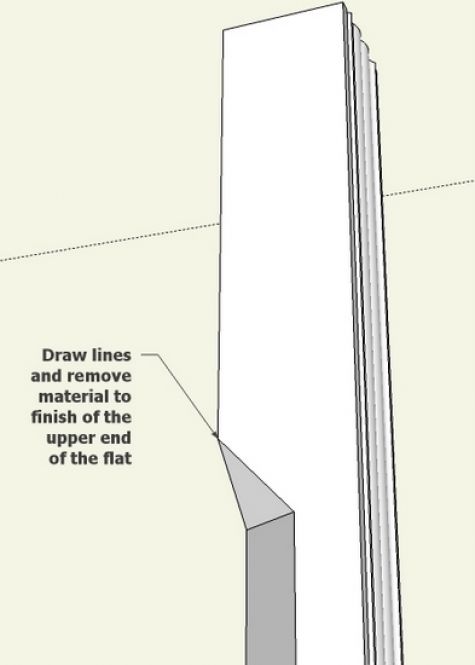
Step 8: The squared off end of the cut-out requires modification with the Line Tool and Eraser to easer.
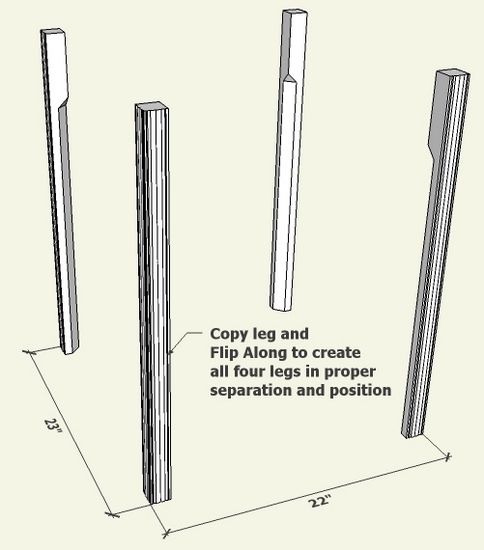
Step 9: With the Move/Copy Tool, copy a leg (requires tapping the Ctrl Key) and move it to the right. Right click on the copied leg, and select Flip Along in the pop-up menu. Now copy the pair of legs and move them down other axis and again execute Flip Along.
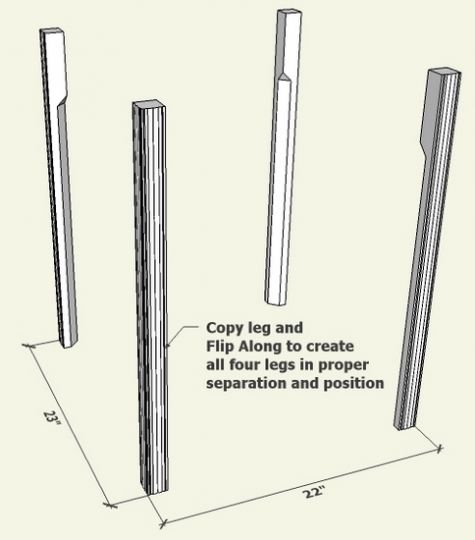
All the legs should be properly separated and positioned for the assembled table. We will use this existing leg framework to build out the remaining parts of the table.
We’ll complete the leg mortises after we install the skirts and rails.


Log in or create an account to post a comment.
Sign up Log in