
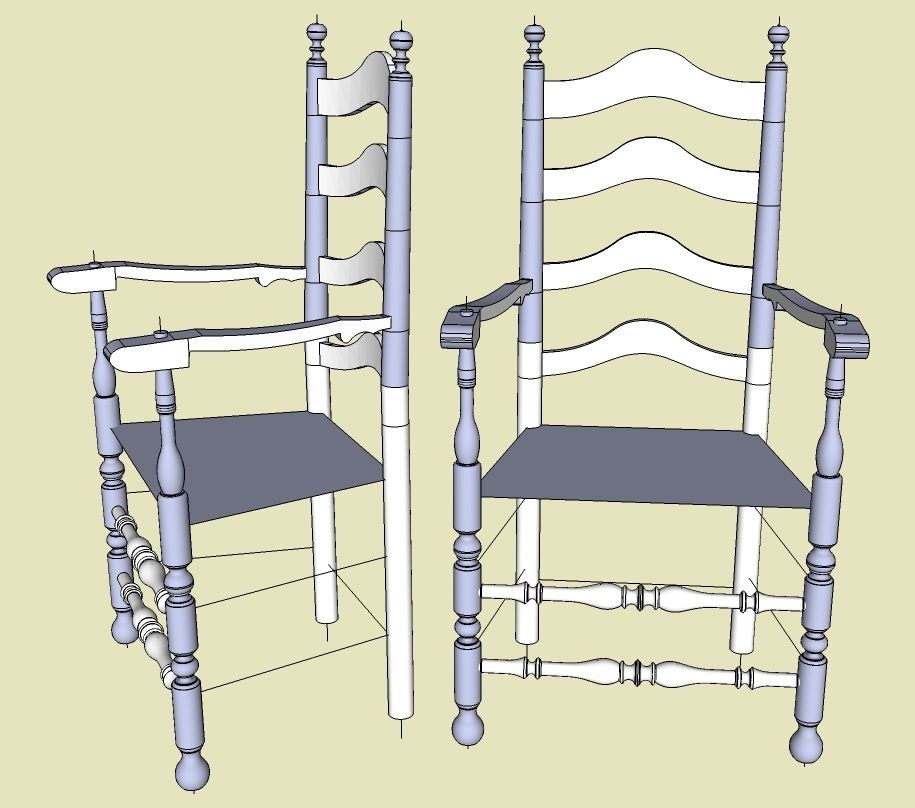
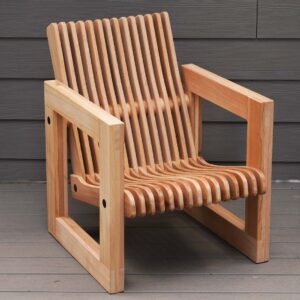
Recently I have been modeling an 18th C. Ladder Back Arm Chair (Connecticut, Circa 1740). Here is a picture of the modeling status so far.

Again I faced the creation of Back Slats – four of them, all of different graduating sizes. In this case, I tried making these components all in one go. Here is the procedure I used.
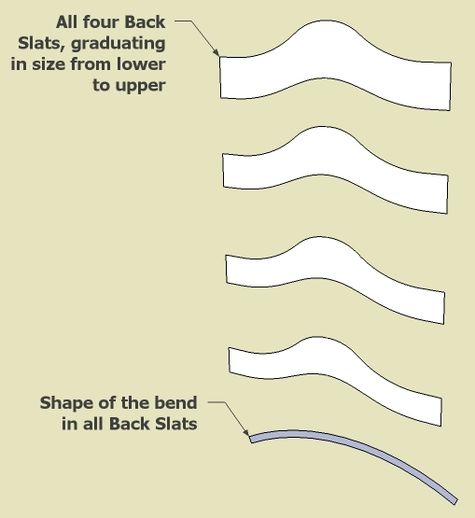
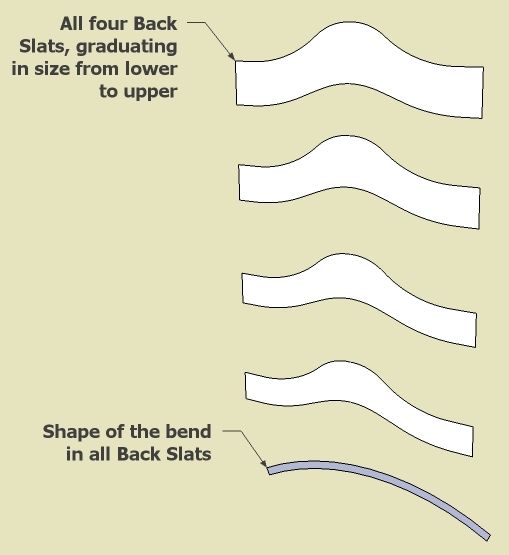
Step 1: Make the flat front facing patterns for each Back Slat. Also create the shape of the bend and the thickness of the slats (in this case 1/2″).
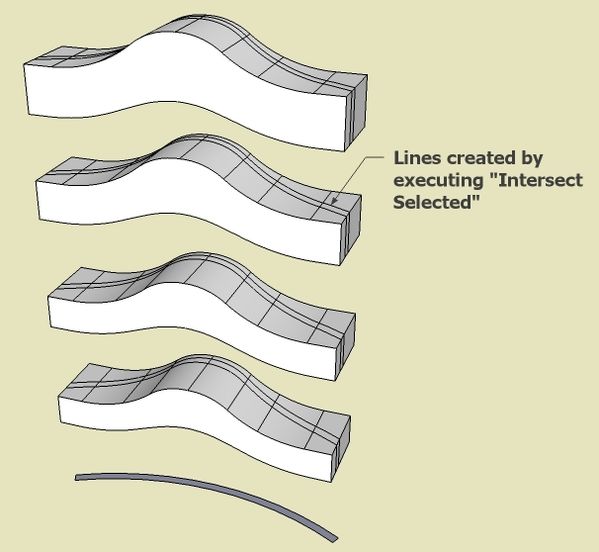
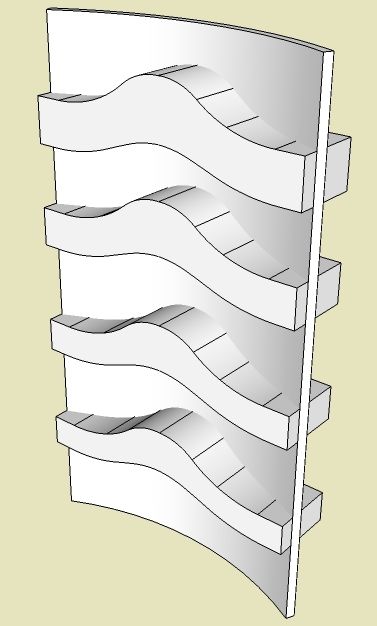
Step 2: Push/Pull the flat front facing patterns to a couple inches thick. Then raise up the bend pattern with the Push/Pull Tool so that it protrudes through all four of the back slats.

Step 3: Select all, then execute “Intersect with Selected”
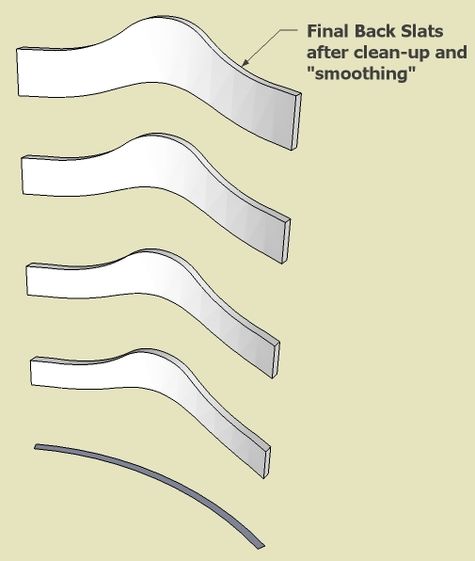
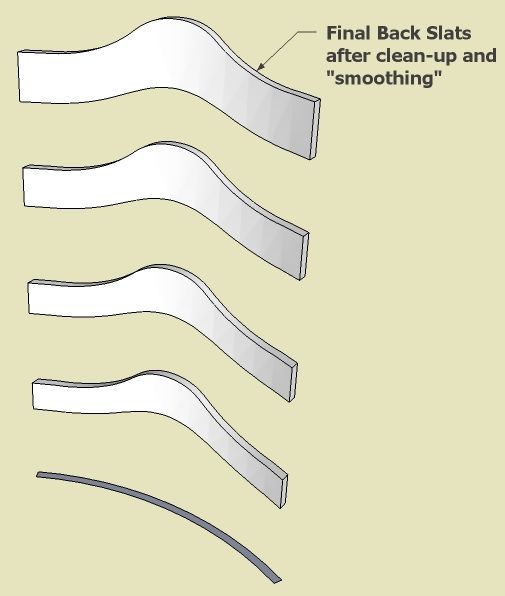
Step 4: Delete waste, clean-up and smooth…….
There are other interesting SketchUp procedures in creating this Ladder Back design that I will cover in future posts.
Tim Killen


Comments
I am not able to print the articles. Only get the first page. Help
Hoop: can you send me an email telling me what browser and operating system so are using. It could be a bug with our new blogs. Send to [email protected].
Thank you. I had been working on a part of this problem -- drawing one curved slat. I had almost figured it out. Its great to know how you did it, and three at a time is a lot more elegant. This should save your readers a lot of time.
I'm looking forward to further posts on drawing chairs.
Your chair has more of a Pennsylvania feel to it - rather than a Connecticut influence. Also, your front posts are more like that of a bannister back chair not a ladderback. Don't get me wrong you have done a fine job.
Making the slats can also be done by boiling thin pieces of wood cut to size/shape and then dried in a press made in a similar fashion to your slats. In fact, I believe that my method is how they were originally formed.
If you have any questions I have done restoration work on numerous period chairs from CT, RI and MA area.
David
David, thank you for the comments and offer of help. You must be right about the Pennsylvania look. I quote from the Lester Margon book, "This type of ladder-back chair resembles closely one belonging to William Penn, which he brought over from England. However,....."
This chair according to the reference, is from the Wallace Nutting Collection in the Wadsworth Atheneum, Hartford Conn.
I'm interested how you would do the bend of the Back Post. I steamed the upper half of each Post today, clamped them to each side of a thick plank in the middle, and pulled the finial ends together with a clamp (no form). I'm hoping that I've adjusted for the rebound in the bend. I will see tomorrow when I remove from the clamps.
Tim
Tim,
It is, in fact, a rare attribute to have a canted rear post on a fully turned leg. Also, you rarely see it on a ladderback. It is more often found on a bannister back.
Again, however, the lower portion of the leg is usually square.
In 35 years of collecting I have see a fully turned canted rear post less than 5 tines.
The square type as referred to above on the bannister back - you see greater than 25% of the time.
I believe that this feature was costly (in its day) as I think it was achieved by using a larger piece of stock and utilizing two sets of center points (Is this clear?)
Back to the slats for a moment. Slats were almost always made of Ash (occasionally Maple).
Hope some of this helps.
Regards,
David
Windsor, CT
David, thank you for the information. I understand doing the two-point type of turning. I have done that before on a bannister back, which was a two-piece post. I assumed they would have steam bent the back post - I think this was much easier than messing with a double point turning and large stock. As it turns out, the bending method I used worked fine. I've finished the chair now - I did the whole thing in ash (original was cherry). Then I painted with barn red, then pitch black milk, paint. So I strayed from the strict reproduction style. Interestingly, I found a picture of the original I took when visiting the Wadsworth Atheneum. Didn't know I had this picture until after finishing the chair.
Tim
Log in or create an account to post a comment.
Sign up Log in