While struggling to steam bend fresh ash lumber in the shop, I’m also striving for better and easier methods of bending on the computer in SketchUp.
For “real” bends, I’m learning to appreciate key factors for success including:
1. Selection of quality straight-grained lumber
2. Efficient bending cauls and clamping devices
3. Steel straps with constricting blocks, and
4. Adequate steam and temperature
With SketchUp, I’ve experimented with many different procedures, but finally falling back to basics and brute force. I’ve tried plug-ins, including two different bending applications, and joint push/pull. But have not been able to improve on my basic approach.
Some bends are easier, such as the Windsor Bowback, which is a bend in one plane and having a common cross-section throughout its length. However, the Continuous Bow is a bigger challenge, having two bends in different planes, and a different cross-section in the lower arm section vs. the upper bow section.
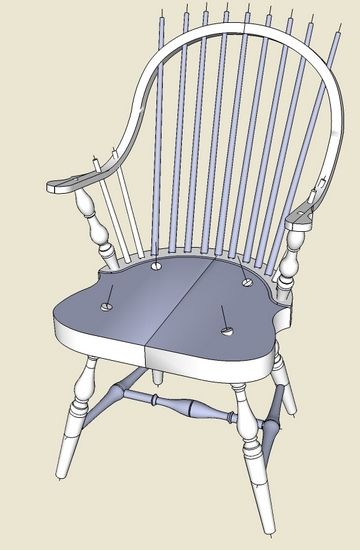
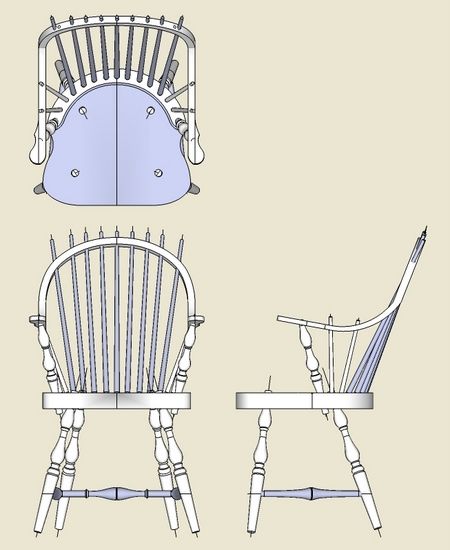
Here is an example of an unbraced Continuous Arm Chair. It’s a rough model without spindle trimming and seat contouring, but the bow is complete with handles.

In my library of furniture books, I can usually find an orthographic drawing with front, side and top views. These are very helpful in detailing a bow’s shape and size in SketchUp. I will scan the picture of the orthographic drawing and import into SketchUp as an image. After re-sizing and straightening the image in SketchUp, I trace over the shape of the bow on top of the picture.

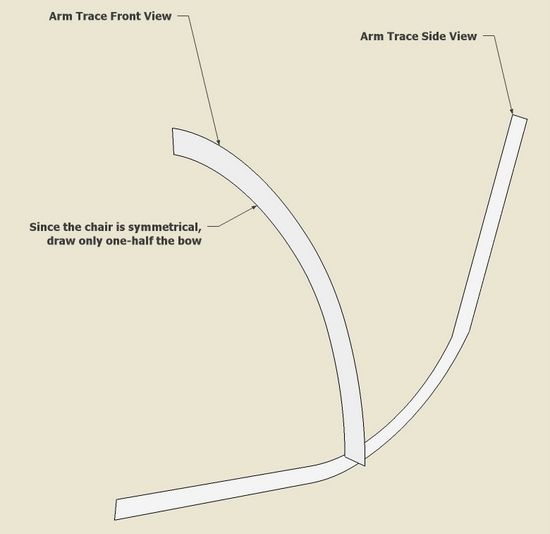
Step 1: With Arc and Line Tools, trace over the shape of the bow in the front and side views. In my books, usually there is a detail drawing of the shape in the proper projection. Otherwise you will need to compensate the size for the angle of the splay. You only need to do one-half of the bow shape since the chair is symmetrical in the front view.

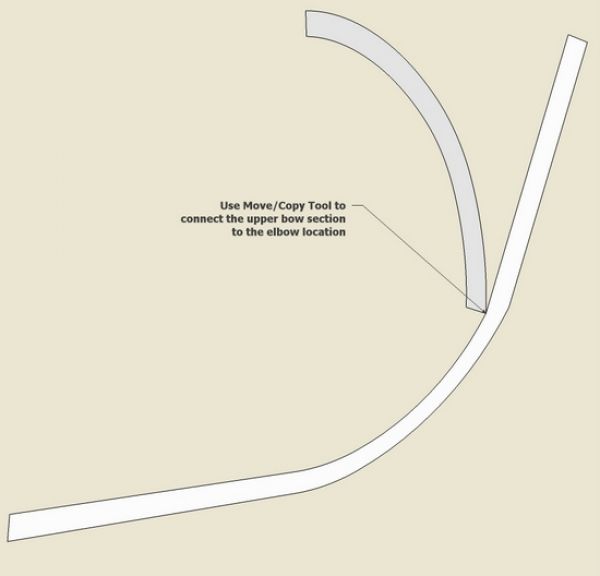
Step 2: In creating the shapes, I decide the location of the elbow, that is, the joint between the lower arm section and the upper bow section. Then with Move/Copy Tool, I move the upper bow section to connect at the elbow.
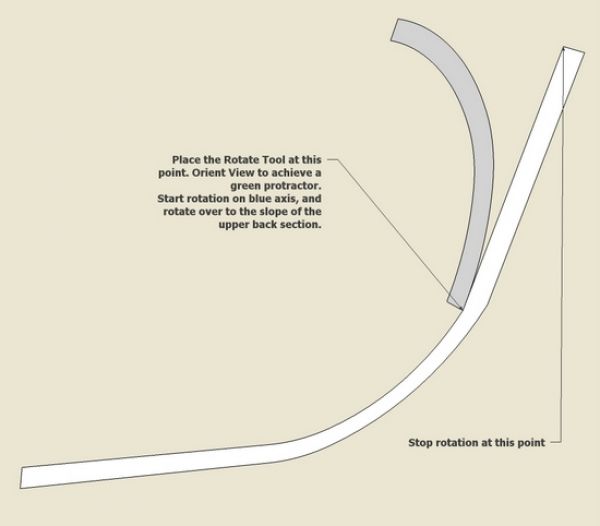
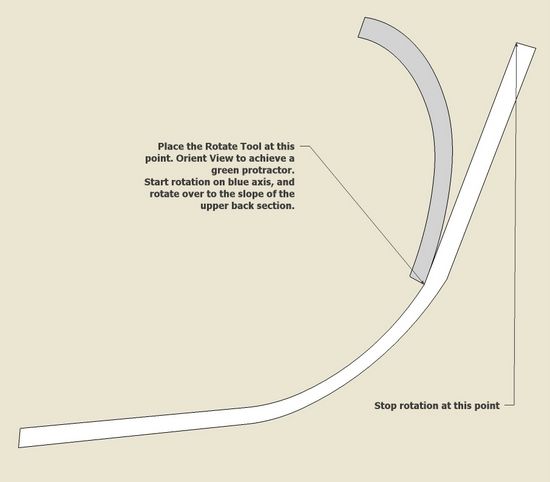
Step 3: Since the upper bow section was created on the vertical plane, I will roll it over to coincide with the splay of the back. Use the Rotate Tool to roll this upper part into position. The protractor-like icon of the Rotate Tool should be connected to the center of rotation which is at the elbow. Make sure the protractor is set for the correct plane of rotation (in my case it needs to show in green color). You may have to orbit down to have the protractor show the proper axis color.
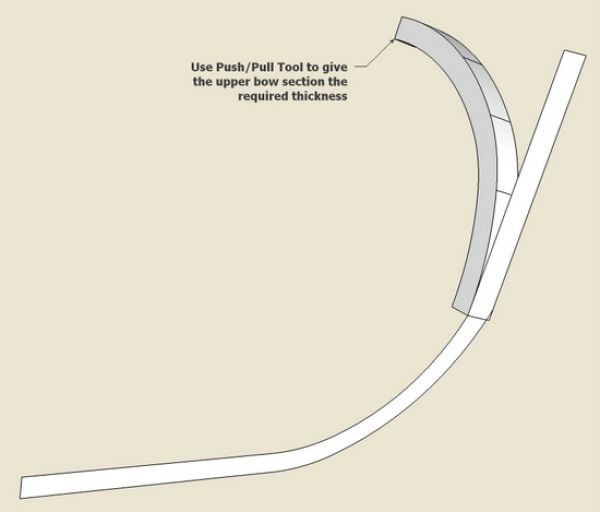
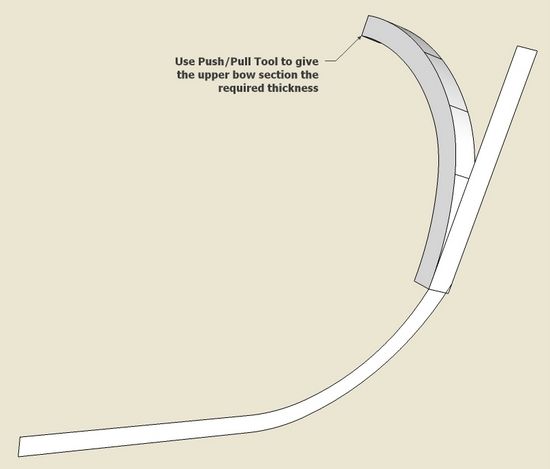
Step 4: Use the Push/Pull Tool to give the upper bow section its proper thickness.
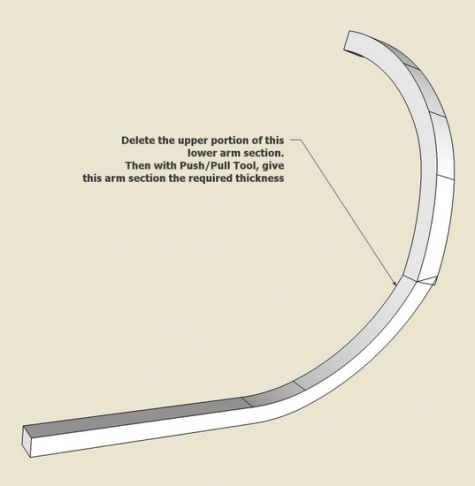
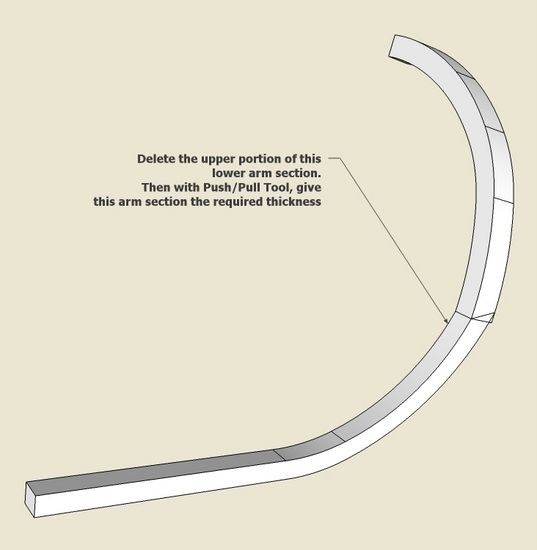
Step 5: With the Eraser Tool, delete the upper rectangular part of the lower arm section. Then using the Push/Pull Tool, give the remaining portion of the lower arm its thickness.
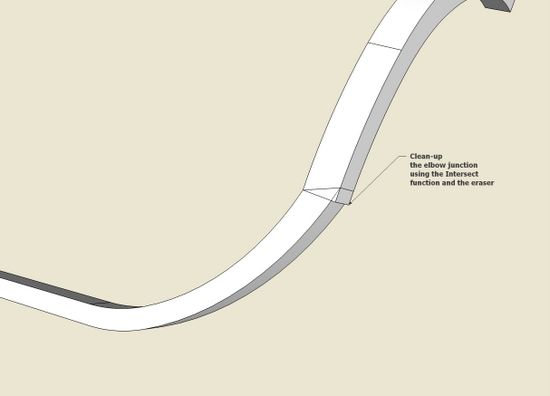
Step 6: The elbow section will require some repair and clean-up. I used the Intersect function to pare the joint. The Eraser is the necessary companion tool after an Intersect, to remove the waste.

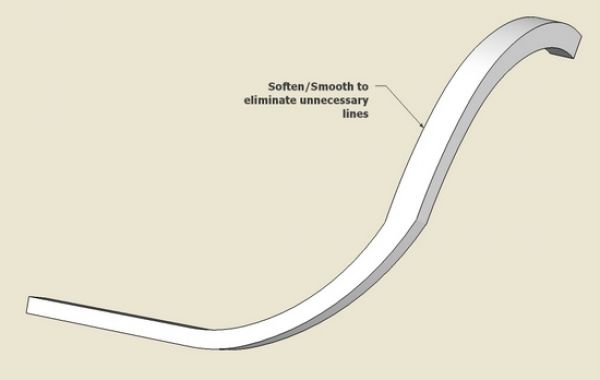
Step 7: Use a select box to select all faces and edges in the bow. Right click on the selected bow, and pick the Smooth/Soften function from the pop-up menu. This will remove all the extra unnecessary lines.
Now the bow is ready for the spliced “glue-on” scrolled handle piece. Make it a component, copy and flip to create the complete bow.


Comments
Hello Tim, Been fillowing all your work carefully.Thanks for your help.The continuos arm is one of my favorites.I make one version with the arm laminated of continuous strips of either hickory or white oak,[1/8"x7/8" strips].I'm in the process of using your design to build a trial which is in the mold as we speak.Unfortunately,my computer,{or me},has lost the Sketchup program which refuses to open after a new program download so I'll have to wait on a new computer delivery next week.In the meantime,I can take pictures of the process,and, if you're interested,send them to you.You might be able to produce this in Sketchup.Its interesting because a lamination will only bend in the direction of the thin,1/8",dimension ,so the arm is formed taking a 180 degree twist at the quarterpoints. Regards,Denis M.
denismo: I am very interested in your procedure. One of my students is having much difficulty making a successful continuous arm bend on a high chair which has sharper turns. Laminations may be a way out of the dilemma.
Tim
Log in or create an account to post a comment.
Sign up Log in