-
Five Minute Guide: Glue-Ups -
Best Tabletop Finish -
Tablesaw Tapering Jig is Safer and Faster -
Box Making Tips and Tricks -
T-Track is a Smart Workbench Accessory -
How to Make a Simple Jig for Offset Knife Hinges -
How to Apply an Aerosol Finish -
Upgrade Your Jointer with a Segmented Cutterhead -
How to Drill Windsor Chair Mortises -
How to Cut Sliding Dovetail Joints -
Five Minute Guide: How to Use a Tablesaw -
How to Sharpen a Card Scraper -
Dedicated Sled Delivers Perfect Finger Joints -
Buying and Using Trim Routers -
3 Steps to Great Glue-Ups: Sliding Dovetail Joints -
Fixing Woodworking Mistakes -
Router Jig for Perfectly Aligned Dadoes
Knife Box - Williamsburg, Part 3
comments (0) March 17th, 2013 in blogs
This is Part 3 of a series of videos on building the Williamsburg Knife Box. In the previous blog entry, I showed the making of the half-length symmetrical End and Side components, and ensuring that the rough lengths of these parts provide sufficient overlap in the corners for the dovetail joints.
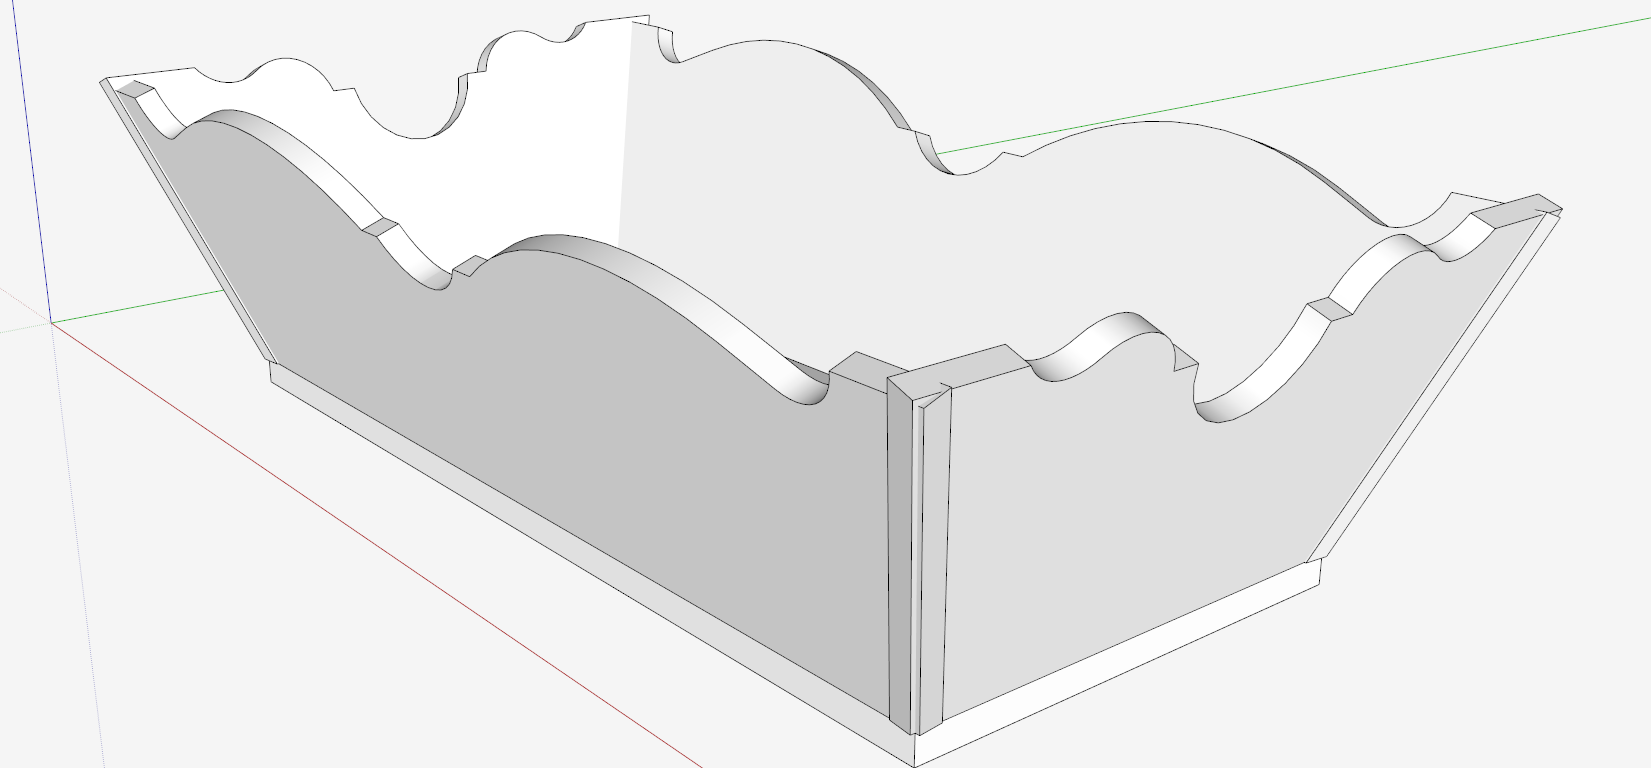
In this video, I show additional steps in completing the End and Side components - creating the bottom edge bevel, expanding the components full-length by copying and flipping, and establishing full width of the box base or bottom.
This results in a stage of the model as shown below - i.e., lacking dovetail joinery, a mid-spar handle, and a molding around the base.

So the next entry will cover the making of the dovetail joints.
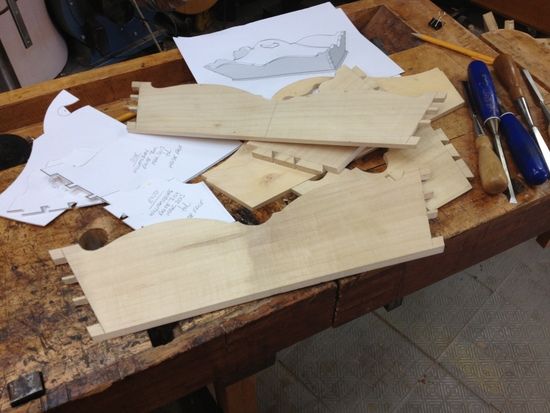
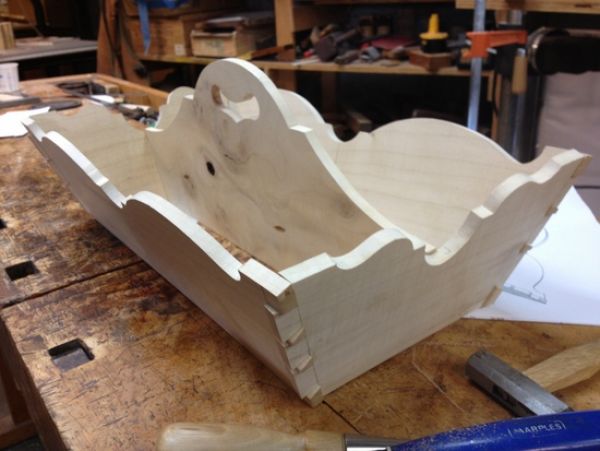
Meanwhile, I've started work in the shop in silver maple. The final fitting of these parts is yet to be done, so it is not glued at this stage. Here are two pictures of the shop work. Note the number of templates used produced by SketchUp. I produced templates for both the inside and outside faces of the End and Side components. The splay in two directions creates interesting geometrical realities. I'm glad to have worked them out in my mind in SketchUp before trial in the shop. In this piece, I had to be very careful in setting the marking gauge as working to 1/32 accuracy was required. Also, I had to be very careful in setting the bevel gauge for accuracy in angle marks.
Here is the video:
posted in: blogs, period interpretation, dovetails, box
Become a Better Woodworker
About Design. Click. Build.
Learn the art and science of designing furniture in SketchUp with Fine Woodworking's official blog. Moderated by a devoted community of woodworkers, we feature step-by-step SketchUp tutorials on designing components, downloads of pre-built 3D models of furniture parts, and news and information about the evolving world of digital furniture design.
Buy the Video
Don't miss Dave Richard's brand-new DVD/video download, The Basics.
Buy the Book
Get Tim Killen's popular eBook, the Google SketchUp Guide for Woodworkers.
Basic SketchUp Tutorials
Learn the basics of building furniture in SketchUp with these classic posts from the Design. Click. Build. blog.
Creating a Project Plan in SketchUp
How I Draw in SketchUp
Axes in SketchUp
The SketchUp Move Tool
The SketchUp Rotate Tool
The SketchUp Scale Tool
Materials, Colors, and Textures
Applying Wood Grain Skins in SketchUp
Easy Dovetail Joints in SketchUp
Digital Project Plans
Download and modify SketchUp files for select projects from Fine Woodworking. View all. Top Sellers: Matt's Monster Workbench New England Pine Cupboard Garden BenchMeet the Authors
|
|
DaveRichardsI am a Biomedical Equipment Technician. I maintain anesthesia and respiratory equipment for the largest medical facility in southeast Minnesota. I...view profile |
|
|
Tim KillenI am retired from Bechtel Corporation after 36 years in Engineering and IT management. I grew up among woodworking machinery in...view profile |
|
|
FineWoodworkingEditors...view profile |


Comments (0)
You must be logged in to post comments. Log in.