
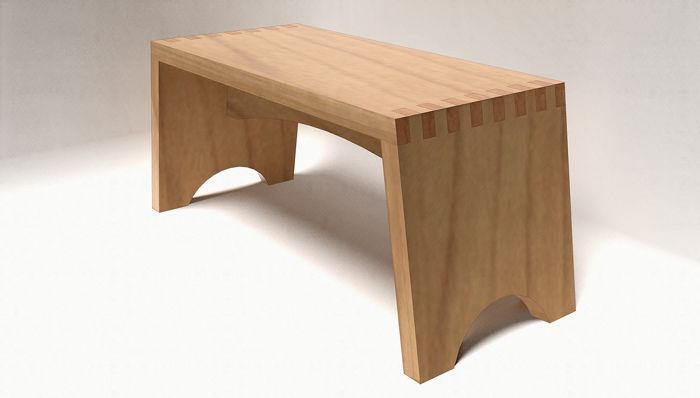
The other day I received an e-mail from a reader who was struggling with small step stool he was trying to draw. His stool has angled legs that are wider at the bottom than at the top. The bevels and and angles require a few tricks but with a logical approach, this really isn’t too difficult. This video shows one approach. You’ll notice I make extensive use of the Move tool throughout the drawing process.
This site is protected by reCAPTCHA and the Google
Privacy Policy and
Terms of Service apply.


Comments
Dave,
I have been using Sketchup for about 8 years, and I still learn at least one or two tricks or shortcuts in your videos and tutorials. Perhaps the most valuable lessons pertain to workflow, and this project is an excellent example of putting the basic Sketchup tools to work in and efficient and logical manner. Thanks for all of your efforts, and keep them coming.
Matt
A suggestion (with reason) then a question.
Dump the perspective view. This is not building architecture, it is a design process. It also allows better control of your rotate and zoom functions.
Rather than flip, which takes a lot of getting used to, why not use rotate of the components? It seems to have fewer operations.
Thank you, Matt.
Bruce, I respectfully disagree with you about using Perspective view. I do not find that Parallel Projection allows better control of orbiting and zooming. (I assume you mean orbiting instead of of rotating. Those are two different things in SketchUp.) In fact I find just the opposite. Zooming can be especially troublesome in Parallel Projection due to clipping which doesn't occur in Persepective view. Fortunately, if you find it easier in your work flow to work in Parallel Projection, you can do so.
I don't use Parallel Projection for the images I create, either. We see our world with perspective and I find most people don't understand isometric views.
As to the choice to flip the copy of the component instead of rotating it, again, you can do it either way. In my mind flipping makes more sense because it is a mirroring operation. It won't make any difference in this model if it doesn't get edited but suppose a design change is needed later. Something don't to the front edge of the left leg will be done to the rear edge of the right leg. Although I didn't show it in this video, I have keyboard shortcuts set up for the various flipping operations so it is actually faster to flip than rotate.
Consider the stiles on a frame and panel door model. Start with the left stile. Copy it to make the right hand stile and, based on your suggestion, rotate the right hand copy end for end. Everything looks normal. Now open the left hand stile for editing and increase its length by 3 inches. Where does the right stile component show the length change? The change occurs at the bottom. Then you'll have to move the right hand stile up to compensate.
If you had flipped the right hand stile instead of rotating it, the length change would occur on the same end of the stile as it does on the left side and you would be finished.
Also consider case sides. Again, start with the left side component, copy it to make a right hand side. Rotate it 180° on its blue axis so the outside face is out. Now cut a rabbet for the back on the beck edge of the left case side. the rabbet will be cut on the front of the right side. How do you correct that problem without mirroring?
In general, flipping components just makes for less work and it in itself is not difficult.
Remember, though, it is your model so you can do what you wish.
-Dave
I have to agree with Dave. There was a time I used to rotate and came across the problems he describes. Once I got used to Flipping, then it made the building and changing much easier.
Dave, one thing I saw that I would change is the building and placing of the loose tennon. I would have built the first one, made it a component, then moved it to INSIDE the one leg component. This eliminates the reason to build the second one entirely, and all the gyrations(ie. rotations) that went along with it. Just a thought.
Thanks for sharing these. As already mentioned, I always seem to pick up a tip or two.
Rance
Rance, That method would be a possible solution. I would have had to have created a nested component of the leg and the tenon in order to have both the leg and the tenon show in a cutlist. Although I didn't make a cutlist for this stool, yet, the cutlist is always in the back of my mind and I model to make an accurate list.
If I had simply cut and pasted the loose tenon into the leg component, I would have had a component called 'Leg' with a bunch of loose geometry in the shape of the leg along with a loose tenon component. If I had run the cut list, only the loose tenon would be shown. The loose geometry from the leg would be ignored.
The solution would be to make a nested component, maybe 'Leg with tenon' containing the leg component and the loose tenon. I could have then exchanged the other leg component for the 'leg with tenon' component.
I demonstrated something similar to this putting pegs into table legs in a splay-legged table here: https://www.finewoodworking.com/item/46058/leveraging-the-power-of-components
-Dave
Dave, in actuality, I would open the leg component, select all, make that a component, insert the tennon, exit the editing of the original 'leg' component, then optionally explode it(both copies). That would give you both placement of the 2nd tennon, and capability for your cut-list. Sorry for the lack of details. :) I don't do the cutlist thing with the wizzard. I do mine manually.
Yes. That is what I was trying to describe and what I showed in the blog post I linked to. ;)
This is a great help worthy of further study. This exercise deals with many issues I have been thinking about as to,"how can I do that?". Dave is the prime example of a master craftsman with this tool. Thanks, Dave, v.much.
Great Tutorial.
But, I'd like to learn how to "render" the stool the way you've shown it in the final image... Is that a "photorealistic" rendering plug-in you are using? The wood grain looks really acurate, and I like the way the end grain of the box joints is slightly darker than the face grain of the end panels. Could you give us a little insight on how this was done?
Thanks!
I have so much to learn!
Noman1: You're quite welcome.
MV123: I use Kerkythea for rendering. Take a look at this post: https://www.finewoodworking.com/item/57824/adding-some-realism-to-your-models In the case of the step stool, the wood grain texture is actually hand drawn and for this image I did a little additional post processing to combine the texture, a hand drawn line style and a third image which looks like shadows created with the side of a pencil. It's very subtle in this image but it adds a little bit of texture. The images are all combined in an image editor. It sounds very complex but it goes very quickly.
Dave,
I'm about a 2 year user. Every time I think I'm getting fairly good, I see some new techniques & realize I'm just a beginer. I was doing fine following along until you used the Weld plugin. I have not used any plugins, but dove in looking for it. I found a version; however, it is has an .rb extension and is not compatable with my Sketchup v8 (.rbz ext required). I have emailed the site where I found it, but thought others may have the same issue you may be able to help.
ralflf, it appears you have a misunderstanding about the plugins files. Your statement "...it is has an .rb extension and is not compatable with my Sketchup v8 (.rbz ext required)." is not correct. Files with the extension .rb are indeed compatible with V8 of SketchUp. In fact, if you look in the Plugins folder, you'll find files with that extension already there. All you need do is copy weld.rb and paste it into the Plugins folder and it'll be ready to go next time you open SketchUp.
You don't say what operating system you are using but make sure you have full read and write permissions for the Plugins folder before trying to install the plugin.
If you really wanted to install Weld.rb using the Install Extension button, you could. First create a zip file with Weld.rb inside. Then change the extension of the .zip file to .rbz. Then use Install Extension. RBZ files are only zip files with the extension changed, after all. In my mind it's just easier to drop the rb file into the Plugins folder and be done with it.
-Dave
Dave - thanks! I now have my first added plugin. To echo gbear1, "I have so much to learn!". Thanks to you, we are several steps ahead.
OK I'm gonna show my ignoransce here,I've tried to find it on my own,didn't.Where is this plugin file you speak of?I tried creating one on the desk top and that didn't work.
Dave, what operating system are you using?
On a PC the Plugins folder is under Program Files/Google/Google SketchUp 8/. On Mac it's under Macintosh HD/Library/Application Support/Google SketchUp 8/SketchUp/.
In either case make sure you have full read and write permissions for the folder. This is especially important with Win7 or 8 and Mac Lion because you don't normally get full permissions for writing to the folder.
After that you can install the weld plugin or other plugins. If the plugin has the extension .rb, simply drop it into the Plugins folder. If it is a ZIP file, you need to extract the contents of the ZIP file to the Plugins folder making sure you respect the file structure. If there are files in a folder inside the ZIP file, they must be inside that folder in the Plugins folder.
If the file has the extension .RBZ, it is really a zip file with the extension changed. Unless you have the first release of SU8, there's an installer for these RBZ files which you'll access under Preferences>Extensions. Click on the button, navigate to the file and go through the install process.
Except for this latter option for installing plugins you'll restart sketchUp after installation.
If you haven't currently go a menu called Plugins being displayed go to Preferences>Extensions and tick the boxes you find there. then click OK.
By the way, Preferences is found under the Window menu on PCs and under the SketchUp menu to the right of File on the Mac.
Another thing to note: Not all plugins will show under the Plugins menu. Some are set up to show in other menus and/or may show in the context menu.
-Dave
Dave, I meant to add that the Plugins folder on your desktop doesn't work because SketchUp is not setup to look all over your computer for a Plugins folder.
-Dave
Dave,I use W7 SP1 IE9 I'm getting closer but miles to go before I sleep. does it matter what the download opens with,mine is openig with Adobe Reader? I got it unblocked on the desktop,but SU is not able to install it.I've installed a couple plugins,but having a lot of trouble with this one.I didn't understand what to do with that file you talked about and didn.t find it in the run search.I'll pm you FWW,I have to log every time on here.
Here's the link to Weld.rb http://www.smustard.com/script/Weld
Download the file and make sure it saves with the extension .rb. Then copy it into the Plugins folder in the path I listed before. That's all there is to "installing" this particular plugin.
If Windows changes the file extension to something else, change it back to .rb. The file name should be exactly weld.rb and nothing else.
.rb files will open in a text editor but there should be no reason for you to open most plugin files. they simply get dropped into the Plugins folder and SketchUp will load them next time it is opened.
FWIW, I have to log in at least every time I start my browser and visit FWW, too.
Dave,I got it all sorted out finally.Thanks
Thanks David for the information on rendering. The Kerkythea link is great, and I'm looking forward to some experimentation.
Please keep up the great work (and informative tutorials).
Log in or create an account to post a comment.
Sign up Log in