-
Router Jig for Perfectly Aligned Dadoes -
T-Track is a Smart Workbench Accessory -
3 Steps to Great Glue-Ups: Sliding Dovetail Joints -
Upgrade Your Jointer with a Segmented Cutterhead -
Buying and Using Trim Routers -
How to Cut Sliding Dovetail Joints -
Fixing Woodworking Mistakes -
Five Minute Guide: Glue-Ups -
Best Tabletop Finish -
How to Make a Simple Jig for Offset Knife Hinges -
Box Making Tips and Tricks -
How to Apply an Aerosol Finish -
Five Minute Guide: How to Use a Tablesaw -
How to Drill Windsor Chair Mortises -
Tablesaw Tapering Jig is Safer and Faster -
How to Sharpen a Card Scraper -
Dedicated Sled Delivers Perfect Finger Joints
Chamfered Post Table Mortise & Tenon Joints
comments (2) January 12th, 2013 in blogs
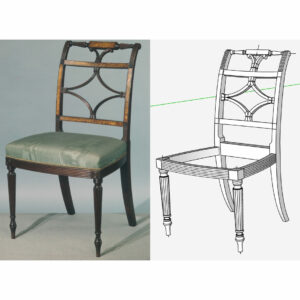
I probably receive the most comments on my eBook "SketchUp Guide for Woodworkers" in the section of Chapter Nine covering mortise & tenon joints in the Chamfered Post Table.
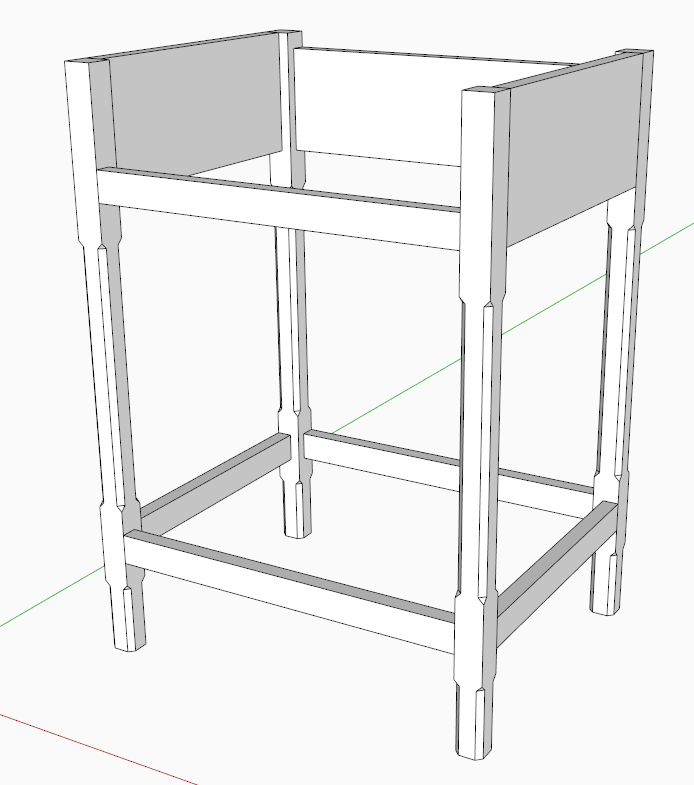
To help show the processes in making these joints, I assembled a video shown below. I'm starting the video after chamfers are cut into the legs, page 48 starting on Step 12. The assembly at this point looks like the following:
Up to this point in the chapter, the four legs are made from one component definition called "Leg". Having a common Front and Back Leg will cause a problem when making mortises, as these joints are different in the two locations. It's efficient to have all four legs identical up to a point. For example, its nice to do the chamfers one time, as they are identical on front and back legs. But after the chamfers are done, its time to separate the component definitions. The video shows how this is done.
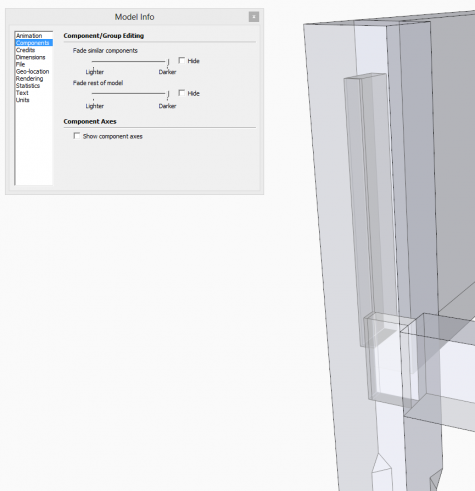
Also, as Dave and I have shown often, we try to use existing tenons to make mortises or vice versa. It saves time and ensures proper positioning and sizing. However, it is sometimes hard to see the joinery in X-ray style that may be used to do these joints.
Therefore, I recommend changing the display settings for components that are available under Window/Model Info/Components. A dialog box appears with two slider bars. I move these sliders to the far end to make it easier to see what you're doing in X-ray. The slide bars adjust the visibility of component edges that are in the background and not the component in Edit mode. It makes a big difference for the process I use. I make these adjustments in my SketchUp template, so they are always at this new setting for all my work.

posted in: blogs, Sketchup, mortise and tenon, Chamfered Post Table
Become a Better Woodworker
About Design. Click. Build.
Learn the art and science of designing furniture in SketchUp with Fine Woodworking's official blog. Moderated by a devoted community of woodworkers, we feature step-by-step SketchUp tutorials on designing components, downloads of pre-built 3D models of furniture parts, and news and information about the evolving world of digital furniture design.
Buy the Video
Don't miss Dave Richard's brand-new DVD/video download, The Basics.
Buy the Book
Get Tim Killen's popular eBook, the Google SketchUp Guide for Woodworkers.
Basic SketchUp Tutorials
Learn the basics of building furniture in SketchUp with these classic posts from the Design. Click. Build. blog.
Creating a Project Plan in SketchUp
How I Draw in SketchUp
Axes in SketchUp
The SketchUp Move Tool
The SketchUp Rotate Tool
The SketchUp Scale Tool
Materials, Colors, and Textures
Applying Wood Grain Skins in SketchUp
Easy Dovetail Joints in SketchUp
Digital Project Plans
Download and modify SketchUp files for select projects from Fine Woodworking. View all. Top Sellers: Matt's Monster Workbench New England Pine Cupboard Garden BenchMeet the Authors
|
|
DaveRichardsI am a Biomedical Equipment Technician. I maintain anesthesia and respiratory equipment for the largest medical facility in southeast Minnesota. I...view profile |
|
|
Tim KillenI am retired from Bechtel Corporation after 36 years in Engineering and IT management. I grew up among woodworking machinery in...view profile |
|
|
FineWoodworkingEditors...view profile |


Comments (2)
Tim
Posted: 1:02 am on January 13th
Posted: 5:43 pm on January 12th
You must be logged in to post comments. Log in.