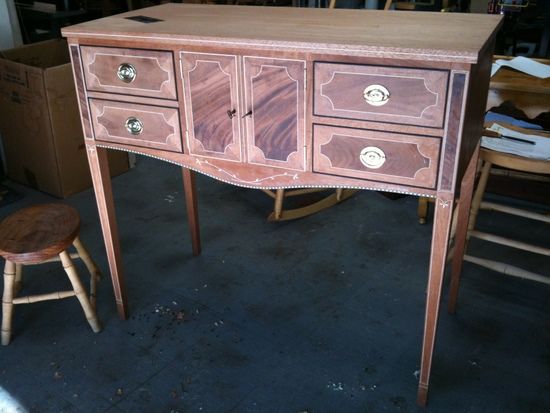
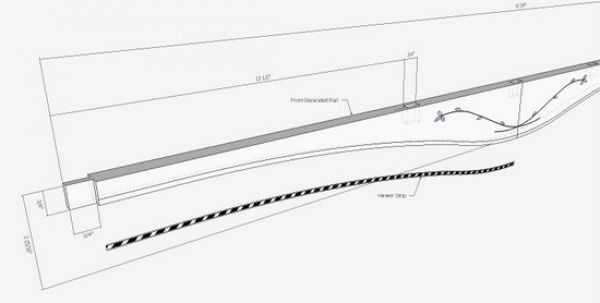
I’m constructing the small sideboard as shown below. The lower front decorated rail has a strip inlay on the bottom curved edge. Not only was I unsure how to bend this strip in the shop, I was equally unsure how to make this in my SketchUp model.
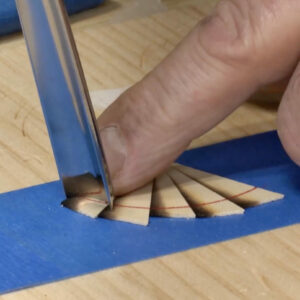
On the mahogany piece, I was able to dampen the inlay strip and coat both sides with hot hide glue. The strip rather easily handled the bend as I pressed it into the rabbet. The rapid grab of the hide glue held the inlay in place (no clamps required).
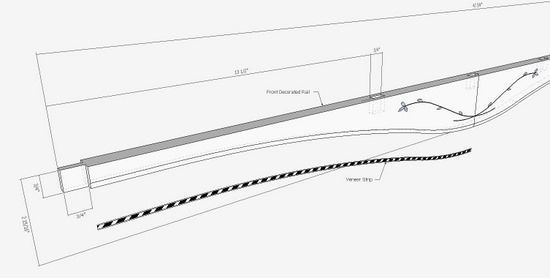
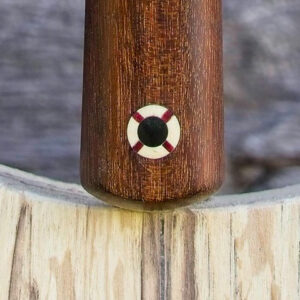
Here is the status of my construction – now working on the finish.

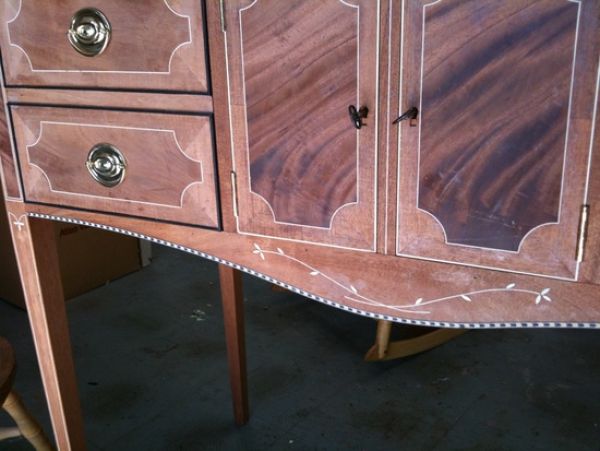
Here’s a closer view of the black & white inlay strip on the lower shaped border of the front rail.
In SketchUp I had to involve a free Plug-in called Shape Bender. You can Google this name and find the location for download.
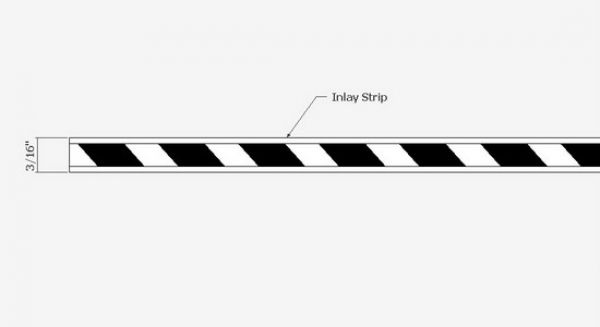
Step 1: Build your inlay strip. Since this repeats the design, I made a small length and copied to make up the full length.
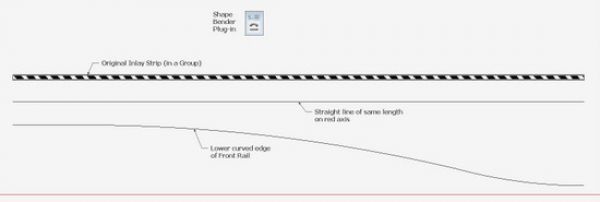
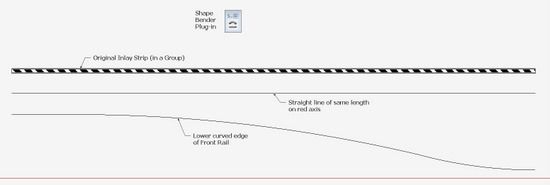
Step 2: To use the Shape Bender Plug-in, you need three things:
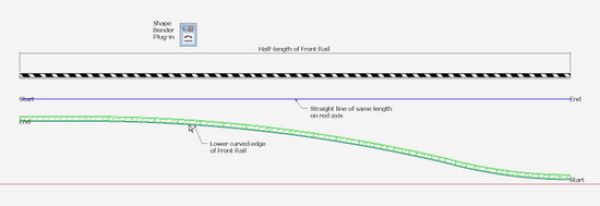
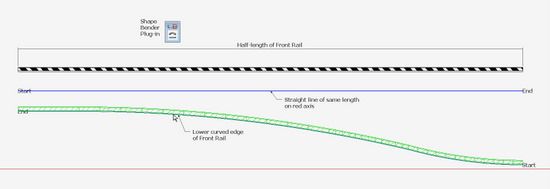
1. The Inlay Strip as a Group at the proper length (I used half the length of the Front Rail).
2. A Straight Line on the Red Axis the identical length of the Inlay Strip
3. The curve of the Front Rail shaped edge. Since I had made this curve using several arc segments, I used the Weld plug-in to combine these arcs into one item
These are shown in the “setup” below.
Step 3: Execute the Shape Bender in this sequence:
1. Click on the Inlay Strip to select it
2. Click on the Shape Bender Tool
3. Click on the Straight Line
4. Click on the curved edge
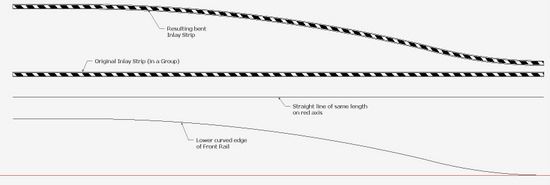
Step 4: You should now see a green shape along the bent curve. Hit the Enter Key.
Step 5: After hitting Enter, you should see the bent Inlay shape which is made a component by Shape Bender.
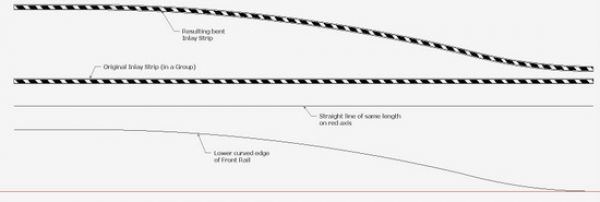
Step 6: Place the bent Inlay Strip into the rabbet on the bottom edge of the Front Rail.
Note: Occasionally, the Shape Bender would fail to give me the correct results. For example it would not be black and white with material colors, rather a default color. However, it would eventually produce correctly.


Comments
I'm glad you know how to do this because I don't think I could have ever figured it out :) and you are so humble: "I'm constructing the small sideboard as shown below." I would have written it this way: "I am building this way cool, kickin', totally awesome, to die for sideboard as show below (really cool don't you think?)" - something like that. Very nice project and thanks for sharing the tip.
I'm curious to know how you would go about applying materials to a SketchUp drawing of the sideboard in this post. Specifically, using one of the drawer fronts as an example, what is the best way to apply materials to a component (a drawer front) when there are inlays and grain running in various directions within the component? Is it necessary to break down each veneered segment and inlay line into its own component, or is there an easier way?
I have reviewed your and Dave's previous posts regarding the application of materials, but can't find an easy answer to this question. I specialize in veneering and inlay work, and need a way to draw these kinds of details for customer proposals, as well as seeing what a potential design would look like.
Thanks in advance for any suggestion you can offer. Your blog is an excellent source of information, and I look forward to every new post.
Warren, I wouldn't bother drawing each piece of veneer as a separate component but instead, I would open the drawer front component for editing and draw in lines for the borders of each piece of veneer. This will divide the surface into smaller faces. Then apply the material to the faces. For this the component must be open for editing or it won't work. Rotate and move the material image as needed--I've covered this in previous blog entries--and, to make it look more correct, hide the lines between pieces of veneer with Shift and the Eraser tool. Hold shift and the left mouse button down while dragging the cursor over the lines.
-Dave
By the way, Warren, if you've made the doors as mirrored instances of the same component, you'll find that you'll have bookmatched wood grain materials when you apply them to the doors. The material image gets flipped automatically because one of the components is flipped.
Dave,
Thanks. I'll try this out.
Log in or create an account to post a comment.
Sign up Log in